Showing posts with label to. Show all posts
Showing posts with label to. Show all posts
Thursday, January 4, 2018
How to install Violin Tuner lastet apk for pc
How to install Violin Tuner lastet apk for pc

ID: com.minigora.violintuner.app
Version: 1.0
Size: 2 Mb
Violin Tuner Screenshots


How to install Violin Tuner apk for android
- For Android 4.0 or higher:Please to Settings, look down to Security, and select Unknown sources. Choosing this choice will enable to install apps download from the internet.
- For devices running on lower Android 4.0:
Please go to Settings - open the Applications option, and select Unknown sources, click OK on the popup alert.
Violin Tuner Details
A free and easy to use pitch tuner for your violin!When I started my violin journey I found a lack of simple and ad-free tuners on the play store, so I made one. This app uses no permissions and includes no ads.
To get your A tuned quickly and efficiently, the tuner can play the tone once or play it on loop. Use the remaining tones to check your other strings, especially the E string.
You can select the sound of your tuner : choose between a tone, a violin string, or a piano key.
To leave feedback or report an issue, send an email to support@minigora.com.
Whats new in Violin Tuner 1.0
Added a new Sound-Type option :Select the sound of the tuner from either a tone, a violin string, or a piano key.
Download Violin Tuner 1.0 APK
Search terms:
How to download Violin Tuner 1.0 mod apk for bluestacks
How to use Violin Tuner unlimited apk
How to mod Violin Tuner 1.0 apk
How to get Violin Tuner unlimited apk
How to Install TWRP 3 1 1 1 and Root Huawei Honor 8 Pro Success 100 Tested
How to Install TWRP 3 1 1 1 and Root Huawei Honor 8 Pro Success 100 Tested
How to Install TWRP 3.1.1-1 and Root Huawei Honor 8 Pro Success 100% Tested.
Root Huawei Honor 8 Pro. If you need any information about how to root Huawei Honor 8 Pro, now you are at the right place. This guide will show you how to root the Honor 8 Android phone. Also, this guide is fully tested on this video. You can directly watch it or continue reading this guide. We will present this guide very simple, and easy to understand. Even if you are a beginner on Android trick. Everyone has different reasons to root their Android device, so does the Honor 8 Pro owner.
By rooting your Huawei Honor 8 Pro, you will get some advantages, for example, you can increase your phone speed and battery life, Block Ads in Apps that contains Ads, even you can remove pre-installed crapware. as we have seen, that crapware cannot be uninstalled without root access. And much more advantages.
Now, lets this guide begin.
Prerequisite.
- As the main requirement to root your Huawei Honor 8, you need to unlock the bootloader. If you dont know how to do it, you can read the following guide - How to unlock the bootloader on any Huawei phone.
- Enable USB debugging on your phone.
- D0wnl0ad ADB and fastboot from Here
- Downl0ad PHH Superuser from Here
- Downl04d TWRP recovery root from this link.
- Once TWRP successfully downloaded, now put this TWRP into a platform-tools folder.
- Rename it to twrp.img
Install TWRP 3.1.1-1 Honor 8 Pro | Guide.
- Extract platform-tools-latest-windows.zip file.
- Go to extracted folder
- Then, Open platform-tools folder.
- Now, connect your Huawei Honor 8 Pro to the computer via USB cable.
- Then, from the ADB fastboot folder right click and hold the shift button, and click open command window here.

open command in adb fastboot - Once command prompt windows come up, now you need to check your Huawei Honor 8 Pro successfully connected or not using the following command and press enter.
- adb device.
- If your device is successfully connected to the computer, then the result will return like this.
- list of devices attached ...

- Once your Huawei Honor 8 Pro successfully connected to the computer. Now, reboot your device into bootloader using this command and press enter
- adb reboot bootloader
- Just wait a minute, your device will reboot into fastboot and rescue mode.
- Once your device in the fastboot and rescue mode, its time to flash TWRP recovery to your device. Therefore you need to type this command at prompt and then press enter button
- fastboot flash recovery twrp.img
- Just wait for 2 or 3 seconds for the complete flashing process.
Boot Honor 8 Pro into Recovery.
- Power off your Honor 8 Pro.
- Now, press and hold three buttons simultaneously located at the side phone body
- Volume UP + Volume Down + Power Button
- Release all button if you see a Honor logo comes up on your screen.
- Now, you will see that honor 8 Pro has been unlocked status on screen.

Honor 8 pro recovery mode - And now your device will boot into TWRP recovery.

- Tap Wipe - Format Data - type Yes - Ok
- Tap Back - Reboot - Recovery - Dont install
- Now your device will reboot into TWRP recovery.again. To root your Honor 8 Pro read the next step below.
Root Honor 8 Pro.
- You need to copy Superuser-r310-beta (download link available at prerequisite) to the internal storage of Huawei Honor 8 Pro
- Continued from step no. 8 above. or, make sure your device in TWRP recovery mode.
- From TWRP main menu, tap Install.
- Then, tap Superuser-r310-beta.zip from internal storage.
- Now, Swap to confirm flash.
- Once Zip file successfully flashed, you just need to click on reboot.system.
- Now, your Huawei Honor 8 Pro will reboot into the system.
how to use flash drive as ram windows 7
how to use flash drive as ram windows 7
Hi friends! I am sharing with you all very interesting trick. From this trick we can make our Flash Drive (USB) as a fastest RAM. Because everyone wants to make his Personal Computer become fastest without RAM. So what we do should that time? If we are working as a professional and our PC is working very slowly maybe it cause of slow speed due to RAM. So Let�s Start!
Right click on My Computer desktop Icon and go to Properties.


System Properties dialogue will be open then go to Advanced tab and press the first settings button.

STEP 4:
When you hit the System Properties settings button, System Properties gives new dialogue box will open go to his Advanced tab.


Check the radio button of Custom Size: and put the value what you want in both options: Initial size (MB): and second one is Maximum (MB):

After the complete action You will look Message from Windows: "You must restart your computer to apply these changes"

Before restarting, save any open files and close all programs.
How To Import Old Blogger Comments Into Disqus
How To Import Old Blogger Comments Into Disqus

Disqus is one of the most popular comment system on internet. Bloggers and webmasters are using it for years now. It is easy to use and easy to setup on Blogger Blog. In my previous post, I have shown you How to install Disqus Comment System in Blogger Blog. But a common question arises in the minds before you switch to Disqus that what will happen to the old comments? The comments which we have already published on Blogger blog, will it be lost? If your blog is old and have some comments, Im sure you are thinking the same. But here is a good news, Disqus lets you to import your old comments with just few clicks! So lets see how you can import your comments into Disqus!
READ ALSO: How to install DISQUS Comment System in Blogger Blog?
How To Import Old Blogger Comments Into Disqus?
1. Go to Disqus.com and signup or sign in.
2. Visit this link: http://myblog.disqus.com/admin/discussions/import/platform/blogger/
Please remove red colored text with the your disqus unique url. For example:
http://myvideolibrary.disqus.com/admin/discussions/import/platform/blogger/
3. Now once you you go the link above, you will be able to see the page Import into Disqus. Choose your Blogger Platform in the menu, and click on Import Comments from Blogger.

4. Once you click on Import Comments from Blogger, a new popup window will open and asks for permission (you can trust on them). So click on Allow button to continue.

5. After clicking Allow button, you will see a list of your Blogger blogs so choose the desired one.
6. Once you choose your blog, Disqus will start importing old comments form blogger blog. Wait for few seconds, now you will see message like this : -- out of -- comments were synced.

Thats it! You have successfully imported your Blogger comments into Disqus.
READ ALSO: How to install DISQUS Comment System in Blogger Blog?
How To Root Nearly Any Android Phone
How To Root Nearly Any Android Phone
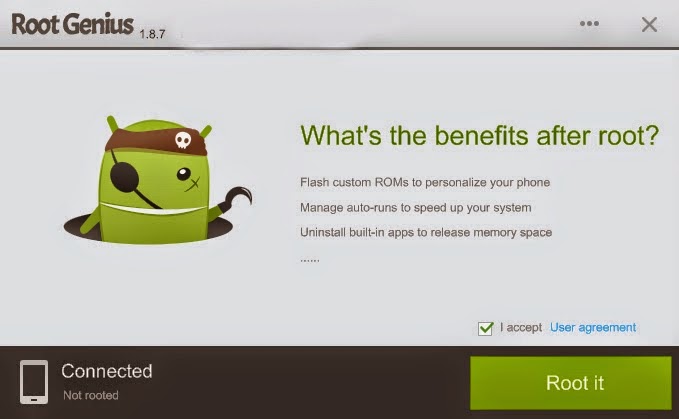
This is a rooting process for nearly any smartphone. The rooting process will be carried out with the help of an application for Windows called Root Genius.
Root Genius is a software which can be used to root 95% of the android phones. It uses special algorithms and features to try and root any android phone it is asked to root. So there is a very good chance for you to root your smartphone.
Disclaimer: The process and instructions given in this article are correct. However I am not responsible if you damage/brick your phone in anyway. Carry out the process at your own risk.
If this method doesnt work try out this one - How To Root Android
If this method doesnt work try out this one - How To Root Android
Follow the following instructions to root your phone:
- Download Root Genius.
- Enable USB debugging on your phone. To do so, open Settings>Developer options. Tick USB Debugging. If Developer options is unavailable then go to Settings>About Phone and tap on Built Number 5-8 times until you get the message You are now a developer.
- Connect your phone to the computer via USB cable. Make sure USB Debugging is enabled.
- Once successfully connected, Root Genius will automatically detect your phone.
- Click on Root Now to begin the rooting of your phone.
- Root Genius will automatically root your phone and install the KingUser application(an application which is used to grant super user access to apps).
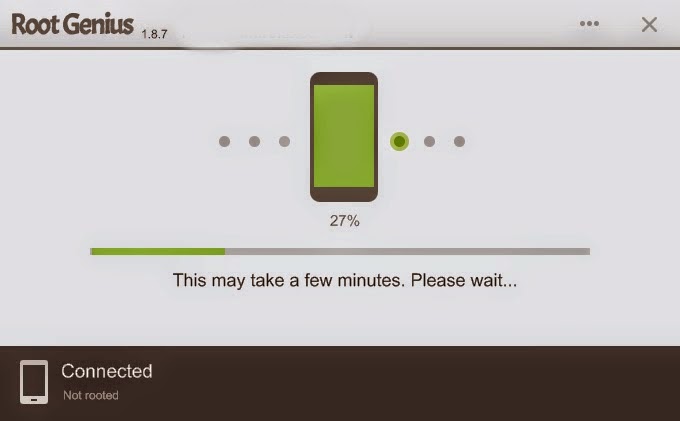
- Your phone is successfully rooted(hopefully).
How to Increase Touch Screen Sensitivity Of Android Smartphone Without Rooting
How to Increase Touch Screen Sensitivity Of Android Smartphone Without Rooting
How To Make Android Touch Screen Smooth Without Root
There are Thousands of ways to increase touch screen sensitivity Of android mobile For rooted users But You will not find any way to Increase Touch screen sensitivity for non rooted users , Thats why i planned to make a post for Non Rooted Android users . By following our guide You will surely Feel Improved Touch screen sensitivity on your non rooted android smartphone. Obviously today we are going to use apps to increase touchscreen responsiveness because editing build.prop and implementing tweaks is not possible without rooting android
.jpg "How to Make android touchscreen smooth without root") |
| Having issues regarding android screen ?? | How to make android touchscreen smooth without root |
I got many mails asking
- Is there any way To make android touchscreen smooth and more sensitive without rooting my phone ??
Ans - Yes !! if you are a non rooted user and want to increase android touchscreen sensitivity without rooting your phone , you are at right place .
- Are there any Apps For Non Rooted users To increase android touch screen sensitivity and make them smooth ??
Ans - Yes !! There are tons of apps With which you can make your android screen smooth and sensitive . But !!!!!! Wrong use of those apps can make your screen malfunction . and at last to get rid of malfunction you will have to perform a hard reset of your android Smartphone .
Dont Miss :- How To Increase Internet Speed In Android Smartphone
Many low budget smartphones start having issues in the sensitivity
of Touchscreen .
So i wondered to find a way to Boost touchscreen and increase screen sensitivity and make it super smooth for non rooted users
Samsung Smartphones already have a option to increase touchscreen sensitivity known as screen calibration. But what about Android Smartphones That dont have a option to calibrate their touch screen and increase performance of their android screen
Before This article i have already covered How To Make Android Touch Screen Smooth For rooted Users .
How to make android touchscreen super smooth without rooting - Guide
This trick will work for every OS i.e gingerbread , ice cream sandwich , jellybean , kitkat so dont hesitate and give a try :)
There are many apps which claim to make your android screen smooth and sensitive but they actually are fake .
Today in this post we will tell you about the most resulting and trusted app .
Lets start with the app which i like the most :- Touch Recalibration
** The only thing which makes it admin choice is its size which is only 30 KB
.png "How to make android touchscreen smooth without rooting") |
| touchscreen booster | How to increase touch screen sensitivity of android smartphone without rooting |
How to use touch screen booster app to make android screen smooth
** Launch The app Screen calibration From your androids App Drawer
** Click On the Re calibration box Shown in the image
 |
| Recalibration | How to increase android touch screen performance without root |
.png "How to make android touchscreen smooth without rooting") |
| Touch screen boosting app | How to increase sensitivity of android screen without root |
** After clicking Ok wait for a while and let the app complete its work and dont touch screen meanwhile
.png "How to make android touchscreen smooth without rooting") |
| android screen calibration | increase android screen performance sensitivity and make smooth without root |
Download Link Here :- DOWNLOAD
Dont miss :- How To Make Android Gingerbread 2.3 Look Like Jelly Bean Without Rooting
Now Second App This app also Shows Good results You Can see In the first Screenshot that i use both app . If you want good gaming performance screen wise then i will recommend this app to you .
This app is basically made for Samsung galaxy S but it works for everyone . tested personally by me
** Launch the App from Drawer
.png "How to make android touch screen smooth without rooting") |
| SGS touchscreen booster | Increase Touchscreen performance of your android smartphone without rooting |
** Set Sensitivity To - 80
** Duration To register Touch - 0
** Minimum Motion - 0
** Motion Filter - 70
** Multi Touch points - 2
** Start service on boot
** click on Apply changes
** You can try various combinations with it and chose the one that suits you best.
Download sgs screen booster from playstore its free :)
Hope Our Guide On How to make android touchscreen smooth without rooting helped you in increasing touch screen sensitivity of your android smartphone
.png "How to make android touchscreen smooth without rooting") |
| Screen booster | How to increase android touchscreen responsiveness and scrolling without rooting |
Download sgs screen booster from playstore its free :)
Hope Our Guide On How to make android touchscreen smooth without rooting helped you in increasing touch screen sensitivity of your android smartphone
How to switch Back to Yahoo Classic Mail – 2013 Yahoo Tricks
How to switch Back to Yahoo Classic Mail – 2013 Yahoo Tricks
How to switch Back to Yahoo Classic Mail � 2013 Yahoo Tricks.
Read More


Read More
How to set font style for Amnotes surface texture symbols
How to set font style for Amnotes surface texture symbols
If the texts in your notes and symbols are displayed in a too bold font, you have probably not set properly the note properties for your drawing standard in AutoCAD Mechanical.
In the Options dialog on the AM:Standard tab (the AMOPTIONS command) double-click on the standard (e.g. "DIN") on the top of the tree (on the right). In the "Standard Properties" dialog then check the option "Link to Dimension Style", click on the radio button "Apply to Leaders Only" and in the list of predefined text styles select the required style (font).
For a one-time change of the font you can also directly set the text style ACISOTS.
How to track the original location of an email via its IP address
How to track the original location of an email via its IP address
Here�s a quick how-to guide on how you can track email to it�s originating locationby figuring out the email�s IP address and looking it up. I have found this to be quite useful on many occasions for verification purposes since I receive lots of emails daily due to my blog. Tracking the IP address of an email sender does require looking at some technical details, so be ready to dig your heels in!
There are basically two steps involved in the process of tracking an email: find the IP address in the email header section and then look up the location of the IP address.
Finding the IP address of an email sender in GMail, Yahoo Mail, and Outlook
Let�s go ahead and take a look at how you would do this for Google, Yahoo and Outlook since those are the most popular email clients
Google�s Gmail
1. Log into your account and open the email in question.
2. Click on the down arrow that�s to the right of the Reply link. Choose Show Original from the list.

Now here�s the technical part that I was telling you about earlier! You need to look for the lines of text that start with �Received: from�. It might be easier to simply press Cntrl + F and perform a search for that phase. You�ll notice that there are several Received From�s in the message header. This is because the message header contains the IP addresses of all of servers involved in routing that email to you.

To find the first computer that originally sent the email, you�ll have to find the Received From that�s farthest DOWN. As you can see from the above image, the first one is from a computer called �aseem� with the IP address 72.204.154.191. Then it was routed to my ISP�s server at eastrmmtao104.cox.net and so on and so forth till it got to your email server.
The computer aseem is my personal home computer and that�s my public IP address for my house! I�ll go through Yahoo and Outlook before talking about tracking the location of that IP address.
Yahoo Mail Beta
1. Log into your account and open the email (if you�re using Yahoo Mail Beta with the new preview interface, make sure you double-click on the email so that it opens in a new tab)
2. At the top right, you�ll see there is a drop-down option where Standard Headeris selected by default.
3. Click on it and choose Full Header.

Again, you�ll see the same information as before, just in a different window:

Microsoft Outlook
1. Open the email in Outlook by double-clicking on it
2. Go to View at the top menu (the menu options for the email, not the main Outlook window) and choose Options.

You�ll get a dialog box where you can set the message options and at the bottom you�ll see the Internet Headers box. For some silly reason, the box is very small and you have to scroll a lot, so it�s best to simply copy and paste the text into Notepad to view it more easily.

Tracking the location of an IP address
Now that we have our originating IP address of 72.204.154.191, let�s find out where that is! You can do this by perform a location lookup on the IP address. My favorites are IP2Location and GeoBytes IP Locator.
GeoBytes gave me a big map of New Orleans, LA along with a bunch of other information about the location itself.

IP2Location also gave me the same information pretty much, including the ISP (Cox Communications). Of course, this is correct since I live in New Orleans!
If you want more information, you can do a WHOIS database search also. My favorite one is the ARIN WHOIS Database Search. This will give you information on who hosts that IP address and their registration information. You can always contact them to try and find more information on that particular IP address.
Have fun tracking down those emails! Questions, comments, or suggestions? Post a comment!

How to save battery in Micromax unite 2
How to save battery in Micromax unite 2
Battery saving Tips for Noobs
By using this method you can save upto 10-20% of battery on micromax unite 2
Steps
Open Setting
Open Wifi
Click on Advanced setting
Click on Keep Wifi on During sleep
Tick on only when plugged in
Screenshot is added below
How to install Track3 Diabetes Tracker lastet apk for android
How to install Track3 Diabetes Tracker lastet apk for android

ID: com.coheso.track3pro
Version: 4.3
Size: 3.9 Mb
Track3 Diabetes Tracker Screen Preview


How to install Track3 Diabetes Tracker apk for android
- For Android 4.0 or higher:Please to Settings, look down to Security, and select Unknown sources. Choosing this choice will enable to install apps download from the internet.
- For devices running on lower Android 4.0:
Please go to Settings - open the Applications option, and select Unknown sources, click OK on the popup alert.
Track3 Diabetes Tracker Details
Track3 Diabetes Tracker makes living with diabetes easier than ever by tracking all of the factors that keep blood glucose balanced.Track:
* food (database includes 100,000 foods)
* glucose
* insulin
* medications
* exercise
* weight
With multi-device add-on option, use any number of devices to manage your data. For example, use Track3 Diabetes Tracker on your iPhone while outside and on your iPad while at home. Your data automatically shows up in all your devices!
Features:
* Easy to use glucose tracker and logbook
* Chart glucose trends
* Carb and calorie details for over 100,000 foods
* Customized information for the foods, exercises, and medications unique to your life
* Enter your own foods and recipes
* Use as a carb counter - adjust serving sizes to see the exact amount of carbs in your meals
* Record your own insulin and medication types
* Log and track blood glucose, food, exercise, insulin, and medications
* Email your log information that can be opened by any spreadsheet program.
* With the multi-device sync add-on, you can share data among multiple devices and view your data on www.track3.com
* Be able to monitor glucose levels (mg/dl)
* Build a "favorites" list of foods and exercises for quick entry
* Create pre-set entry categories like "100 calorie snack" or "morning coffee with creamer"
* Utilize exercise calorie per minute values specific to your weight, time spent, and type of exercise done
* Enter direct calorie or carb values displayed from cardio machine workouts
* Create customized exercise routine entries, such as 200 calorie yoga class.
The Track3 Diabetes Tracker App is the diabetes manager and tracker that people with diabetes have been waiting for. You can now leave carbohydrate and medication worries behind by letting the Track3 Diabetes App assist with managing glucose levels. Track3 logs nutrition and exercise information as well as oral medications and insulin. It will even record different insulin types plus unique foods and exercise routines. Track3 Diabetes logbook app keeps at their finger tips all of the information people with diabetes need to stay healthy.
Diabetes management made easy!
Whats new in Track3 Diabetes Tracker 4.3
- Minor bug fixesDownload Track3 Diabetes Tracker patch 4.3 APK
Search terms:
How to install Track3 Diabetes Tracker lastet apk for android
How to use Track3 Diabetes Tracker unlimited apk
How to mod Track3 Diabetes Tracker 4.3 apk
How to get Track3 Diabetes Tracker unlimited apk
How To Register And Sell On Jumia Online Mall
How To Register And Sell On Jumia Online Mall
How To Register And Sell On Jumia Online Mall
As a matter of fact,�Many sellers register and sell on Jumia. Jumia is the number one online shopping mall in Nigeria.. There is a lot for you to gain when you register and sell on Jumia. This guide will show you the easy steps on how you can register and sell on Jumia.CONTINUE READING
How To increase Ram Of Pc laptop computer
How To increase Ram Of Pc laptop computer
How to Boost Computer / laptop speed using windows Xp / Windows 7 / windows 8
The heading "How to increase ram of computer / laptop " itself sounds funny But today we are going to show you a guide on How to Boost computer ram which will help you in boosting your Computer / pc / laptop performance without upgrading ram .In this tutorial we will not use any software or any app . This is a notepad trick personally tested by me " How to increase ram of computer pc laptop using notepad "
.JPG "How to Boost computer pc laptop speed by increasing ram of computer laptop without using any software") |
| How to Boost computer pc laptop speed by increasing ram of computer laptop without using any software |
Yesterday i was checking my mail box And many of the mails were pointing questions towards Boosting computer speed , increase ram of computer , any app for increasing ram of computer ...
One of the best question which forced me to write this post was
" There are many guides on how to increase ram of android mobile without rooting etc etc . But there is no post for How to increase ram of a computer PC laptop "
So today we are here to show you How you can increase ram of your computer and boost the performance of your computer by a simple notepad trick .
Dont miss :-
How To Run Android Apps On Computer/Pc/Laptop
How to increase ram and boost speed / performance of your computer pc laptop in windows xp / win 7 / win 8 - Guide
Prerequisites :-
** A computer pc or laptop
** Os - windows xp / 7 / 8 / vista
** Notepad
** 250 $ To buy our software ( Hahahaha :) just kidding .. we dont need any software to increase ram of computer we just need notepad )
 |
| No need to buy a set of ram | increase ram of computer pc laptop | boost computer performance and speed |
Speed up your ram :-
Have a look at :-
How To Convert 1 GB File Into 1 MB
** Go to start > program > accessories
** Choose Notepad
** Type in the Notepad MYSTRING=(80000000)
** Save the file as MEMORY.VBE (or RAM.VBE.just remember the extension .VBE)
** Save the file to desktop
** Just double-click on the newly created file on your desktop whenever your PC seems sluggish. It will give your RAM a much needed boost.
** if you are having ram less then 128mb then change the 80000000 to 160000000 and it should work the same.
How To Check if it is working or not ?
You all might be familiar with a small light on your cpu box which blinks when cpu is performing tasks . so when you click on the saved notepad file you will notice that the light stopped blinking which means the ram is free now .
Hope you liked our guide on How to Boost computer pc laptop speed by increasing ram of computer laptop without using any software
How to Identify Photoshopped Pictures
How to Identify Photoshopped Pictures

How it Works ?
This web based app identifies the errors that can produce an image using the Image Error Level Analysis which is used to highlight the compressed pixels after extracting a heat map out of a JPEG image, since a Photoshopped image is saved not once but several times over and over, then it identifies the compression that was generated by those saves during Photoshopping. After highlighting those important pixels, it creates some extra layers (colored or black & white) to identify the Photoshop edits that have been made to that picture. And finally it gives a simple result telling you if its photoshopped or not and the effects applied to that image.
Does it Identify only Images by Photoshop?
No this web app is designed to identify any sort of modifications that happened to an image from any image editing apps, it surely identifies Gimp images, Pixlr images, Photo Effects pictures and more...
How to Identify Photoshopped Pictures
1) Go to PSKiller web app
2) You have the option to Choose an Image from Computer or From URL
3) Hit Submit. Wait few moments for uploading the picture and analysis time.

4) The Analysis result should be showed in the bottom of the picture.

5) It will shows up the different effects and mods that have been applied to the photo submitted. Ive edited Mark Zucks picture by changing: Brightness and Contrast, Color balance and saved it twice so the compression result is twice as it shows in the above image. Theres different results according and depending of the picture submitted.
Note: Sometimes it fails to identify Photoshopped pictures because its based on some algorithms that are not very smart but uses some advanced techniques like Image Error Level Analysis.
How to mod NetLube Valvoline Australia 1 0 164 apk for android
How to mod NetLube Valvoline Australia 1 0 164 apk for android

ID: au.com.infomedia.netlube.au.valvoline
Version: 1.0.164
Size: 0.9 Mb
NetLube Valvoline Australia Screen Preview


How to install NetLube Valvoline Australia apk for android
- For Android 4.0 or higher:Please to Settings, look down to Security, and select Unknown sources. Choosing this choice will enable to install apps download from the internet.
- For devices running on lower Android 4.0:
Please go to Settings - open the Applications option, and select Unknown sources, click OK on the popup alert.
NetLube Valvoline Australia Details
Net Lube� is the online marketing solution used by the world�s leading lubricant suppliers to help sell their products to equipment owners and service workshops in the Asia Pacific region. Net Lube matches equipment manufacturers� lubricant specifications with the latest lubricant products from the leading oil companies.The resulting recommendations assist in fast and accurate retail lubricant selection for a comprehensive range of engines, transmissions, differentials and hydraulics across 13 different categories of automotive vehicles, marine craft, agricultural machinery and industrial equipment.
Whats new in NetLube Valvoline Australia 1.0.164
Rebuilt with Apache Cordova 3.5.1.Download NetLube Valvoline Australia lastet APK
Search terms:
How to get NetLube Valvoline Australia patch 1.0.164 apk for laptop
How to use NetLube Valvoline Australia mod apk
How to mod NetLube Valvoline Australia 1.0.164 apk
How to get NetLube Valvoline Australia unlimited apk
Subscribe to:
Posts (Atom)