

I am surely said that when you go on Google and search for this queries �how to retrieve Facebook messages� OR �Recover deleted Facebook messages� then you can find lots of fake post and article there. This is time wasting to read fake posts. That�s why I guide you how you can get back deleted txt massages and photos. Continue reading�
Showing posts with label and. Show all posts
Showing posts with label and. Show all posts
Thursday, January 4, 2018
How to Install TWRP 3 1 1 1 and Root Huawei Honor 8 Pro Success 100 Tested
How to Install TWRP 3 1 1 1 and Root Huawei Honor 8 Pro Success 100 Tested
How to Install TWRP 3.1.1-1 and Root Huawei Honor 8 Pro Success 100% Tested.
Root Huawei Honor 8 Pro. If you need any information about how to root Huawei Honor 8 Pro, now you are at the right place. This guide will show you how to root the Honor 8 Android phone. Also, this guide is fully tested on this video. You can directly watch it or continue reading this guide. We will present this guide very simple, and easy to understand. Even if you are a beginner on Android trick. Everyone has different reasons to root their Android device, so does the Honor 8 Pro owner.
By rooting your Huawei Honor 8 Pro, you will get some advantages, for example, you can increase your phone speed and battery life, Block Ads in Apps that contains Ads, even you can remove pre-installed crapware. as we have seen, that crapware cannot be uninstalled without root access. And much more advantages.
Now, lets this guide begin.
Prerequisite.
- As the main requirement to root your Huawei Honor 8, you need to unlock the bootloader. If you dont know how to do it, you can read the following guide - How to unlock the bootloader on any Huawei phone.
- Enable USB debugging on your phone.
- D0wnl0ad ADB and fastboot from Here
- Downl0ad PHH Superuser from Here
- Downl04d TWRP recovery root from this link.
- Once TWRP successfully downloaded, now put this TWRP into a platform-tools folder.
- Rename it to twrp.img
Install TWRP 3.1.1-1 Honor 8 Pro | Guide.
- Extract platform-tools-latest-windows.zip file.
- Go to extracted folder
- Then, Open platform-tools folder.
- Now, connect your Huawei Honor 8 Pro to the computer via USB cable.
- Then, from the ADB fastboot folder right click and hold the shift button, and click open command window here.

open command in adb fastboot - Once command prompt windows come up, now you need to check your Huawei Honor 8 Pro successfully connected or not using the following command and press enter.
- adb device.
- If your device is successfully connected to the computer, then the result will return like this.
- list of devices attached ...

- Once your Huawei Honor 8 Pro successfully connected to the computer. Now, reboot your device into bootloader using this command and press enter
- adb reboot bootloader
- Just wait a minute, your device will reboot into fastboot and rescue mode.
- Once your device in the fastboot and rescue mode, its time to flash TWRP recovery to your device. Therefore you need to type this command at prompt and then press enter button
- fastboot flash recovery twrp.img
- Just wait for 2 or 3 seconds for the complete flashing process.
Boot Honor 8 Pro into Recovery.
- Power off your Honor 8 Pro.
- Now, press and hold three buttons simultaneously located at the side phone body
- Volume UP + Volume Down + Power Button
- Release all button if you see a Honor logo comes up on your screen.
- Now, you will see that honor 8 Pro has been unlocked status on screen.
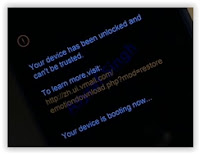
Honor 8 pro recovery mode - And now your device will boot into TWRP recovery.

- Tap Wipe - Format Data - type Yes - Ok
- Tap Back - Reboot - Recovery - Dont install
- Now your device will reboot into TWRP recovery.again. To root your Honor 8 Pro read the next step below.
Root Honor 8 Pro.
- You need to copy Superuser-r310-beta (download link available at prerequisite) to the internal storage of Huawei Honor 8 Pro
- Continued from step no. 8 above. or, make sure your device in TWRP recovery mode.
- From TWRP main menu, tap Install.
- Then, tap Superuser-r310-beta.zip from internal storage.
- Now, Swap to confirm flash.
- Once Zip file successfully flashed, you just need to click on reboot.system.
- Now, your Huawei Honor 8 Pro will reboot into the system.

How To Register And Sell On Jumia Online Mall
How To Register And Sell On Jumia Online Mall
How To Register And Sell On Jumia Online Mall
As a matter of fact,�Many sellers register and sell on Jumia. Jumia is the number one online shopping mall in Nigeria.. There is a lot for you to gain when you register and sell on Jumia. This guide will show you the easy steps on how you can register and sell on Jumia.CONTINUE READING
How to Root and Flash Custom Recovery on Samsung Galaxy SL GT I9003
How to Root and Flash Custom Recovery on Samsung Galaxy SL GT I9003

Maybe you�re looking to run some root-only apps on your device? Maybe you want the freedom that your friend�s having with his rooted Android device? No problem, we�ll help you root your device. The Samsung Galaxy SL can be rooted using the popular SuperOneClick app and this guide walks you through all the steps to root the device. So, follow it and get your device rooted.
I. Before You Begin:
1. Be aware that rooting your device will void its warranty. However, unrooting should help you reinstate the warranty provided an unrooting procedure�s available there.
2. This works on Windows based PCs only.
II. Downloading Required Files:
1. SuperOneClick (Download the latest version of the app)
III. Rooting the Samsung Galaxy SL (GT-I9003):
1. Download and place the app archive onto your Desktop.
2. Extract files from the archive over to your Desktop.
3. Turn ON the USB debugging option on your device by heading to Menu>>Settings>>Applications>>Development>>USB debugging.
4. Once enabled, connect your device to your PC via USB cable.
5. Run the SuperOneClick app by double-clicking on its executable file.
6. Click Root button in the app and it�ll start rooting your device.
7. Once it�s done, reboot your device.
8. You�re done!
Awesome! Your device has been rooted and you should be able to find the Superuser app in your App Drawer. Your phone is now ready to be loaded with root-only apps!
IV. Flash a Custom Recovery Image (Optional):
1. If you would like to flash a custom recovery image in order to flash custom ROMs, head to the How To Flash a Custom Recovery Image on the Samsung Galaxy SL (GT-I9003) to learn how to do that.
If this procedure helped you please thank/donate to the original developers here and here.
If you need help with this procedure, please ask in the comments below.
Improve Samsung Galaxy S4s Audio and Video Recording Quality
Improve Samsung Galaxy S4s Audio and Video Recording Quality

This MOD helps you to get better Audio and Video Bitrate. The MOD also disables "Cant use flash on low battery" and "Low Battery" alert.
ORIGINAL SAMSUNG STOCK CAMERA VIDEO RECORD QUALITY

MOD CAMERA VIDEO RECORD QUALITY

Instructions:
- Root you phone and backup all your data
- Download and Copy the MOD zip to you SD Card
- Reboot you phone into SD Card
- Install ZIP from SD Card
- Reboot and Enjoy !!!
- XWUBMG7 DEODEX: http://depositfiles.org/files/k6zh7lc9b
- XXUBMG9 DEODEX: http://depositfiles.org/files/dnsceuzg7
- XWUBMG1 DEODEX: http://depositfiles.org/files/wu3dxw0je
- XWUBMG1 ODEX: http://www.mediafire.com/download/lyr68t4xu0ejfcy/Mod_Camera_GT-I9500_XWUBMG1_by_Arrow.zip
Disclaimer: RK World will not be responsible, if your brick your device. Please have a backup before using any kind of MODs.
Hurray! How To Use Airtel BIS 3GB For N1000 Plan On Android And PC
Hurray! How To Use Airtel BIS 3GB For N1000 Plan On Android And PC
Yes you can start heaving some sighs of relief in this browsing tweak scarcity period as we are beginning to roll out the latest and blazing tweaks again.
Since MTN blocked BBLITE browsing tweak, it has not been easy for many to stay longer online because of the high cost of data subscriptions, but since we want to see you steady online just the way you also want, then we are here to the rescue all the time.
You also know that Glo recently increased the monthly Glo BIS rate from N1000 to N1400 and N1500 respectively, and it is with this Glo BIS android via IMEI tweak that many have returned back to in order to be managing themselves and be staying online.

But to us, we see the Glo increment as something quite expensive for you, and especially on this period of economic meltdown that is currently bedevilling the nation.
Must Read: Cheap weekend data for heavy downloaders on MTN, Airtel, Glo and Etisalat
You will agree with me that it is easier for you to pull out N1000 for your data subscriptions than having to top the 1K again with additional N400 or N500; this is totally unaccepted and this is why we have to bring out another better and cheaper alternative browsing tweak for you.
Even the Glo browsing network is somehow very poor these days in many locations, but Airtel on the other part has been confirmed blazing at high speed in many locations currently.
Now, here is the main deal; if you can recall, Airtel recently slashed down their price of monthly Blackberry Complete data plan that offer 3GB of data from N1400 to N1000.
But this Airtel Blackberry Complete data plan was designed to be used on blackberry devices only, and since it was introduced, trying to tweak it to work on android and PC has been very difficult.
But we want you now to rejoice as we have finally being able to crack it to work on your android and PC.
Recommended: Etisalat unveiled new call and data plan in Easyflex Evolution
Before we give you the steps on how to use the Airtel Blackberry Complete Plan of 3GB for N1000, we want you to understand that this particular plan works on Blackberry normally, without any form of zapping, and since it involves IMEI tweaking of your android to blackberry, the plan does not also zap on your android unlike other Airtel Blackberry Unlimited data plans.
There we go with the detailed steps on how you too can also use the Airtel BIS 3GB for N1000 plan on your android and PC;
� Tweak this IMEI 35292205184 into your android device; you should note that I dropped the first 11 digits of the IMEI for you to now tweak out the remaining 4 digits as usual.
For those still new to IMEI tweaking and analysing, you can checkout to see how to analyse and tweak IMEI here to complete the IMEI digit�it is very easy! And you can even analyse IMEI online if you don�t want the app method suggested above
� After tweaking the IMEI into your android, you can now subscribe to the Airtel BIS 3GB plan for N1000 by dialling the subscription code *431#
� Now you should leave your phone APN to the normal Airtel APN which is internet.ng.airtel.com and don�t bother to change it to blackberry.net
� You can then fire up your browser and start browsing and downloading at high speed.
You can check your remaining data balance anytime by dialling *140#
How can I use it on PC?
You can use it on PC in the same way you have been using your Glo BIS android tweak on PC via hotspot-WiFi tethering.
Enjoy!
Wednesday, January 3, 2018
HTC U11 full specs and overview
HTC U11 full specs and overview

The HTC U11 has a liquid glass surface which is crafted to impress using optical spectrum hybrid deposition and by randomly layering highly refractive precious minerals across the phone�s back, HTC created very stunning vivid new colors that transform light with every movement a user make. The new seamless curved look of HTC U11 is quite nice and smart, it�s 3D glass on both front and back makes the phone looks elegant and not only beautiful but more secure and comfortable to hold.
DISPLAY
The HTC U11 has a 5.5�� 3D glass screen designed to preserve the authenticity of the image. HTC has one of the best display quality Smartphone�s in the industry and with their ability to provide a good display, HTC provides the HTC U11 a purer full-framed viewing experience.CAMERA
The HTC U11 camera (12.0MP) has an incredible DxOMark 90 cores, making it one of the highest rated Smartphone ever in DxOMark history. It has an impressive multi-axis optical and electronic stabilization system and super fast auto focus in all lighting conditions make the camera quick delivering smooth and sharp pictures.HTC improved on the camera and video for more dynamic exposure range with HDR boost without lag, new white balance, a major reduction in noise and e.t.c
It is equipped with 16MP font camera with high resolution and an ultra-pixel light sensitivity for brilliant selfies in day or night. It also uses the same powerful HDR boost and noise reduction technology as the main camera.
PERFORMANCE
HTC U11 is powered by a Qualcomm Snapdragon� 835 which packs a punch with the first 10 nanometer mobile processor. It has a high speed, high graphics, and an impressing smooth performance and it enhances longer battery life. Users get 25% faster graphics with HTC U11 along with 35%hrs more video playback, 30% or 8hrs more music playback and 43% or 3.5hrs longer web browsing time via LTE network.TECH SPECS
Display
- Size- 5.5�� inch, Quad HD 18:9
- Type � Super LCD 5
- Resolution � 2560*1440 pixels
- Protection � 3D Corning� Gorilla� Glass 5
Main Cameras
- 12MP (HTC Ultra pixel� 3 with 1.4um pixel)
- Ultra-speed Autofocus, BSI Sensor, optical image stabilization (OIS)
- F/1.7 aperture, dual LED flash, self timer, face detection, slow motion video
- Video pic, RAW format, panorama, hyper lapse, 4k video recording.
Front Camera
- 16MP with BSI Sensor
- F/2.0 aperture, live make up, auto selfie, voice selfie
- Self timer, HDR Boost, selfie panorama, full HD 1080p video recording.
Processor
- CPU � Qualcomm� Snapdragon� 835, 64 Bit Octa �core up to 2.45 GHz
Memory
- RAM � 4GB/6GB
- ROM � 64GB/128GB
- Extented memory- microSD�
- Flex storage supported
Battery
- Capacity - 3000mAh
- Quick charge 3.0
Platform Android
- Android 7.1� with HTC sense
Connectivity
- NFC
- Bluetooth � 4.2
- WLAN � 802.11a/b/g/n/ac, (2.4 & 2.5 GHz)
Network Band
- GSM: 850/900/1800/1900
- WCDMA: 900/2100
- LTE: 1/3/7/8/20
Sensor
- Ambient light sensor, proximity sensor, motion G- sensor, compass sensor, fingerprint sensor, gyroscope and geomagnetic sensor, edge sensor, sensor hub.
Water protection
- IP67
HTC Velocity 4G Pc Suite and Usb Driver for Windows
HTC Velocity 4G Pc Suite and Usb Driver for Windows
HTC Velocity 4G Pc Suite and Usb Driver for Windows
Could you look for in a mobile Usb Drivers and Pc Suite, here provides a Usb Drivers and Pc Suite free download and how to install to HTC Velocity 4G. Make sure you have the appropriate type of model phone before downloading the driver to the computer. Usb Drivers and Pc Suite support following type model for HTC Velocity 4G Usb Driver, Pc Suite, Modem, Com port. Without delay, please download the following. Download HTC Velocity 4G for Windows here Pc Suite and Usb Driver
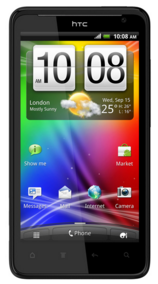
HTC Velocity 4G Pc Suite and Usb Driver Installation Tutorial :
- You should know that if HTC Velocity 4G Usb Driver and Pc Suite for Windows smartphone is powered by a corresponding Mtk processor, here is explained how to install the Usb drivers and Pc Suite for the model of this type.
- Run and use as an administrator if you are HTC Velocity 4G Usb Driver and Pc Suite work very precisely and correctly.
Feel free to skip this step if the mobile device is not supported by Mtk Cpu :
- Enable Usb Driver Pc Suite debugging on HTC Velocity 4G to do that, please go to Settings > Developer Options.
- Download the driver to the computers usb driver Extract files using WinZip or WinRAR, find the file "PdaNetA4150.exe" and start note (Be sure to close all programs).
- Select the Type phone model HTC Velocity 4G Smartphone, Please select press / click the install button.
- Now you just connect HTC Velocity 4G there will be a popup message saying your phone is connected. Congratulations you have completed the installation.
Well, thats a brief explanation neighbor how to download and step by step how to install HTC Velocity 4G Usb Driver and Pc Suite for Windows, and uses his good luck.
How To Root Yu Yuphoria Unlock Bootloader And Install CWM Recovery
How To Root Yu Yuphoria Unlock Bootloader And Install CWM Recovery

Yu has already rocked the Indian markets with its Yureka, and now it has introduced the Yuphoria, trying to cover each and every area of the smartphone segment. If you are looking for a guide to root your Yuphoria, then this is a one stop shop to do so.
Note: We are not responsible for any damage caused to your device. Proceed on your own risk, And follow tutorial carefully. However, we will try our best to get your device recovered from any disastrous situations.
You need:
1. Yu Yuphoria- Obviously.
2. Battery Charged up to 50%- To prevent accidental shut down of the device.
3. A computer to install recovery temporarily in the phone.
4. Root kit (Custom Recovery and SuperSU) to root the device. (Download)
To root your phone follow these steps:
To root your phone follow these steps:
Prerequisites:
Before we go into the process, let do make some necessary settings on your Yuphoria.
- Go to Settings.
- Scroll down and go to About Phone.
- Scroll down and tap build number 7-10 times until you see a popup stating �You are now a developer�.
- Press back and now a new section called �Developer Options� will appear in settings. Tap on it and turn on the toggle at the top.
- Now scroll down and turn on USB Debugging.
- Now make a backup of all your data as the next step will wipe all the data present in the Internal Memory.
- Make sure you have 70-80% battery to prevent unexpected failures.
How To Unlock Yu Yuphoria�s Bootloader:
- Extract the adb_fastboot file in a new folder in your C:/ drive.
- Power Off your phone.
- While continuously pressing the Volume Up key, connect your phone to the PC/Laptop via USB cable.
- You will get a black screen stating �Fastboot Mode� at the middle.
- As soon as you plug your phone into the PC, windows will start installing drivers all by itself. Please wait for the installation to complete.
- After the drivers have been installed successfully, go to the folder where you have extracted adb_fastboot file.
- While pressing the Shift key on your keyboard, right click in the folder and select �Open Command Prompt Here�. The command prompt will open up.
- Now type the following command to check if your device has been detected in the fastboot mode.
fastboot -i 0x2A96 devices - You�ll get an error if the drivers aren�t installed successfully. However, if you don�t get any error, you may proceed to the next step.
- Now, run the following command to unlock the bootloader.
fastboot -i 0x2A96 oem unlock - Now, run the following command to reboot your device to system.
fastboot -i 0x2A96 reboot
Now, that you have successfully completed the first step, let�s jump onto the next step.
How To Hotboot CWM Recovery:
- Hotbooting is way of temporarily introducing a custom recovery in your recovery partition. As soon as you reboot your device, the custom recovery will be replaced by the stock cyanogen recovery.
- Now, since we have to flash supersu zip from a hotbooted recovery, you first need to copy the supersu zip from the rooting kit to the sd card of your phone.
- Now, copy the yuphoria-cwm-recovery file from the rooting kit to the folder where you extracted adb_fastboot.
- Using the same old method, go to fastboot mode and open command prompt. Now, type the following command.
fastboot -i 0x2A96 boot yuphoria-cwm-recovery.img - The above command will boot your yuphoria into cwm recovery.
How To Root Yu Yuphoria By Flashing SuperSU:
Now that you are in cwm recovery, to flash SuperSu zip on your device, you need to follow these steps-
- Select �Install zip from sd card� and navigate to the place where you copied the SuperSU file.
- Now, select �Yes�. It will flash the SuperSU zip on your phone.
- You should now have root access on your phone. After rooting, it is recommended to install Busybox.
- Download Busybox installer app from playstore and follow the instructions to install it.
Congratulations, you�ve rooted your Yu Yuphoria! Enjoy!
SUCCESS :-) N
imo free video calls and chat
imo free video calls and chat

Message and video chat with your friends and family for free, no matter what device they are on!

- Avoid SMS and phone call charges: Send unlimited messages and make free video and voice calls over your 3G, 4G or Wi-Fi connection
- Make high-quality video and voice calls
- Group chat with friends, family, roommates and others
- Share photos and videos
- Express yourself with hundreds of free stickers!
- Encrypted chats and calls
- Optimized for Android tablets

How To Install TWRP Custom Recovery and Root Moto G4 Plus
How To Install TWRP Custom Recovery and Root Moto G4 Plus
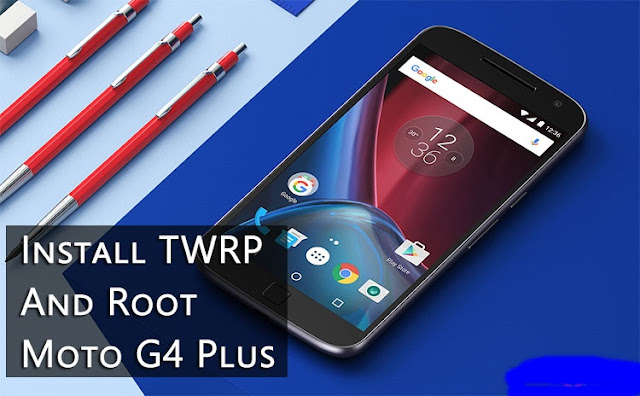
Moto G4 Plus is the better variant of the two Moto G series devices launched last month. With a better camera, more RAM and a fingerprint scanner, Moto G4 Plus should be your choice over Moto G4 if you are looking for a good smartphone in this price segment. Moto G4 Plus runs the latest Android Marshmallow 6.0.1 and the user experience is quite similar to a Nexus smartphone. The only difference being Moto display and Moto Camera are added with few nifty features like double twist to open the camera, double chop to start flashlight, etc.
The user experience is quite minimal with minimal customization options available. but if you wish to enhance your user experience and want to customize your Moto G4 Plus according to your liking and requirements you would need a rooted device. Here is a step by step guide to root your Moto G4 Plus.
Before starting off with this guide follow the following guide: �How To Unlock Bootloader on Moto G4 /G4 Plus�. As you would need a Moto G4 with an unlocked bootloader to start the rooting process.
Things You Will Need
-
Moto G4 Plus with Unlocked Bootloader
-
TWRP 3.0.2-2 | Link
-
Root-motog4-athena.zip | Link
-
SuperSU v2.62-3 Beta | Link
Steps To Follow
Step 1. Download the SuperSU zip file and copy it to your Moto G4 Plus�s internal storage.Step 2. Make sure you setup the Minimal ADB and Fastboot on your PC. If not follow the guide given above. Then download the TWRP 3.0.2-2.img on your PC and copy the file to Minimal ADB and Fastboot folder (usually C:/Program Files/Minimal ADB and Fastboot). You may rename the file to �twrp.img� for ease of use in later steps.
Step 3. Now reboot your device to Bootloader mode. To do so, power off the device and then press and hold Power + Volume Down buttons simultaneously for few seconds.
Step 4. Once in Bootloader mode connect your device to your PC using Usb cable. Also, start the Minimal ADB and Fastboot on your PC.
Step 5. Enter the following command in the window opened and then press enter:
Step 6. Download the Root-motog4-athena.zip from the link given above and extract the zip file on your PC. In the extracted folder you will see an �ROOT.bat� file, run this file. This will flash the custom boot image on your device which will help in rooting your device.fastboot flash recovery twrp.img
Step 7. Now reboot your device to TWRP custom recovery. To do so, make sure your device is in bootloader mode then select Recovery option from the menu. You can use volume down button to scroll through the options and volume UP to select an option.
Step 8. Once is TWRP recovery, select Install option and browse the SuperSU zip file which you earlier copied to your device. Select the SuperSU zip file and swipe to install it on your device.
Step 9. Reboot your device to the system.
Congratulations! You have successfully rooted your Moto G4 Plus. Enjoy your rooted device by customizing it according to your needs. You may check if your device is successfully rooted using the Root checker application available on Play Store.
joeykrim Tools Free
Download
How to Install and Download Latest Google play store free download
How to Install and Download Latest Google play store free download
How to Install and Download Latest Google play store

The latest Google play store 5.12-9 arrive with complete detail side, stuff Design, and it has more elements Application such as G mail and Google updates with the new stuff design.
There are just two ways for installation Google play store in your Device, or you can direct on your Phone ore with your Computer/Laptop.
This is the official free downloading link, you can just click the below download button, and install the latest version Google Play store.
Download Here
Tuesday, January 2, 2018
How To Recover Deleted Facebook Messages Pictures And Videos
How To Recover Deleted Facebook Messages Pictures And Videos
How To Recover Deleted Facebook Messages, Pictures And Videos

Hello friends today I�m come with another Facebook trick. I find some queries from internet, many people want to recover deleted Facebook messages, pictures and video. But they don�t know about Facebook new feature but here we discuss about this feature.

Recover Deleted Facebook Messages, Pictures And Videos With Date:
Follow my easy steps and get back deleted text messages, recover deleted pictures, videos and also get back your all profile data.1. Login into your Facebook account and go to setting after it navigate to General account Settings.2. Now you can see the Download a copy of your Facebook data, now click on download a copy link.3. After clicking on link this will open a new page and on this page you can see download archive button. Click on it, after clicking it want you password and asking security question by Facebook.4. Now you get message by Facebook � �the download link will be sent to your email id which you used to create your Facebook account.5. Wait for a minute, check your e-mail, now you can see that you received Message from Facebook with download link. Click on download link can download zip file.

6. After downloading zip file extract it and find you lost messages, pictures and videos Note: After extracting you will find the .HTML file so double click on file and chose your browser and see the data. � IT IS Very EASY�
  How To Recover Deleted Facebook Messsages, Pictures
Follow my easy steps and get back deleted text messages, recover deleted pictures, videos and also get back your all profile data.
1. Login into your Facebook account and go to setting after it navigate to General account Settings.
2. Now you can see the Download a copy of your Facebook data, now click on download a copy link.
3. After clicking on link this will open a new page and on this page you can see download archive button. Click on it, after clicking it want you password and asking security question by Facebook.
4. Now you get message by Facebook � �the download link will be sent to your email id which you used to create your Facebook account.
5. Wait for a minute, check your e-mail, now you can see that you received Message from Facebook with download link. Click on download link can download zip file.
6. After downloading zip file extract it and find you lost messages, pictures and videos
Note: After extracting you will find the .HTML file so double click on file and chose your browser and see the data. � IT IS Very EASY�
How To Recover Deleted Facebook Messsages, Pictures
Subscribe to:
Posts (Atom)