
Showing posts with label twrp. Show all posts

Thursday, January 4, 2018

How to Install TWRP 3 1 1 1 and Root Huawei Honor 8 Pro Success 100 Tested

How to Install TWRP 3 1 1 1 and Root Huawei Honor 8 Pro Success 100 Tested


How to Install TWRP 3.1.1-1 and Root Huawei Honor 8 Pro Success 100% Tested.

Root Huawei Honor 8 Pro. If you need any information about how to root Huawei Honor 8 Pro, now you are at the right place. This guide will show you how to root the Honor 8 Android phone. Also, this guide is fully tested on this video. You can directly watch it or continue reading this guide. We will present this guide very simple, and easy to understand. Even if you are a beginner on Android trick. Everyone has different reasons to root their Android device, so does the Honor 8 Pro owner.

By rooting your Huawei Honor 8 Pro, you will get some advantages, for example, you can increase your phone speed and battery life, Block Ads in Apps that contains Ads, even you can remove pre-installed crapware. as we have seen, that crapware cannot be uninstalled without root access. And much more advantages.

Now, lets this guide begin.

Prerequisite.

  1. As the main requirement to root your Huawei Honor 8, you need to unlock the bootloader. If you dont know how to do it, you can read the following guide - How to unlock the bootloader on any Huawei phone.
  2. Enable USB debugging on your phone.
  3. D0wnl0ad ADB and fastboot from Here
  4. Downl0ad PHH Superuser from Here
  5. Downl04d TWRP recovery root from this link.
    • Once TWRP successfully downloaded, now put this TWRP into a platform-tools folder.
    • Rename it to twrp.img

Install TWRP 3.1.1-1 Honor 8 Pro | Guide.

  1. Extract platform-tools-latest-windows.zip file.
  2. Go to extracted folder
  3. Then, Open platform-tools folder.
  4. Now, connect your Huawei Honor 8 Pro to the computer via USB cable.
  5. Then, from the ADB fastboot folder right click and hold the shift button, and click open command window here.
    open command in adb fastboot
    open command in adb fastboot
  6. Once command prompt windows come up, now you need to check your Huawei Honor 8 Pro successfully connected or not using the following command and press enter.
    • adb device.
  7. If your device is successfully connected to the computer, then the result will return like this.
    • list of devices attached ...
  8. Once your Huawei Honor 8 Pro successfully connected to the computer. Now, reboot your device into bootloader using this command and press enter
      • adb reboot bootloader

  9. Just wait a minute, your device will reboot into fastboot and rescue mode.
  10. Once your device in the fastboot and rescue mode, its time to flash TWRP recovery to your device. Therefore you need to type this command at prompt and then press enter button

    • fastboot flash recovery twrp.img

  11. Just wait for 2 or 3 seconds for the complete flashing process.

Boot Honor 8 Pro into Recovery.

  1. Power off your Honor 8 Pro.
  2. Now, press and hold three buttons simultaneously located at the side phone body
    • Volume UP + Volume Down + Power Button
  3. Release all button if you see a Honor logo comes up on your screen.
  4. Now, you will see that honor 8 Pro has been unlocked status on screen.
    Honor 8 pro recovery mode
    Honor 8 pro recovery mode
  5. And now your device will boot into TWRP recovery.
  6. Tap Wipe - Format Data - type Yes - Ok
  7. Tap Back - Reboot - Recovery - Dont install
  8. Now your device will reboot into TWRP recovery.again. To root your Honor 8 Pro read the next step below.

Root Honor 8 Pro.

  1. You need to copy Superuser-r310-beta (download link available at prerequisite) to the internal storage of Huawei Honor 8 Pro
  2. Continued from step no. 8 above. or, make sure your device in TWRP recovery mode.
  3. From TWRP main menu, tap Install.
  4. Then, tap Superuser-r310-beta.zip from internal storage.
  5. Now, Swap to confirm flash.
  6. Once Zip file successfully flashed, you just need to click on reboot.system.
  7. Now, your Huawei Honor 8 Pro will reboot into the system.


visit link download
Read more »

Wednesday, January 3, 2018

How To Install TWRP Samsung Galaxy J2 SM J200

How To Install TWRP Samsung Galaxy J2 SM J200


How To Install TWRP Samsung Galaxy J2 SM-J200


 If you want to Root Samsung Galaxy J2 SM-J200, you can try using Tool RootGenius, iRoot, KingoRoot, OneClickRoot, MobileGo or SRSRoot. Some tools are indeed made to gain root access on Android devices.
  But if you want to Root Android Without a PC, you can use the application RootGenius Mobile, iRoot Mobile, KingRoot Mobile, 360Root Mobile, Key Master Root, TowelRoot, or FramaRoot. These applications are made specifically for rooting on android devices.

Okay, now just at the discussion, namely Install TWRP Samsung Galaxy J2 SM-J200, Follow the steps as below.

Preparation:

Smartphone must have at least 30-40 percent of the battery to make the process of rooting
On your Samsung Galaxy, Enable USB Debugging Mode and OEM Unlock.
Download and install the Samsung USB driver on your computer.
Download and extract the file Odin Downloader
Download file TWRP Samsung Galaxy J2 SM-J200
Once you have downloaded all the files above, now turn off your Smartphone


After turning off, you need to boot into Download Mode, to boot into Download Mode press and hold the "Volume Down + Home + Power" together to Download Mode is active.


In the Download Mode you will see a yellow triangle warning signs, in this situation you have to press the Volume Up key to continue.

Now, open the file that you have downloaded Odin3_v3.exe.


Then connect your smartphone to a computer via USB cable


After you connect the smartphone to a computer, Odin will automatically recognize device and message "Added"


Once the device is detected by Odin, click on the button "AP" and select the file twrp-2.8.7.0-j2lte.img.tar
Now, click on the "Start" button in Odin to start Flahing, Flashing usually takes 30-50 seconds to complete the process of flashing the Samsung Galaxy J2 SM-J200. Once the flashing process in completed you will be able to see a green box with the words "Pass" in Odin. During this process the Smartphone will automatically re-boot

source: http://www.beritahuaja.com/2015/10/how-to-root-samsung-galaxy-j2-sm-j200.html?en


visit link download
Read more »

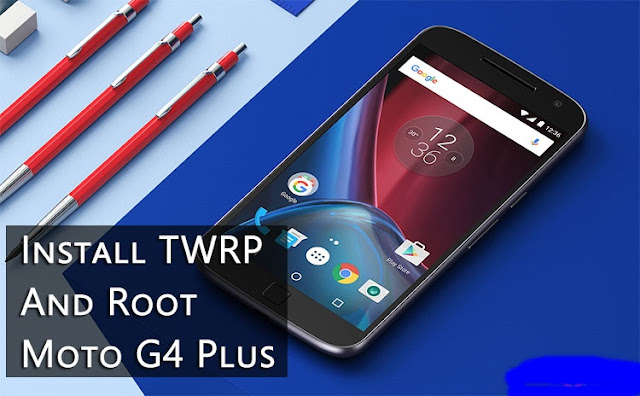
How To Install TWRP Custom Recovery and Root Moto G4 Plus

How To Install TWRP Custom Recovery and Root Moto G4 Plus


Moto G4 Plus is the better variant of the two Moto G series devices launched last month. With a better camera, more RAM and a fingerprint scanner, Moto G4 Plus should be your choice over Moto G4 if you are looking for a good smartphone in this price segment. Moto G4 Plus runs the latest Android Marshmallow 6.0.1 and the user experience is quite similar to a Nexus smartphone. The only difference being Moto display and Moto Camera are added with few nifty features like double twist to open the camera, double chop to start flashlight, etc.

The user experience is quite minimal with minimal customization options available. but if you wish to enhance your user experience and want to customize your Moto G4 Plus according to your liking and requirements you would need a rooted device. Here is a step by step guide to root your Moto G4 Plus.
Before starting off with this guide follow the following guide: �How To Unlock Bootloader on Moto G4 /G4 Plus�. As you would need a Moto G4 with an unlocked bootloader to start the rooting process.

Things You Will Need

  • Moto G4 Plus with Unlocked Bootloader

  • TWRP 3.0.2-2 | Link

  • Root-motog4-athena.zip | Link

  •  SuperSU v2.62-3 Beta | Link

Steps To Follow

Step 1. Download the SuperSU zip file and copy it to your Moto G4 Plus�s internal storage.
Step 2. Make sure you setup the Minimal ADB and Fastboot on your PC. If not follow the guide given above. Then download the TWRP 3.0.2-2.img on your PC and copy the file to Minimal ADB and Fastboot folder (usually C:/Program Files/Minimal ADB and Fastboot). You may rename the file to �twrp.img� for ease of use in later steps.
Step 3. Now reboot your device to Bootloader mode. To do so, power off the device and then press and hold Power + Volume Down buttons simultaneously for few seconds.
Step 4. Once in Bootloader mode connect your device to your PC using Usb cable. Also, start the Minimal ADB and Fastboot on your PC.
Step 5. Enter the following command in the window opened and then press enter:
fastboot flash recovery twrp.img
Step 6. Download the Root-motog4-athena.zip from the link given above and extract the zip file on your PC. In the extracted folder you will see an �ROOT.bat� file, run this file. This will flash the custom boot image on your device which will help in rooting your device.
Step 7. Now reboot your device to TWRP custom recovery. To do so, make sure your device is in bootloader mode then select Recovery option from the menu. You can use volume down button to scroll through the options and volume UP to select an option.
Step 8. Once is TWRP recovery, select Install option and browse the SuperSU zip file which you earlier copied to your device. Select the SuperSU zip file and swipe to install it on your device.
Step 9. Reboot your device to the system.
Congratulations! You have successfully rooted your Moto G4 Plus. Enjoy your rooted device by customizing it according to your needs. You may check if your device is successfully rooted using the Root checker application available on Play Store.

Root Checker
joeykrim Tools Free
Download


visit link download
Read more »

Monday, January 1, 2018

How To Install TWRP Recovery On Samsung Galaxy S Plus

How To Install TWRP Recovery On Samsung Galaxy S Plus


If you have been looking for a touch based recovery for your Galaxy S Plus I9001 smartphone, then TeamWin Recovery will be a perfect choice for you. TWRP recovery provides you almost all the features that you expect from a custom recovery, like it allows you to flash custom ROMs on your phone. You don�t have to use hardware buttons anymore, just tap on the option in the recovery and it will perform the appropriate action. Following is the guide on how you can install TWRP 2.1 Recovery on your Galaxy S Plus I91001 smartphone.

I. Before You Begin:

1. You must have rooted your Galaxy S Plus I9001 smartphone before doing this procedure. Please head to our how to Root Galaxy S Plus I9100 procedure first, finish it, then return to this procedure and continue.
2. This will replace your stock recovery. So, you will not be able to reboot your phone into the stock recovery afterwards.

II. Downloading Required Files:

1. Download the QuickFlasher Tool from here.
2. Download the TWRP 2.1 Touch Recovery Image from here.

III. Installing TWRP 2.1 Touch Recovery on Galaxy S Plus I9001:

1. Place the QuickFlasher and Recovery Image onto your Desktop.
2. Extract files from the QuickFlasher archive and place them on your Desktop.
3. Enable USB debugging on your phone by heading to Menu>>Settings>>Applications>>Development>>USB debugging.
4. Connect your phone to your PC with the help of the USB cable that came with it.
5. Launch the QuickFlasher Tool by double-clicking on sgsflasher_x86.exe file.
6. In the QuickFlasher Tool, check-mark the box labeled as Flash a new Recovery as shown in the below screenshot.
[ Quick Flasher Tool ]
7. Click on the Browse� button and locate the Recovery Image you downloaded earlier.
8. Hit the Start Now button to begin flashing the recovery on your phone.
9. After the recovery is successfully installed on your phone, your phone will reboot.
You did it ! You have successfully installed the Touch Based TWRP 2.1 Recovery on your Galaxy S Plus I9001 smartphone. Now, Go and get some custom ROMs to try out on your phone.


visit link download
Read more »

Friday, December 29, 2017

How to Install TWRP 3 1 1 Recovery on Huawei Honor 9 EMUI 5 1

How to Install TWRP 3 1 1 Recovery on Huawei Honor 9 EMUI 5 1


How to Install TWRP 3.1.1 Recovery on Huawei Honor 9 EMUI 5.1

TWRP 3.1.1 Huawei Honor 9. In this guide, guidebelajar will show you how to flash TWRP recovery on Huawei Honor 9 EU and Chinese version. By installing TWRP recovery on your Huawei Honor 9 allow you to install third-party firmware or custom ROM and back up the current system, and then revert to at any time. Also, you can install the third party app, kernel, and add-on (e.g. SuperSU, Google Apps, Themes), and other mods. Once TWRP recovery successfully installed on your Huawei Honor 9, you can make backing up, restoring, Wiping, and mounting various device partitions. For example boot, system, cache, user data and internal storage the Huawei Honor 9. This guide is sourced from the following video.
Ok, now lets the tutorial begins. Do at your own risk.. :)

Prerequisite.

  1. First, you need to download these files (TWRP Recovery for Honor 9).
    • Here
  2. Downl0ad Huawei Honor 9 driver.
    • Here
  3. ADB Fastboot tool
    • Here
  4. Make sure you have Unlock Bootloader on your device. See this guide to unlock bootloader Huawei Honor 9.
  5. Enable USB debugging on Huawei Honor 9. How to do it? or see this guide
    • Go to Settings - Scroll down - About Phone - tap 7 times at Build number.
    • Now you get Developer Option.
    • Then Enable USB debugging

Guide to Install The TWRP.

  1. First, you need to install the Hsuite as a Huawei Honor 9 USB driver.
  2. Extract ADB fastboot tool using any zip program. e.g 7zip.
  3. Now, move the TWRP.3.1.1-0.img to the extracted ADB folder.
  4. Now open ADB folder.
  5. Then just click adb.exe to run it.
  6. Rename TWRP.3.1.1-0.img to twrp (there is no other extension)
  7. Now, connect your Huawei Honor 9 to the computer via USB cable.
  8. Then, from the ADB fastboot folder right click and hold the shift button, and click open command window here.
    open command in adb fastboot
    open command in adb fastboot
  9. Once command prompt windows come up, now you need to check your Huawei Honor 9 successfully connected or not using the following command and press enter.
    • adb device.
  10. If your device is successfully connected to the computer, then the result will return like this.
    • list of devices attached ...
  11. Once your Huawei Honor 9 successfully connected to the computer. Now, reboot your device into bootloader using this command and press enter
    • adb reboot bootloader
  12. Just wait a minute, your device will reboot into fastboot and rescue mode.
    reboot into bootloader
    reboot into bootloader
  13. Once your device in the fastboot and rescue mode, its time to flash TWRP recovery to your device. Therefore you need to type this command at prompt and then press enter button
    • fastboot flash recovery twrp.img
  14. Just wait for 2 or 3 seconds for the complete flashing process.
  15. Make sure the twrp.img at the command prompt is the same name as the twrp name in the adb fastboot folder. (refers to step no. 6 above).
  16. At the end of the flashing process, you need to send a command to your device by typing this at the command prompt.
    • fastboot reboot.
  17. And now, your Huawei Honor 9 will automatically reboot.
  18. Finish.

Check the TWRP is work or not?

First method (using adb fastboot command)

  1. Make sure your device is still connected to the computer while check the TWRP is working or not.
  2. From the command prompt type the following command and press enter
    • adb reboot recovery
  3. Then, back to your phone and now it will enter the recovery mode as shown in the image below.
    enter TWRP recovery mode
    enter TWRP recovery mode
  4. finish.

Second method (using physical button)

  1. This is the alternative method you can use to enter TWRP recovery mode without connected your phone to the computer.
  2. At the second method is using physical button located on the outside phone body.
  3. Make sure your phone is completely powered off.
  4. Then, power on again by press and hold the following button for a 10 to 15 seconds
    • The Power Button + Volume Up
  5. Now, release all button when your phone successfully enters recovery mode.
  6. enter recovery honor 9
    how to enter recovery mode huawei honor 9
    enter recovery honor 9
  7. Finish


visit link download
Read more »

Monday, December 25, 2017

How To Install TWRP and Root Galaxy S6 Edge Plus on Marshmallow firmware

How To Install TWRP and Root Galaxy S6 Edge Plus on Marshmallow firmware


(G928C/F/I/G/C7)

We recently shared with you the method to install Marshmallow update on your Galaxy S6 Edge Plus. If you missed it and haven�t upgraded your device to latest firmware head over to this article and install the update on your device. If you are already on Marshmallow firmware you must be waiting for a rooting guide as upgrading your device will incur in loss of root access. Well, this guide will help you root your Galaxy S6 Edge Plus running Marshmallow.

To get root access on your Galaxy S6 edge Plus you will have to install a custom kernel that will support rooting. In the following guide, we will install Skyhigh Kernel developed by Xda senior member UpInTheAir. We will also install TWRP custom recovery which would be used to flash SuperSU zip file and the aforementioned kernel that will help us obtain root on the device.
WARNING: Any harm to your device would be your responsibility only developer or Droidviews should not be held responsible for bricked devices. Do note that your Knox counter would be tripped while performing steps mentioned below, so proceed at your own will.

Things You Will Need

  • Galaxy S6 Edge Plus (G928C/F/I/G/C7) and a PC
  • Skyhigh Kernel: Link
  • TWRP: Link
  • Odin: Link
  • SuperSUv2.68: Link

Steps To Follow

  1. If you have previously attempted ANY other root method, then please flash fresh firmware (wipe system, data, cache, Dalvik-cache).
  2. Enable OEM unlock by going into Settings application > Developer Options > OEM Unlock is enabled. (You would need to enable developer options by tapping Build Number in the About Phone of your Settings app  multiple times).
  3. Download and move the kernel and SuperSU zip files to your device�s storage.
  4. Now boot your device into Download Mode by pressing and holding Volume Down + Home + Power buttons for few seconds.
  5. Download Odin v3.10.7 from the link given above.
  6. Extract Odin ZIP file on your PC.
  7. Open Odin v3.10.7.exe.
  8. Connect your phone to your PC, once it has booted into Download mode and wait until you get a blue sign in Odin and an Added message in the log tab of Odin.
  9. Download the twrp-3.0.0-0-nobleltezt recovery from the link given above. (YES � This recovery will work with Marshmallow bootloader)
  10. Add the twrp-3.0.0-0-nobleltezt-nobleltezt.img.tar file to AP/PDA in Odin.
  11. Now click Start button to begin the installation.
  12. Now boot your device into custom recovery by pressing and holding Volume Up + Home + Power buttons for few seconds.
  13. To obtain root flash [BETA][2016.02.28] SuperSU v2.68 in TWRP. Tap on Install button in TWRP, then browse for the SuperSU file and swipe to install it.
  14. Do not reboot your device now. First flash SkyHigh_kernel.zip in a similar manner as described in the previous step.
  15. Now reboot your device. You may get one boot-loop directly after flashing kernel. This is normal.
  16. Enjoy!
To check that you have successfully rooted your Galaxy S6 Edge Plus you may install Root Checker application from the link given below and confirm the root access.You may also install Synapse from Google Play store and remove Knox using it.
Root Checker
joeykrim Tools Free
Download
Enjoy root access on your Galaxy S6 Edge Plus on Marshmallow firmware. Let us know if you have any queries regarding the installation procedure in the comments section below.


visit link download
Read more »

Sunday, December 24, 2017

HOW TO INSTALL TWRP RECOVERY ON CANVAS NITRO A310

HOW TO INSTALL TWRP RECOVERY ON CANVAS NITRO A310


 HOW TO INSTALL TWRP RECOVERY ON CANVAS NITRO A310    


Micromax Canvas Nitro A310 is a high specs featured phone from micromax . Due to its low budget it gained a good popularity in indian market . Some of its features include a 5 inch IPS LCD Capacitive Touchscreen display, which is powered by 1.7 GHz Octa-core processor and the device runs on Android 4.4 Kitkat Operating system . This smartphone featured a good camera with 13 Mega Pixel rear and 5 Mega Pixel front camera best suited for skype and other video calling services.

WARNING: This rooting procedure will void the warranty of your Smartphone. Also, if anything happens to you device while following this procedure, don�t held us responsible. 

 Prerequisites : 

1. Your canvas nitro a310 must be rooted (For Rooting .........)
2. Backup data for emergency or accidental cause.

  Tutorial To install TWRP Recovery on Micromax Canvas Nitro A310 Android Phone:    

1. First download TWRP Recovery Image  for your smartphone on the phone sd card. Note : Put downloaded file in your root directory .
2. Now, download and install MobileUncle Tool from here or from google playstore on your phone . 
3. Then, open MobileUncle Tool apk on your phone and then click on the Recovery Update option  .
4 . Now Click on Recovery Image and Click OK on The Promt Dialog Box.
5.Wait Few Seconds, after that it will ask for Reboot, Reboot Your Device and Check your Installed TWRP Recovery.

That�s it, You have Installed TWRP Recovery in your Phone, If you face any issues during the process, then comment here.


visit link download
Read more »

Saturday, December 23, 2017

HOW TO Root Cherry Mobile Thunder And Install TWRP Recovery

HOW TO Root Cherry Mobile Thunder And Install TWRP Recovery


-How to root Cherry Mobile Thunder-
-From: Cherry Mobile Thunder Official Admins

Tools:
    Computer
    CM Thunder (phone)
    USB cable

Drivers:
    PDAnet
Link: http://pdanet.co/a/
    ADB drivers
Link: x32: http://www.mediafire.com/download/5a8g3f2mt2bh7so/ADB+driver.zip
x64: http://www.mediafire.com/download/3q5xu4je4x524ie/ADBdriverx64.rar
    Bin4ry Tool
Link: http://d-h.st/qML


How To Root Cherry Mobile Thunder
1. Download first the PDAnet for windows, ADB drivers and Bin4ry Tool provided above.

2. Extract and install the ADB Driver.exe.

3. Connect your device, be sure that the USB debugging is ON/checked (Setting >> Application >> Development).

4.Go to My Computer >> Properties >> Hardware >> Device Manager and right click the circle just like screenshot showing below and click update driver.

5. After the installation of drivers open ADB drivers and you will see a red circle, run it and wait the installation.

6. After the installation, open PDAnet (install) and click �other� and install, just wait for the process and reboot.

7. Open Bin4ry Tool and run.
8. Type �1� for normal mode then enter.
9. Check your device and once asked for a restore just proceed to �Restore My Data� and your device will automatically reboot.
10. The last thing to is check the SuperSU icon to your device.
11. If you see a SuperSU icon it means your device already rooted and if you didn�t see any SuperSU icon to your device you need to start again.


---------------------------------------------------------------------------------------------------------------------------


How To Install Recovery?

1. Download This https://play.google.com/store/apps/details?id=com.mobileuncle.toolbox
2. And This http://www.4shared.com/file/nXug2_Q4ba/thunder_twrp2420_recovery.html
3. Rename the  thunder_twrp2420_recovery.img to recovery.img
4. Move recovery.img to /sdcard
5. Open Mobileuncle
6. Touch Recovery Update
7. Choose recovery.img
8. It will ask you to go to TWRP then Yes/OK it will go you there if You See the logo of TEAMWIN
9. Welcome TO TWRP Recovery
10. Reeboot/System

Finish!!
Credit To: Jonash Raboy Marcelino for This Blogger and Dean for all Links of Roms xD :P

visit link download
Read more »

Tuesday, December 19, 2017

How to Update Stock EMUI 4 1 B895 B896 Huawei P8Lite Via TWRP Recovery

How to Update Stock EMUI 4 1 B895 B896 Huawei P8Lite Via TWRP Recovery


How to Update Stock EMUI 4.1 B895/B896 Huawei P8Lite Via TWRP Recovery.

Update EMUI 4.1 Huawei P8Lite. The following guide will show you how to update stock EMUI 4.1 on Huawei P8Lite. We use TWRP recovery to install or flash this zip file. Make sure the TWRP recovery already installed on your device. If TWRP is not installed yet, you can try to read the following guide to install it on your phone (how to install TWRP recovery on Huawei P8ite). EMUI update is one of the requirements to upgrade Huawei P8Lite to GZOSP Android Oreo 8.0.

Ok, lets the tutorial begin.

Prerequisite.

  • Stock EMUI 4.1
    • B895_update.zip - md5 : 0868fab65e2a38bff95408c02ffa0aba
    • B896_update.zip -  md5 : 2b3d6b4b0945592ce506d44874f00d73
  • Enable USB debugging on your phone.
  • D0wnl0ad ADB and fastboot from Here 
  • Enable OEM unlock
  • TWRP recovery already installed on Huawei P8Lite. See this guide how to do it?

Installation Guide.

1. Reboot into Fastboot Recovery.

  1. Connect your Huawei P8Lite to the computer via USB cable.
  2. Copy Stock EMUI 4.1 to the internal phone storage.
  3. Boot your device into fastboot recovery.
    • Open a command prompt from ADB and fastboot folder. 
    • Press and hold shift + right click
    • Select open command here
    • Type the following command.
      • adb device
    • If your device successfully connected, you will see a device ID number at the command prompt.
    • Then type the following command to reboot into fastboot recovery.
      • adb reboot recovery
    • Now your device will reboot into TWRP recovery
  4. Done

2. Flash EMUI 4.1

  1. Once your device successfully reboots into TWRP recovery, you will see the following image comes up on your screen.
    how to enter recovery mode huawei P8Lite
    enter recovery P8Lite
  2. Tap Wipe
  3. Tap Factory Reset - Swap to Wipe - Tap Back to the main menu
  4. Tap Install.
  5. Then browse to find EMUI 4.1 Zip (B895_update.zip or B896_update.zip)
  6. Once this file found, now swap to confirm flash.


visit link download
Read more »

Monday, December 18, 2017

How to Make TWRP Backup to PC TWRP Backup Tool

How to Make TWRP Backup to PC TWRP Backup Tool


Hello Guys, In this tutorial I will talk about How to make Backup your Device Using TWRP Backup Tool. Yes, Now you can directly make a TWRP backup to PC Computer using ADB Tool. Yes the developers release their new version with this amazing feature, but this method is not so easy for lots of uses but If you know how to use ADB Commands, then you can use it very easily without any issue. So without wasting time, Lets start.


Pre-Requested
  • TWRP Backup Tool
  • ADB USB Drivers installed on your PC
  • Your device must have TWRP 3.1.0 recovery installed
  • Battery at least 60% charged


How to Copy TWRP Backups to Your PC

  1. Download TWRP Backup & Restore tool from the end of the post link given and Extract it on your PC.
  2. Enable Developer Mode
  3. Once the above installation process is done. Now Enable USB debugging mode on your Android device. From Settings > about > Build number. Hit 7 times on build number to enable developer mode. Once it shows developers mode enabled. Now Go back to settings > Developers Options > Check USB Debugging mode.
  4. Now Connect Your device with USB Data cable
  5. Now, open extracted folder and double click on TWRP Backup Tool.exe file to launch it.
  6. Once TWRP Backup Tool Run on your PC, Now From the List just Select the �Option 7� and hit Enter. Your device will boot into recovery mode
    TWRP Backup Tool
  7. Now TWRP Backup Tool Gives you server different backup options. However, I recommend you to choose �Option 1� to keep the Full_Nandroid backup.
  8. Now it will ask compress the backup file. Type  �y� to enable compression OR type  �n� if you don�t want to compress the backup file and Hit Enter.
  9. After completing the above steps press Enter to start creating Backup. At this point, you can see the action on your phone�s screen.
  10. Once the whole process completed. A backup of your device will be created in the same folder in which you extracted the TWRP tool.

NOTE: If you face any ADB system error or waiting for the device, then the Reinstall ADB driver properly on your PC.

Download here
TWRP BACKUP TOOL- http://bit.ly/2mvKWJy

How to Restore the backup
  1. Connect your device with PC using data cable
  2. Run TWRP Backup Tool and select �Option 6� to restore the full backup of your device.
  3. Now, Type the file name which you have backup earlier
  4. Finally Hit �Enter� to restore the backup and wait for the process to Complete.

Now you can make TWRP Backup to PC Computer using TWRP Backup Tool. So Now you dont need to worry about storage available on your device or not. Share this blog as much as you can. You can also check out WWE Smackdown vs Raw 2K14 iso Game for PPSSPP Android.


visit link download
Read more »

Wednesday, December 13, 2017

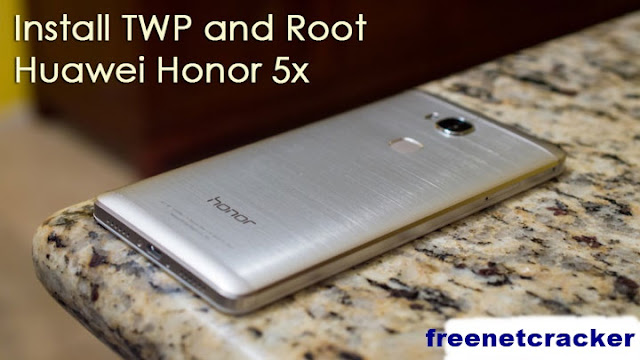
How to Install TWRP and Root Huawei Honor 5X KIW L24

How to Install TWRP and Root Huawei Honor 5X KIW L24


Honor 5x is the latest offering by Huawei in the budget segment. With the great success of Huawei Nexus 6P and Mate8, Huawei is looking to expand its smartphone business all over the world. This time, they have launched Honor 5x simultaneously in many countries including USA, India, and European countries to expand its business globally.

Honor 5x comes with a budget price tag but has a premium design with all metal body. The honor 5X has an octa-core Snapdragon 616 CPU with 2GB of RAM and 16GB of storage with microSD expansion up to 128GB. The 3,000mAh battery with SmartPower, a power saving feature can help extend battery life up to a day and a half with moderate usage. The 13MP camera has an f2.0 aperture while the 5MP front-facing camera has an f2.4 lens. On the back, the honor 5X has a fingerprint sensor that the company claims improves over time with usage.
Honor 5x has all the power and specs to impress a budget user. But one may/may not like the EMUI, the customized Android skin made by Huawei. You may root your Honor 5x to customize its software to your liking. Follow the steps given below to install TWRP and root your device.

Things You Will Need

  • Huawei Honor 5x KIW-L24 and a PC
  • TWRP: twrp_kiwi.img
  • BETA-SuperSU-v2.67-20160121175247.zip

Steps to Root Huawei Honor 5X

  1. Make a Huawei ID at this link.
  2. Log in and fill out the details needed: https://goo.gl/VEKvXY
  3. To get the product identification code, in the phone�s dial-up interface, enter * # * # 1357946 # * # *.
  4. Now that you have your unlock code go to about phone in settings and click the build number until it tells you that you are a developer. Then go back once and select developer options and look for USB debugging and turn it on.
  5. Enable Developer settings by going to Settings > About phone and keep tapping build number until it says you are a developer. Once that is done go back to the main settings and go to developer settings and enable OEM Unlock.
  6. You would need ADB and Fastboot installed on your computer, but if do not have them installed follow this guide to install Minimal ADB and Fastboot in seconds, �How to Install Adb and Fastboot Within Seconds�.
  7. Plug your device into the computer and authorize your device key so ADB will work, then type the following commands in the Minimal ADB and Fastboot window:
    adb reboot bootloader
  8.  Once it boots into the bootloader do the following command:
    fastboot oem unlock 2062712452147427 (change the unlock code to yours)
  9. Where numbers are put what you got from the website(unlock code). Keep in mind the above step will wipe your data so if you have any personal data back it up first.
  10. Boot up the phone and set it up.
  11. Download the TWRP recovery image for the link given above and copy it to the folder  Minimal Fastboot and ADB.
  12. Boot back into the bootloader by typing the following command:
    adb reboot bootloader
  13. Flash the recovery with the following command: Code:
    fastboot flash recovery twrp_kiwi.img
  14. Once it finishes, type the following command:
    fastboot reboot
  15. Download SuperSU zip from the link given above and copy it your device.
  16. Boot into recovery by typing the following:
    adb reboot recovery
  17. This will boot TWRP on your device, select Install and browse for the copied SuperSU zip file and then swipe to confirm/Install it.
  18. Reboot your device.
  19. Enjoy!


visit link download
Read more »

Saturday, December 9, 2017

How to Root and Install TWRP Recovery on Mi Mix

How to Root and Install TWRP Recovery on Mi Mix


Now you can easily Root and Install TWRP Recovery on Mi Mix. Latest beautiful flagship device from Xiaomi  is already available in the market and if you bought the phone and looking for a way to root Mi Mix then you are in right place.


First you need to install TWRP Recovery on Mi Mix and then flash SuperSu to Root Mi Mix. Recently, TWRP recovery got updated with material designed to TWRP 3.0.0. That means you can install the latest TWRP 3.0.2.0 on Mi Mix.

If you are a Mi Mix user, then you can Root Mi Mix and Install TWRP Recovery On it. And the good news is you get the official version of TWRP for Mi Mix. So here is the step by step guide to Root and Install TWRP Recovery on Mi Mix. Read the below note carefully before you Root and Install TWRP Recovery on Mi Mix.

Note:-
  • Rooting may void your phone warranty, and you won�t claim it back.
  • Follow the steps correctly otherwise you may brick your device. We are not responsible for any damage to your phone.
  • You need to unlock bootloader of Mi Mix before proceeding. 
  • Ensure that your phone has at least 50-60% charged to prevent the accidental shutdown in-between the process.

Files required to Root and Install Custom Recovery on Mi Mix �

  • Download ADB and fastboot driver for windows and install it on your PC. This will also install your device driver.
  • You need to Unlock your Phone�s Bootloader. Check out How to unlock bootloader of Mi Mix.
  • Download TWRP Recovery for Mi Mix.
  • Latest dm-verity and forced encryption disabler zip
  • Download SuperSu to root Mi Mix and copy it to your phone sd card.

How to Root and Install TWRP Recovery on Mi Mix �

Step 1: First, enable �USB debugging� and �USB Unlocking� option from setting>developer option>. To enable Developer Options, go to About phone and tap the Build Number 7 times.

Step 2:Download TWRP 3.0.0 for Mi Mix from above and place it in the folder where ADB installed and rename it to �recovery.img�.


Step 3:Now go to installation directory open ADB folder and open the command window thereby pressing and hold the �shift� key and right-clicked anywhere in that folder.

Step 4: Now connect your phone to PC and reboot the device into fastboot mode by typing below command or pressing  �Power + Volume Down� button at the same time.
adb reboot bootloader

Step 5:You are in Fastboot mode now to check your connection by entering below command in command prompt. It will return your device serial number means your device properly connected. Check your driver if the above command is not responding.
fastboot devices
Step 6:Now type below command to boot into recovery.

fastboot boot recovery.img

Step 7:With above command your phone boot into the recovery mode.

Step 8:Now select your preferred Language and set it to what you want, tap �Never show this screen on boot again�, and Swipe allow modification.

Step 9:Now without leaving TWRP, transfer the no-verity-opt-encrypt zip to your device over MTP and flash it.

Step 10: Now Go to �Wipe� section and tap �Format Data�, and type �yes� (If you want to mount internal storage).

Step 11: Now from the main menu navigate to Install Zip and select �SuperSu.zip� to root Mi Mix.

Step 12: Swipe to install SuperSu and reboot your device. That�s it, you root Mi Mix and install custom recovery on Mi Mix successfully. The first reboot takes some time to start the system.

That�s all; this is the complete guide of how to Root and Install TWRP Recovery on Mi Mix. If you have any questions, then comment below.


visit link download
Read more »

Friday, December 8, 2017

How To install TWRP 3 0 1 0 Recovery for Micromax Unite 3 Material Designed And Invert Touch Fixed

How To install TWRP 3 0 1 0 Recovery for Micromax Unite 3 Material Designed And Invert Touch Fixed


Download Requirements Files:-
1.) Sp Flash Download Here.
2.) TWRP Recovery Download Here.
 Follow Flashing Steps By Steps:-

1.) Download TWRP Recovery Files And Extract Files in Your Pc. 
2.) Open The Flash Tools (Same Version Which Used To Flash Rom)Click on Scatter Loading Button.Select The TWRP Folder And Select Scatter File.
3.) Click The Download Button in Your Sp Flash Tool. 
4.) Remove The Battery in Your Phone And Connect The Pc Vai USB Data Cable.
5.) Flashing Will Take 1-2 Minutes To Complete, Youll Se Download Ok Successfully Flashing Message in You Display. 

if You Flashing Doesnt Start in 1-2 Minutes Then Try You Flashing With Battery. Also Make Sure That Drivers are installed Properly in You Pc.
  
How to reboot to recovery:-
You can reboot to recovery in several ways. Use which you think is easiest.  The 1st option mentioned below may not work sometimes if vol keys get damaged. 2nd & 3rd options requires rooted phone and won�t work in non-rooted phones. 
2.) Switch off phone � Press and hold vol down + vol up + power button ; Two options will come in screen, press vol up to reboot to recovery .
2: Open termial emulator app -; type su and press enter -; type reboot recovery and press enter.
 3.) Open any app which has reboot to recovery option like mobileuncle tools, flashify, rashr, etc and select reboot recovery option.


visit link download
Read more »

Wednesday, December 6, 2017

How to Root Motorola G2 nd gan XT1063 XT1068 5 0 2 Rooting TWRP v2 4 8 0

How to Root Motorola G2 nd gan XT1063 XT1068 5 0 2 Rooting TWRP v2 4 8 0


Credits : XDA Developers
Credits : @Chainfire for Auto-Root
Credits : @luca020400 for TWRP
Greetings my dear friends,

[TESTED ON WINDOWS 7/8/8.1]
I have made this tutorial for those users who want to root and install custom recovery like CWM/TWRP/PhilZ on their phones running on 5.0.2 Official Stock ROM. I have tried the conventional rooting method.
Download SuperSU Zip + TWRP image + Fastboot drivers > Boot into Fastboot Mode > Type fastboot flash recovery TWRP.img > Boot into TWRP > Select SuperSU zip > Flash zip > Reboot.
Unfortunately this fails in Lollipop 5.0.2. The reason is there is a script file in /system directory recovery-from-boot.p that gets executed everytime amd that flashes stock recovery after every boot. So what happens is, after flashing TWRP and booting into recovery mode, the TWRP doesnt get booted up. Instead stock recovery gets flashed. Chainfire has made a working root method to root the phone.

How does it work?
The zip contains a modified kernel (boot image) that is booted up temporarily and pushes the SU apk and SU binary into /system. After the files are pushed and the permissions are set, the phone reboots. So here the phone is 1st rooted and then TWRP is flashed via Flashify app. This method can also be used to flash other recoveries like CWM/PhilZ.

Warning:
1. For those users who have their bootloader LOCKED, this will unlock the bootloader and void your WARRANTY !
2. After unlocking the bootloader your phone will be erased. Your installed apps and data in internal storage will be wiped !
3. Before proceeding make sure you backup your apps. contacts, SMS and move your data from internal storage to external storage like sdcard or PC.
4. For those users who have their bootloader already unlocked need not worry as this process wont wipe anything from the device.

You need:
1. Chainfire Auto-Root Zips
  • [XT 1063] titan_retuglb : Download
  • [XT 1068] titan_retailde : Download
  • [XT 1068] titan_retaildsds : Download
2. TWRP[All Variants] v2.4.8.0 : Download
3. Motorola PC Drivers

To root your phone follow these steps:
  • Step 1: Go to Settings > About Phone > System Version. Note down your phone model name from the text.
  • Step 2: Else from ES File Explorer go to /system/build.prop and open it. Scroll down and find the line ro.product.name= and note down your phone model name.
  • Step 3: Download the appropriate zip file corresponding to your phone model name.
  • Step 4: Extract the zip on the desktop.
  • Step 5: Switch off the phone & enter into Fastboot mode by pressing & holding down Volume Down Key and Power Key together and releasing it after 3-4 seconds.
  • Step 6: Connect the phone to the PC via USB Cable.
  • Step 7: Go to the extracted zip folder and run the root-windows.bat file.
  • Step 8: Follow the instructions in the command window.
  • Step 7: After this is done, your phone will reboot and you will see BOOTLOADER UNLOCKED in red text. 
  • Step 8: After booting completely, open App Drawer, you will see SuperSU app installed.
  • Step 9: Download Root Checker app from the Google Play Store to confirm.

TWRP Installation Steps:

  • Step 1: Download the TWRP recovery image file.
  • Step 2: Download Flashify app from the Google Play Store
  • Step 3: Open it Click on Accept and then grant SuperSU access. Go to Backup/Restore Tab and backup your current stock recovery.
  • Step 4: Go to Flash Tab, select Recovery Image, choose file and select the directory of downloaded TWRP image and select File Way and finally select Yup!
  • Step 5: After flashing is complete, click on Reboot Now to boot into TWRP
Congratulations ! You have successfully rooted and flashed TWRP recovery on your phone. 
SUCCESS :-) N


visit link download
Read more »

Monday, December 4, 2017

How to Install TWRP Recovery On Moto E3

How to Install TWRP Recovery On Moto E3


Now you can download and install TWRP Recovery On your Moto E3.By using TWRP Recovery you can Root your device.TWRP Recovery is a Custom Recovery which is also known as TeamWin Recovery built with a touchscreen-enabled interface which allows users to install third-party firmware likes custom ROMs and backup the current system,c an install exposed module etc.


Before doing the methods, I just want to warn you that, By doing this you will loose the warranty and sometime if you don�t read the steps and do something wrong can brick your device. So be careful

How to Install TWRP Recover on Moto E3

  • Enable USB debugging.
  • In your PC/Laptop, Open the extracted ADB Folder and Open Command Window by pressing Shift Key + Right Mouse Click
  • Download TWRP Recovery and Rename the TWRP file to Recovery.img not �recovery.img.img� and Copy it to extracted ADB and Fastboot Tools Folder
  • Now connect the PC to Mobile with USB Cable.
  • You need to Reboot the phone into Bootloader � Type the Command from below in your Command window that you opened
  • adb reboot bootloader
  • Your device will boot into bootloader, If it don�t check if your cable or drivers working properly. Now type the below command on your command window
  • fastboot devices
  • To flash the recovery, Type the command
fastboot flash recovery recovery.img
  • To flash Boot Code
  • fastboot boot recovery.img

Now reboot your device. TWRP has successfull installed. Enjoy To reboot into Recovery mode, TURN YOUR PHONE OFF, PRESS VOLUME UP + POWER BUTTON TOGETHER TO ENTER RECOVERY


visit link download
Read more »