Showing posts with label 9. Show all posts
Showing posts with label 9. Show all posts
Thursday, January 4, 2018
How to setup Network Attached Storage NAS FreeNAS 9 10
How to setup Network Attached Storage NAS FreeNAS 9 10
Hardware Recommendations
Since FreeNAS� 9.10 is based on FreeBSD 10.3, it supports the same hardware found in the FreeBSD Hardware Compatibility List. Supported processors are listed in section 2.1 amd64. FreeNAS� is only available for 64-bit (also known as amd64) processors.
FreeNAS� boots from a GPT partition. This means that the system BIOS must be able to boot using either the legacy BIOS firmware interface or EFI.
Actual hardware requirements vary depending on the usage of the FreeNAS� system.
RAM
The best way to get the most out of a FreeNAS system is to install as much RAM as possible. The minimum recommendation is 8 GB of RAM. The more RAM, the better the performance.
- To use ZFS deduplication, at least 5 GB of RAM per TB of storage to be deduplicated.
- To use Active Directory with many users, add an additional 2 GB of RAM for winbind�s internal cache.
FreeNAS installation
The FreeNAS operating system is installed to at least one device that is separate from the storage disks. The device can be a USB stick, compact flash, or SSD. Technically, it can also be installed onto a hard drive, but this is discouraged as that drive will then become unavailable for data storage.
Use 16GB USB flash Drive to install NAS OS on it
=> DOWNLOAD NAS 9.10.1
=> DOWNLOAD RUFUS
Download rufus to burn on usb disk then install on 16gb FlashDrive
Lets Start
Setup your computer to the same network of your other
computer By router or Switch
Download NAS operating system it will be .iso file
then plug in your pen drive. And open Win 32 Disk Imager
in right corner click on blue folder icon and select the iso.
after that click on "write" then the writing process begin on
pendrive.
After finishing writing process. Plug out the Pendrive
And plug in to your Old computer. And turn on
And press Key for access in boot menu
usually key for different types of pc is mention - Esc - F9 - F10 - F11 - F12.
After Accessing select the pendrive and press enter
then system boots the pendrive and shows the Nas version and detail then again press enter.
The loading Process Begin .After loading a screen appear Select " Install / Upgrade "
Then its show the available drives . Then select one drives by pressing space bar where you want to install Nas os. And then select "ok". Then it will ask you to give root password.
Now the installation process begin. Please wait Until its finish.
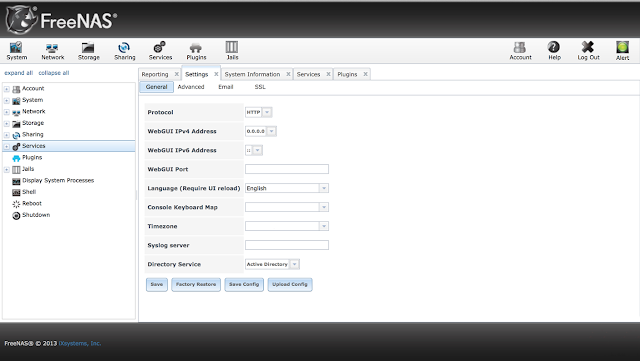
After finishing up then it will show the IP address.
Then Open browser of Another computer Type the IP address.
hit enter . log in with User name - root
Password - which you enter in root
And manage the NAS storage. Now you have Home Network Attached Storage.
Setup your computer to the same network of your other
computer By router or Switch
Download NAS operating system it will be .iso file
then plug in your pen drive. And open Win 32 Disk Imager
in right corner click on blue folder icon and select the iso.
after that click on "write" then the writing process begin on
pendrive.
After finishing writing process. Plug out the Pendrive
And plug in to your Old computer. And turn on
And press Key for access in boot menu
usually key for different types of pc is mention - Esc - F9 - F10 - F11 - F12.
After Accessing select the pendrive and press enter
then system boots the pendrive and shows the Nas version and detail then again press enter.
The loading Process Begin .After loading a screen appear Select " Install / Upgrade "
Then its show the available drives . Then select one drives by pressing space bar where you want to install Nas os. And then select "ok". Then it will ask you to give root password.
Now the installation process begin. Please wait Until its finish.
After finishing up then it will show the IP address.
Then Open browser of Another computer Type the IP address.
hit enter . log in with User name - root
Password - which you enter in root
And manage the NAS storage. Now you have Home Network Attached Storage.

Wednesday, January 3, 2018
HunterSoft Business Translator 9 27 Build 8007 Serial
HunterSoft Business Translator 9 27 Build 8007 Serial

Products Features :
- Translate whatever you can imagine, document, web contents, letters, chats, and emails and more.
- Translation among 53 language: English, French, German, Italian, Spanish, Portuguese, Dutch, Greek, Russian, Japanese, Korean, Simplified Chinese, and Traditional Chinese, Hungarian, Danish, Dutch, Finnish, Swedish, Arabic, Catalan, Croatian, Czech, Hebrew, Norwegian, Afrikaans, Albanian, Belarusian, Bulgarian, Estonian, Filipino, Galician, Haitian, Hindi, Icelandic, Indonesian, Irish, Latvian, Lithuanian, Macedonian, Malay, Maltese, Persian, Polish, Romanian, Serbian, Slovak, Slovenian, Swahili, Thai, Turkish, Ukrainian, Vietnamese, Welsh, and Yiddish
- Build-in, full-featured Word processor.
- Support Microsoft Word, Notepad, WordPAD, Adobe Acrobat, Outlook Express, Outlook, Internet Explorer, Netscape Navigator, Frontpage and more.
- 100% Unicode compatible.
- Unicode Viewer enables users to automatically download Chinese, Japanese, Korean, Russian fonts from Microsoft website, when neccessary.
- Open a wide variety of documents, .DOC, .RTF and .TXT.
- Save or print the translated text with a print.
- Multilingual user interface: English, French, Spanish, German, Portuguese, Italian, Japanese.
- Windows 10/8.1/8/7/Vista compatibility certificated. Native support for Windows 2000/XP/2003/2008/2012.


iBall Launches Andi 2 Dual SIM Android Phone at Rs 9 999
iBall Launches Andi 2 Dual SIM Android Phone at Rs 9 999
iBall has announced a new Dual SIM Android smartphone in medium budget price tag for all Indian dual SIM lovers. The iBall Andi 2 is runs on Android 2.2 Froyo OS with an 800MHz processor.
Its second Android smartphone by iBall and its a new player in Android phone market. The first one was Andi available at Rs. 5400, and this newly launch is iBall Andi 2 both based on same Android 2.2 OS. Other features in iBall Andi 2 are 3.5-inch capacitive touchscreen display, 3.0 megapixel rear camera, a front facing VGA camera, Wi-Fi, Bluetooth, GPRS and 3G capabilities.
Other specification of iBall Andi 2 are microSD card slot for memory expansion, dual SIM standby mode, 3.5mm earphone jack and a powerful 1450 mAh battery for longer backup time.
This is second phone by iBall company and based on almost same specs with old version of Android OS on a comparably high price tab. I dont think its a right choice for such an amount, as we already have some other good choices available in market like Micromax A78 & A73 Low Price Dual SIM Android Phones, Samsung Galaxy Ace, Y Duos and Y Pro Duos Dual SIM Android Phones, and LG launched LG Optimus Net Dual SIM etc. It will be great if iBall reduced the price and if theres any official update for Android 2.3
Its second Android smartphone by iBall and its a new player in Android phone market. The first one was Andi available at Rs. 5400, and this newly launch is iBall Andi 2 both based on same Android 2.2 OS. Other features in iBall Andi 2 are 3.5-inch capacitive touchscreen display, 3.0 megapixel rear camera, a front facing VGA camera, Wi-Fi, Bluetooth, GPRS and 3G capabilities.
 |
| iBall Launches Andi 2 Dual SIM Android Phone |
This is second phone by iBall company and based on almost same specs with old version of Android OS on a comparably high price tab. I dont think its a right choice for such an amount, as we already have some other good choices available in market like Micromax A78 & A73 Low Price Dual SIM Android Phones, Samsung Galaxy Ace, Y Duos and Y Pro Duos Dual SIM Android Phones, and LG launched LG Optimus Net Dual SIM etc. It will be great if iBall reduced the price and if theres any official update for Android 2.3
Tuesday, January 2, 2018
How to install Pop Owl patch 1 9 apk for android
How to install Pop Owl patch 1 9 apk for android

ID: petjewels.world
Version: 1.9
Size: 9.4 Mb
Pop Owl Screen Preview


How to setup Pop Owl apk for android
- For Android 4.0 or higher:Please to Settings, look down to Security, and select Unknown sources. Choosing this choice will enable to install apps download from the internet.
- For devices running on lower Android 4.0:
Please go to Settings - open the Applications option, and select Unknown sources, click OK on the popup alert.
Pop Owl Description
Pop Owl is a magnificent matching game with fun and great challenge.Pop Owl follows the same gameplay as the classic match-3 puzzle game: What you need to do, is simply tap on two owl jewels you want to interchange in order to match three or more of the same color.
Pop Owl is a classic match-3 puzzle game, and it is addicting as ever! Match three or more Owl jewels in vertical or horizontal row to get points. Now lets enjoy this funny game!
Feature:
Simple control, Simple concept
A physics-based puzzle game!
120 unique levels to unlock from!
If you like jewels matching games or any kind games of this category, you will love this one also! Thanks for play!
Whats new in Pop Owl 1.9
bugfixDownload Pop Owl patch 1.9 APK
Search terms:
How to install Pop Owl lastet apk for laptop
How to use Pop Owl unlimited apk
How to mod Pop Owl 1.9 apk
How to get Pop Owl unlimited apk
Monday, January 1, 2018
How to Root Android Huawei Mate 9 in EMUI 5 0
How to Root Android Huawei Mate 9 in EMUI 5 0
How to Root Android Huawei Mate 9 in EMUI 5.0.
Root Huawei Mate 9. The following guide will show you how to root Huawei Mate 9. This is very simple guide you can follow. Even if you are a beginner in Android experience. You will find many benefit in rooting for your Huawei Mate 9 Android device. For example, you can install or flash any custom ROM or just want to delete unwanted built-in apps by yourself. By default, Android devices coming from the factory do not have root access. So, if you need more feature you must root this device. Although it looks easy but can make your device to break even lose the warranty period.
If you already understand the advantages and risks posed by root Huawei Mate 9, now you can start to read all step by step instruction below.
Prerequisite.
- Make sure your device is Huawei Mate 9 in order to continue following this guide.
- Donwl0ad superuser-r275.zip. Here
- D0wnload Superuser_2.0_Beta_9.apk Here
- TWRP 3.03-1 must be installed on your phone. See here how to flash TWRP 3 Huawei Mate 9.
Installation Guide.
- Copy superuser-r275.zip & Superuser_2.0_Beta_9.apk to the root directory of phone Internal memory.
- Power off phone.
- Once your phone completely powers off, you need to boot your phone into TWRP recovery.
- Now, tap Install and browse the superuser-r275.zip file that you transferred to your phone in Step 1 above.

install supersu mate 9 - Once the superuser-r275.zip found, Then you need to Swipe to Confirm Flash on the bottom of the screen to begin the flashing process.
- Just wait for the flashing process, then select Reboot System to reboot your phone.
- Once your phone boot up and ready to use, you need to install Superuser_2.0_Beta_9.apk from the file manager.
- Superuser_2.0_Beta_9.apk used to verify the root status of your phone.

welcome to superuser - Done.
Friday, December 29, 2017
How to Install TWRP 3 1 1 Recovery on Huawei Honor 9 EMUI 5 1
How to Install TWRP 3 1 1 Recovery on Huawei Honor 9 EMUI 5 1
How to Install TWRP 3.1.1 Recovery on Huawei Honor 9 EMUI 5.1
TWRP 3.1.1 Huawei Honor 9. In this guide, guidebelajar will show you how to flash TWRP recovery on Huawei Honor 9 EU and Chinese version. By installing TWRP recovery on your Huawei Honor 9 allow you to install third-party firmware or custom ROM and back up the current system, and then revert to at any time. Also, you can install the third party app, kernel, and add-on (e.g. SuperSU, Google Apps, Themes), and other mods. Once TWRP recovery successfully installed on your Huawei Honor 9, you can make backing up, restoring, Wiping, and mounting various device partitions. For example boot, system, cache, user data and internal storage the Huawei Honor 9. This guide is sourced from the following video.
Ok, now lets the tutorial begins. Do at your own risk.. :)
Ok, now lets the tutorial begins. Do at your own risk.. :)
Prerequisite.
- First, you need to download these files (TWRP Recovery for Honor 9).
- Here
- Downl0ad Huawei Honor 9 driver.
- Here
- ADB Fastboot tool
- Here
- Make sure you have Unlock Bootloader on your device. See this guide to unlock bootloader Huawei Honor 9.
- Enable USB debugging on Huawei Honor 9. How to do it? or see this guide
- Go to Settings - Scroll down - About Phone - tap 7 times at Build number.
- Now you get Developer Option.
- Then Enable USB debugging
Guide to Install The TWRP.
- First, you need to install the Hsuite as a Huawei Honor 9 USB driver.
- Extract ADB fastboot tool using any zip program. e.g 7zip.
- Now, move the TWRP.3.1.1-0.img to the extracted ADB folder.
- Now open ADB folder.
- Then just click adb.exe to run it.
- Rename TWRP.3.1.1-0.img to twrp (there is no other extension)
- Now, connect your Huawei Honor 9 to the computer via USB cable.
- Then, from the ADB fastboot folder right click and hold the shift button, and click open command window here.

open command in adb fastboot - Once command prompt windows come up, now you need to check your Huawei Honor 9 successfully connected or not using the following command and press enter.
- adb device.
- If your device is successfully connected to the computer, then the result will return like this.
- list of devices attached ...

- Once your Huawei Honor 9 successfully connected to the computer. Now, reboot your device into bootloader using this command and press enter
- adb reboot bootloader
- Just wait a minute, your device will reboot into fastboot and rescue mode.

reboot into bootloader - Once your device in the fastboot and rescue mode, its time to flash TWRP recovery to your device. Therefore you need to type this command at prompt and then press enter button
- fastboot flash recovery twrp.img
- Just wait for 2 or 3 seconds for the complete flashing process.
- Make sure the twrp.img at the command prompt is the same name as the twrp name in the adb fastboot folder. (refers to step no. 6 above).
- At the end of the flashing process, you need to send a command to your device by typing this at the command prompt.
- fastboot reboot.
- And now, your Huawei Honor 9 will automatically reboot.
- Finish.
Check the TWRP is work or not?
First method (using adb fastboot command)
- Make sure your device is still connected to the computer while check the TWRP is working or not.
- From the command prompt type the following command and press enter
- adb reboot recovery
- Then, back to your phone and now it will enter the recovery mode as shown in the image below.

enter TWRP recovery mode - finish.
Second method (using physical button)
- This is the alternative method you can use to enter TWRP recovery mode without connected your phone to the computer.
- At the second method is using physical button located on the outside phone body.
- Make sure your phone is completely powered off.
- Then, power on again by press and hold the following button for a 10 to 15 seconds
- The Power Button + Volume Up
- Now, release all button when your phone successfully enters recovery mode.
- Finish
|
|
|---|


IDM v6 26 Build 9 Full Key Download
IDM v6 26 Build 9 Full Key Download

Today i want to share a great pc software that name is IDM v6.26 Build 9 Full Key Download
IDM v6.26 Build 9 Full Key Download info :
Dl4all24.com
IDM v6.26 Build 9 Full Key Download

IDM v6.26 Build 9 Full Key Download : Dl4all24-Hello My dear Friends Today i want to give you a nice Pc Software that is IDM v6.26 Build 9 Full Key Download pc software is excellent pc Software. Most of the pc user use this IDM v6.26 Build 9 Full Key Download Software. You can also Use this IDM v6.26 Build 9 Full Key Download pc Software and enjoy.
Key features of Internet Download Manager software:
-Compatibility with all types of browsers Internet Explorer, Netscape, Opera, MSN Explorer, AOL, Mozilla Firefox, Mozilla Firebird, Avant Browser, MyIE2, Mozill and other popular browsers to automatically run the program in order to download files
-The ability to read the download half of where your Internet connection has been disconnected for some reason
-Download FLV video files from YouTube site, Google Video, MySpaceTV and
-Support for a variety of Microsoft ISA Proxy servers such as FTP proxy, servers
-Quick and easy installation software
-Speed Limiter features to limit the download speed of a specified file
-The ability to categorize files according to personal taste
-Improved user interface, new writing program
-Virus detection types and sorts of the downloaded file
-The ability to drag and drop-Drag & Drop links
-Support for ZIP files and run them after downloading
-Supports HTTP protocol, FTP, HTTPS and MMS
-Avoid downloading duplicate files that have been previously downloaded
-Increase download speed based on the equality of the five newest techniques
-Supports most languages of the world including live sweet language English
-Full compatibility with all Web browsers
-Compatible with different versions of the popular Microsoft Windows operating system
Additional Information:link download
Thursday, December 28, 2017
How to Update iPhone iOS 9 1 Firmware
How to Update iPhone iOS 9 1 Firmware
How to Update iPhone iOS 9.1 Firmware

To update your iPhone you will need to download the latest firmware file (IPSW). iOS 9.1 makes your iPhone more intelligent and proactive with powerful search and improved Siri features
To update your iPhone you will need to download the Latest and updated Firmware file IPSW. iOS 9.1 Make your iPhone more intelligent, fast and positive with powerful search and improved Siri feature.
Click the link for download iPhone iOS 9.1 firmware for free. This downloading link is official downloading link.
Just click below link for free downloading.
iPhone 6s plus (iPhone 8,2)
iPhone 6s (iPhone 8,1)
iPhone 6 (iPhone 7,2)
iPhone 6 plus (iPhone 7,1)
iPhone 5s Global (iPhone 6,2)
iPhone 5s GSM (iPhone 6,1)
iPhone 5c Global (iPhone 5,4)
Saturday, December 23, 2017
How to Update and Root Nexus 9 LTE on Android 7 0 Nougat
How to Update and Root Nexus 9 LTE on Android 7 0 Nougat
Google officially released Android 7.0 Nougat on August 22. While available for several other Nexus devices, the company had promised that Nexus 6 and Nexus 9 LTE will receive the latest OS in the coming weeks. Following the release of Android 7.0 for Nexus 6 earlier this week, now we are also seeing the update being sent out to Nexus 9 LTE. You can now update your HTC Nexus 9 LTE to Android 7.0 Nougat over-the-air.

In any case, it�s the latest update available for your Nexus 9 LTE and Google would probably send October�s security patch with another OTA update. Follow this guide to update Nexus 9 LTE to Android 7.0 Nougat.
Prerequisites
In any case, it�s the latest update available for your Nexus 9 LTE and Google would probably send October�s security patch with another OTA update. Follow this guide to update Nexus 9 LTE to Android 7.0 Nougat.
Prerequisites
- Create a backup of all important data on your Nexus 9 device. Creating a Nandroid backup of your device is highly recommended.
- Download and install USB drivers for Nexus 9 in your computer.
- Enable USB debugging option by pressing Menu > Settings > Applications. Navigate and tap on Developer Options to ensure that USB Debugging is enabled.
- Make sure that Android SDK is installed on your system and you have experience working downloading and installing files with it.
- Ensure that your Nexus 9 carries more than 70% of charge.
How to update Nexus 9 LTE to Android 7.0 Nougat NRD90R
Required files: download Android 7.0 for Nexus 9 (LTE). Once downloaded, follow these steps to flash NRD90R Android 7.0 Nougat on Nexus 9 LTE.
- Connect your Nexus 9 using a USB cable and turn it off.
- Now, start the device in Fastboot mode (assuming that you have Fastboot and ADB already set up and ready to use): turn off your device. Then, press and hold Volume Up, Power and Home buttons until you see the Fastboot mode. You will see a START option at the top of the screen.
- Go to the downloaded folder volantis-NRD90R and copy / paste all the files to your Fastboot directory. Your Fastboot directory should be the platform-tools folder in the Android SDK directory.
- Unlock the bootloader:
- fastboot oem unlock � confirm.
- From the factory images files in your Fastboot directory (platform-tools folder), also run the following command depending on your operating system:
- Windows: Run flash-all.bat
- Mac: Run flash-all.sh using Terminal
- Linux: Run flash-all.sh
- Once the script finishes running, your Nexus 9 will reboot.
Your Nexus 9 is now running the latest Android 7.0 Nougat.
Tuesday, December 19, 2017
How to Update Nexus 5X Nexus 6P Nexus 6 and Nexus 9 to Android N Developer Preview 3 Factory Image
How to Update Nexus 5X Nexus 6P Nexus 6 and Nexus 9 to Android N Developer Preview 3 Factory Image
Android N Developer Preview Beta is now available for the Nexus 5X, Nexus 6P, Nexus 6, and Nexus 9 phones and tablets. The latest Android N Developer Preview Beta NPD35K is the next upcoming major firmware release by Google. It brings some new features like multi-window mode, an enhanced doze mode, a revamped Settings screen and a quick toggle in the notifications panel. Other changes include improved notifications, improved multitasking and app switching, dark mode etc.

Don�t worry we are going to share step by step guide to safely Update your Nexus 5X, Nexus 6P, Nexus 6, and Nexus 9 to Android N NPD35K Developer Preview 3 Factory Image.
Don�t worry we are going to share step by step guide to safely Update your Nexus 5X, Nexus 6P, Nexus 6, and Nexus 9 to Android N NPD35K Developer Preview 3 Factory Image.
Prerequisites:
- This tutorial is only for Huawei Nexus 6P and we are not sure if it will work on the other variants of the Nexus 6P on other carriers.
- Your phone can be on any previous Android version or even on a custom ROM. It doesn�t matter at all. This tutorial will still work for installing Android N Developer Preview Beta.
Disclaimer: We provide various Firmware Updates and Rooting process along with Custom ROM, Modes, file are all belong to their owners/developers. The autor of this site or the developers are not responsible, if you damage or brick your device.Do it on your own risk and follow the instruction properly.
How to Update Huawei Nexus Device to Android N NPD35K Developer Preview 3 Factory Image
Step 1 � Download Android N Factory Image on your PC, if you haven�t already.
- Download Android N Factory Image for Nexus 6P
- Download Android N Factory Image for Nexus 5X
- Download Android N Factory Image for Nexus 6
Step 2 � Connect your Nexus Device to your computer using the USB cable.
Step 3 � Please make sure Fastboot is configured and properly installed on your computer.
Step 4 � Turn OFF your phone.
Step 5 � Get into the Fastboot/Bootloader Mode on your phone. Turn ON the phone while pressing and holding the Volume Up + Volume Down + Power buttons till you see the Fastboot menu and START on top.
Step 6 � Now extract the downloaded file anywhere in your computer. Go to the folder angler-NPD35K and then copy/paste all the files to your Fastboot directory.
Note: If you followed our tutorial on setting up Fastboot on your computer, there is a 99% chance your Fastboot directory will be the platform-tools folder in your Android SDK directory.
Step 7 � From the factory image files in your Fastboot directory, do the following depending which OS you are on:
- On Windows: Run the file �flash-all.bat�.
- On Mac: Run the file �flash-all.sh� using Terminal.
- On Linux: Run the file �flash-all.sh�.
Step 8 � That�s pretty much that you had to do for flashing the stock factory image on your Nexus. Now wait and watch as the process is completed � or follow the on-screen instructions on your phone if in case you have to unlock the bootloader.
Step 9 � After the installation completes, the phone will boot now and it might take about 5 minutes to boot on your first time. So, please wait with patience!
That�s it! Your Nexus device should now have the official Android N NPD35K Developer Preview Beta software update installed on your phone using the stock factory image from Google! Go to Settings >About phone to verify.
How To Install Miui 9 On Redmi 3S Prime 3X stock rom go to rompure com
How To Install Miui 9 On Redmi 3S Prime 3X stock rom go to rompure com
How To Install Miui 9 On Redmi 3S/Prime/3X
Hello Guys In this video i am going to show you How To Install Miui 9 On Redmi 3S/Prime/3X. So guys finally we got Miui 9 Globle Devloper Rom for our Redmi 3S /Prime /3X users. So guys watch this full video till the end then you properly understand all installation proces of Miui 9 On Redmi 3S users.
ALLSO READ : How To Install Android O (Oreo) 8.0.0 In Redmi 3S/Prime/3X
Miui 9 Changelog :
Highlights
New - Mi Picks gets a new name and a new icon! Meet Apps!
System
Fix - Only Mi TV/Mi Box can be added/shown on Mi Remote app after the update.
Lockscreen, Status Bar, Notification Bar
Fix - Wallpaper Carousel couldnt load online resources (a Play Store update was required)
Themes
Optimization - Redesigned home page
Other
New - Mi Picks gets a new name and a new icon! Meet Apps!
ALLSO READ : Official Resurrection Remix N For Redmi 3S/3X/Prime Nougat 7.1.2 ROM
REQUIREMENTS For installing Miui 9 On Redmi 3S/Prime /3X :
1. Unlocked Bootloader.
2. TWRP Recovery Installed On your Redmi 3S /Prime /3X.
3. Download Miui 9 Full Rom file.
4. Download Lazy Flasher Zip file.
ALLSO READ : LineageOS 14.1 for Redmi 3s/Prime/3X Nougat 7.1 ROM
Step By Step Tutorial To Install Miui 9 On Redmi 3S/Prime /3X :
1. Unlocked Bootloader Needed. If you dont know how to unlock bootloader on any Xiaomi deivce the watch this tutorial video or follow the full tutorial post. (which may VOID your warranty and may delete all your data. SO first Take a full backup of your all data).
2. Need Latest custom Recovery installed (Like CWM OR TWRP). If you dont know how to install custom recovery on your Redmi 3S /Prime /3X then watch this video tutorial or follow the post link.
3. First Take a full backup of your current rom using TWRP recovery.
4. Download Miui 9 Rom file & Lazy flasher zip file and save it in your phone Storage.
5. Boot Your phone into Twrp Recovery mode for that Press Volume Up + volume Down + Power At the same time.
6. Go to Wipe section and Wipe data factory reset, Cache partition, Dalvik Cache and Format the System partition.
7. Now Click on install section and select Miui 9 Rom and flash it.
8. After flashing Miui 9 Go back and select Lazy flasher zip file and flash it.
9. Now click on Reboot System. It will take some time to first Boot.
10. Done. Now Miui 9 Installed on your Redmi 3S/Prime /3X.
ABOUT ME :
I Make Tech Videos Based Around SmartPhones especially Android Devices
Easy To Use Tutorials,Cool Android Tips & Tricks,Games & Apps Reviews.I Also show case interesting accessories & Gadgets
So what are you waiting for S-U-B-S-C-R-I-B-E and Join the best Android Tips and Hacks Channel On Youtube
Mahesh Technicals
ALLSO READ : Lineage OS 15 for Redmi 3s / Prime /3X � Android Oreo 8.0 ROM
Download Miui 9 Full Rom file for Redmi 3S/Prime /3X + Lazy Flasher file:
1. Download Miui 9 Full Rom file.
LINK - 1:

LINK-2:
2. Download Lazy Flasher Zip.
LINK - 1:
LINK - 2:
Thank You For Reading How To Install Miui 9 On Redmi 3S/Prime/3X.
(YouTube video)
Hello Guys In this video i am going to show you How To Install Miui 9 On Redmi 3S/Prime/3X. So guys finally we got Miui 9 Globle Devloper Rom for our Redmi 3S /Prime /3X users. So guys watch this full video till the end then you properly understand all installation proces of Miui 9 On Redmi 3S users.
ALLSO READ : How To Install Android O (Oreo) 8.0.0 In Redmi 3S/Prime/3X
Miui 9 Changelog :
Highlights
New - Mi Picks gets a new name and a new icon! Meet Apps!
System
Fix - Only Mi TV/Mi Box can be added/shown on Mi Remote app after the update.
Lockscreen, Status Bar, Notification Bar
Fix - Wallpaper Carousel couldnt load online resources (a Play Store update was required)
Themes
Optimization - Redesigned home page
Other
New - Mi Picks gets a new name and a new icon! Meet Apps!
ALLSO READ : Official Resurrection Remix N For Redmi 3S/3X/Prime Nougat 7.1.2 ROM
REQUIREMENTS For installing Miui 9 On Redmi 3S/Prime /3X :
1. Unlocked Bootloader.
2. TWRP Recovery Installed On your Redmi 3S /Prime /3X.
3. Download Miui 9 Full Rom file.
4. Download Lazy Flasher Zip file.
ALLSO READ : LineageOS 14.1 for Redmi 3s/Prime/3X Nougat 7.1 ROM
Step By Step Tutorial To Install Miui 9 On Redmi 3S/Prime /3X :
1. Unlocked Bootloader Needed. If you dont know how to unlock bootloader on any Xiaomi deivce the watch this tutorial video or follow the full tutorial post. (which may VOID your warranty and may delete all your data. SO first Take a full backup of your all data).
How To Unlock Bootloader Of Redmi Note 3
2. Need Latest custom Recovery installed (Like CWM OR TWRP). If you dont know how to install custom recovery on your Redmi 3S /Prime /3X then watch this video tutorial or follow the post link.
How To Install TWRP Recovery On Redmi 3S/Prime/3X
3. First Take a full backup of your current rom using TWRP recovery.
4. Download Miui 9 Rom file & Lazy flasher zip file and save it in your phone Storage.
5. Boot Your phone into Twrp Recovery mode for that Press Volume Up + volume Down + Power At the same time.
6. Go to Wipe section and Wipe data factory reset, Cache partition, Dalvik Cache and Format the System partition.
7. Now Click on install section and select Miui 9 Rom and flash it.
8. After flashing Miui 9 Go back and select Lazy flasher zip file and flash it.
9. Now click on Reboot System. It will take some time to first Boot.
10. Done. Now Miui 9 Installed on your Redmi 3S/Prime /3X.
ABOUT ME :
I Make Tech Videos Based Around SmartPhones especially Android Devices
Easy To Use Tutorials,Cool Android Tips & Tricks,Games & Apps Reviews.I Also show case interesting accessories & Gadgets
So what are you waiting for S-U-B-S-C-R-I-B-E and Join the best Android Tips and Hacks Channel On Youtube
Mahesh Technicals
ALLSO READ : Lineage OS 15 for Redmi 3s / Prime /3X � Android Oreo 8.0 ROM
Download Miui 9 Full Rom file for Redmi 3S/Prime /3X + Lazy Flasher file:
1. Download Miui 9 Full Rom file.
LINK - 1:
LINK-2:
2. Download Lazy Flasher Zip.
LINK - 1:
LINK - 2:
Thank You For Reading How To Install Miui 9 On Redmi 3S/Prime/3X.
Sunday, December 17, 2017
IDM 6 28 v 9 Full Patch Download May 2017
IDM 6 28 v 9 Full Patch Download May 2017

Today i want to share a great internet download manager that name is IDM 6.28 v 9 Full Patch Download May 2017
Key features of Internet Download Manager software:
1-Compatibility with all types of browsers Internet Explorer, Netscape, Opera, MSN Explorer, AOL, Mozilla Firefox, Mozilla Firebird, Avant Browser, MyIE2, Mozill and other popular browsers to automatically run the program in order to download files
2-The ability to read the download half of where your Internet connection has been disconnected for some reason
3-Download FLV video files from YouTube site, Google Video, MySpaceTV and
4-Support for a variety of Microsoft ISA Proxy servers such as FTP proxy, servers
5-Quick and easy installation software
6-Speed Limiter features to limit the download speed of a specified file
7-The ability to categorize files according to personal taste
8-Improved user interface, new writing program
9-Virus detection types and sorts of the downloaded file
10-The ability to drag and drop-Drag & Drop links
11-Support for ZIP files and run them after downloading
12-Supports HTTP protocol, FTP, HTTPS and MMS
13-Avoid downloading duplicate files that have been previously downloaded
14-Increase download speed based on the equality of the five newest techniques
15-Supports most languages of the world including live sweet language English
16-Full compatibility with all Web browsers
17-Compatible with different versions of the popular Microsoft Windows operating system
- ? ...
Additional Information:link download
Read more »
Subscribe to:
Posts (Atom)