Showing posts with label phone. Show all posts

Thursday, January 4, 2018

How To Root Nearly Any Android Phone

How To Root Nearly Any Android Phone


This is a rooting process for nearly any smartphone. The rooting process will be carried out with the help of an application for Windows called Root Genius.

Root Genius is a software which can be used to root 95% of the android phones. It uses special algorithms and features to try and root any android phone it is asked to root. So there is a very good chance for you to root your  smartphone.

Disclaimer: The process and instructions given in this article are correct. However I am not responsible if you damage/brick your phone in anyway. Carry out the process at your own risk.

If this method doesnt work try out this one - How To Root Android

Follow the following instructions to root your phone:
  • Download Root Genius.
  • Enable USB debugging on your phone. To do so, open Settings>Developer options. Tick USB Debugging. If Developer options is unavailable then go to Settings>About Phone and tap on Built Number 5-8 times until you get the message You are now a developer.
  • Connect your phone to the computer via USB cable. Make sure USB Debugging is enabled.
  • Once successfully connected, Root Genius will automatically detect your phone.
  • Click on Root Now to begin the rooting of your phone.
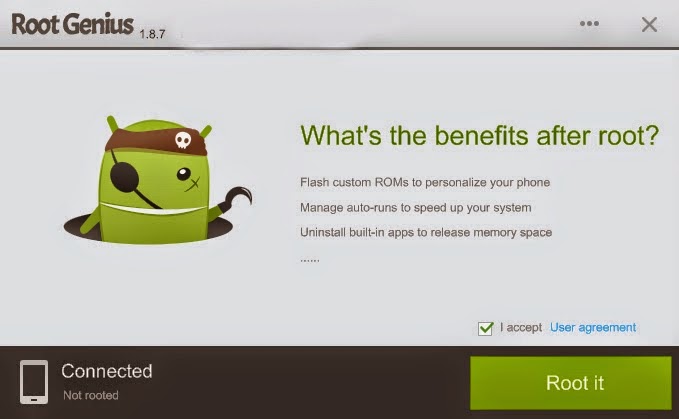

  • Root Genius will automatically root your phone and install the KingUser application(an application which is used to grant super user access to apps).
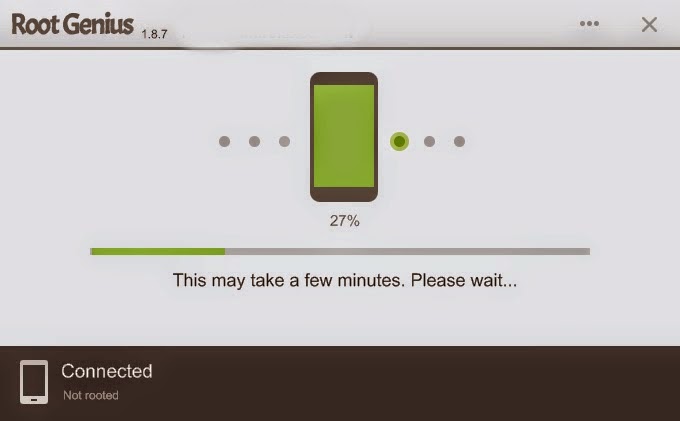
  • Your phone is successfully rooted(hopefully).


visit link download
Read more »

How To Hard Reset An Android Phone

How To Hard Reset An Android Phone


Is your Android Smartphone slow, freezing, not responsive, responding incorrectly, or you can�t remember the phones password? You�re in luck! There is still a pretty powerful option available, and that is to perform a hard reset, also known as an alternate reset, on the device.
Before we begin� If you are still able to access the setting on your device and navigate the phone then you might be more interested in reading How to backup and reset an Android phone, which goes through the process of doing a full backup and then performing a Factory Data Reset through the phones settings.
If you�re having problems accessing your factory data reset options through the settings then you can still perform a factory reset on your Android Smartphone and this article will show you how to do it. This is the perfect solution if you�re having problems with your touch screen, or you can�t navigate correctly on your phone. It�s also an option if you can�t get your device to power on all the way or when your phone won�t power on at all.
If you�re seeking to do a reset on your Android Smartphone then you most likely know how effective a reset can be at solving issues on phones. Through this article I am going to go over multiple ways to perform resets on your phone without actually having to navigate through the touch screen. Your phone doesn�t even need to be on in order to do it in most instances!

Make sure the device is powered off

Most of these hard resets require that your phone is completely powered off, so make sure that your phone is powered off all the way not just locked. If you�re phone isn�t responding and you can�t power off the phone with the power button, then you might need to pull the battery out, count to ten, and then put the battery back in. Just don�t power the phone back on if you have to reinsert the battery. Keep the device powered off.
Also make sure that your phone is not plugged into a charger. If the phone is plugged into a charger or if the device is not fully powered off, the reset is not going to work.

Hard reset methods and procedures may differ

Alternate resets also usually involve performing a series of key combinations which we�ll get to in a minute. The key combination you have to perform will highly depend on the specific make and model of the phone and what version of Android OS (Operating System) is currently running on the device. For example you might be able to perform a reset on a phone one way if it�s running the 2.2 (Froyo) OS, then you upgrade your phone to the 2.3 (Gingerbread) OS and the method no longer works, causing you to use a different method (I have an example of this in method 6 and 7 below). When you upgrade again to the 4.0 (Ice Cream Sandwich) OS you might have to use a different method and different key combination to perform the same alternate reset. So just beware of this.
You might also need to attempt the reset a couple times for it to go through correctly.
Disclaimer: Remember that a reset is permanent and cannot be undone. It will erase all personal data and downloaded content on the phone, don�t worry it will not affect or erase your memory card or anything saved on your SIM card. This includes content such as pictures, ringtones, texts, apps, etc. and will usually fix software glitches, bugs, viruses, etc as well. Try if at all possible, to perform a backup first. Usually when you need to perform an alternate reset on your mobile phone you might not be able to do a backup.

Preparation for a hard reset on an Android phone

Just a minor side note, on a typical alternate reset so that you know what to expect. You�re going to power the phone off, hold a specific set of key combinations (shown below), access a fastboot/testing/recovery/etc screen, select reset, and then the phone is going to power itself off, all by itself, then it�s going to power itself back on, all by itself. This can take a few minutes, some phones can take up to 15 min to reboot (pretty uncommon though, the average phone probably takes 3-5 min). Once it reboots the phone is going to think its brand new right off the shelf. So go ahead and set it up again like you did when you first got it.
If you own an Android Smartphone manufactured by Pantech then unfortunately you cannot perform an alternative reset on your device. Pantech Smartphones currently do not have a hard reset feature; the only reset available on Pantech phones is through the settings.

Let�s start with the most common Hard Reset methods and go from there:

Note: the different types of methods are numbered, method 1, method 2, method 3, etc.
1. When the phone is powered off, press and hold the Volume Up and the Volume Downkeys both at the same time, then press and hold the Power key until a test screen that shows some available options appears, usually takes about 15-20 seconds. When that screen pops up you can let go of the keys.
Press the Volume Down key to navigate down through the options until it highlightsFACTORY RESET then press the Power key to select it.
2. Power the phone off all the way, press and hold the Volume Down key and press than release the Power key, still holding the volume down key for about 10-15 seconds. When you see some additional options pop up on the screen you can let go of the keys.
Press the Volume Down key to navigate down through the options until it highlights the reset option; it usually says FACTORY RESET, then press the Power key to make the selection.
3. While powered off, press and hold the Home key, while continuing to hold the home key power the device on by pressing the Power key.
Once the Android Recovery screen appears release the Home key, then while on the Android Recovery screen, press the Volume Up and Volume Down keys both at the same time.
If/when you�re on the Android System Recovery screen release all the keys, and then use the Volume down key to navigate down to the �wipe date/factory reset� option. Once it�s highlighted press the Power key to select it.
Once you see the �Confirm wipe of all user data?� Press the Volume down key to highlight �Yes�delete all user data�, then press the Power key to select it.
4. Power the device off, then press and hold the Home key and press and release thePower key (while still holding the Home key).
From the Android Recovery screen, press the Search key.
Tap to select wipe data/factory reset then select Ok (located in the lower left of the screen). Note: if screen is not responsive use the Volume keys to scroll and the Camera key to select.
Select Yes � delete all user data, and then select OK (again lower left).
Select �reboot system now� and press OK.
5. This is becoming a common hard reset method and can be used to factory reset Samsung�s more recent Galaxy smartphones such as the Samsung Galaxy S III, the Samsung Galaxy S4, the S5, the Samsung Galaxy Note the Note II and Note 3, etc.

With the device powered off press and hold the Volume Up key the Home key and thePower key all at the same time.

When the phone vibrates (or you see the GALAXY Logo) release the Power key but continue to hold the Volume Up and Home key.

Continue holding the Volume up and Home key until the �Android system recovery� screen appears.

Use the Volume buttons to scroll to and highlight the �wipe data/factory reset� option, and then use the Power key to make the selection.

Once the factory reset is finished you may use the Volume and Power keys to highlight and select the �Reboot system now� option and the hard reset will be complete and your cell phone will be nice and squeaky clean.
6. Here is an alternate reset for a Motorola Atrix still running on the 2.2 Android OS�
While the phones power is off, press and hold the Volume down button and press and release the power button (note: if it doesn�t work after all the steps listed try holding down the power button along with the volume down button in this first step).
A "Fastboot" screen should pop up, press the Volume down key to cycle through the choices until you get to "Android Recovery", then press the Volume up key.
Wait for the "triangle!/Android". Once it pops up you�ll need to tap on the bottom right corner of the screen (note: it may take a few attempts). A menu should pop up.
Tap on "wipe data/factory reset", and then tap OK. Another confirmation screen will appear. Tap Yes and then OK.
After the data is cleared the "reboot system now" option should appear and is highlighted by Default. Tap OK.
Note: this type of reset is common on the 2.2 (Froyo) before the tech geeks wised up and removed the need to use the touch screen.
7. This reset is for the same phone, the Motorola Atrix, but one that�s running on the 2.3 OS.
Power off the phone, press and hold the Volume down button and Power button simultaneously while powering on the unit.
The "Fastboot" screen should pop up. When it does press the Volume down key to cycle through the choices until you get to "Android Recovery", and then press the Volume upkey to boot in this mode.
Wait for the "triangle!/Android" screen to pop up. Once it does press both the Volume upand Volume down keys simultaneously. A Recovery Menu should pop up.
Tap on the Volume down key until "wipe data/factory reset" is highlighted, and then tap the Power button. Another Confirmation screen will come up. Tap on the Volume downkey until it highlights �Yes� and then tap the Power button to make the selection.
After it�s done make sure "reboot system now" is highlighted and then tap thePower button.
In this method you don�t have to use the touch screen any more. So let�s say your touch screen isn�t responding therefore you can�t navigate the phone or go into your settings and do a regular factory data reset. Well now on the 2.3 there is hope. Just power off the phone and perform these steps and the reset should go through.
8. Here is a hard reset for a Sharp Android Smartphone.
While the device is off, hold the Sym button (it�s located on the keyboard) and the Powerbutton simultaneously.
Once the Android boot screen appears highlight the Wipe data/factory reset option by using the volume buttons. Then use the Return key (on the keyboard) to actually make the selection.
Scroll down to Yes - delete all user data and then press the Power key to confirm.
Once it is done select reboot system now and press the Power key to confirm and reboot your handset.
Important Note: On some Sharp models (such as the Sharp FX Plus ADS1) if holding the Sym button and Power key simultaneously doesn�t take you directly to the Android system recovery screen you might have to do one additional step. If using this hard reset key combination takes you to a screen which shows an exclamation mark within a triangle, then press the Home key (while on that exclamation mark screen) and this should take you to your Sharps Android system recovery options.
9. Here is a common method used to hard reset an LG Android smartphone. So if you need to hard reset an LG Optimus this is the hard reset key combination to try first.
After the LG phone has been powered off, press and hold the Volume Down button. While holding the Volume Down button, press and hold the Home button. While holding both theVolume Down button and Home button, press and hold the Power button.
Continue holding these three keys down simultaneously until the LG logo appears.
Once the LG Logo appears release all of the keys. This will complete the reset on many LG phones; you will be given the option to �Select your language� and can proceed with setting up your device as if you were setting up the phone for the first time.
If however, you are taken to a fastboot screen or a screen with additional options then use the Volume Down key to scroll to and highlight the wipe data/factory reset option and then press the Menu key to make the selection.
The phone might give you a confirmation screen in which you can use the Volume Down key to scroll to and highlight Yes -- delete all user data and then press the Menu key to make the selection.
If you get an option to reboot system now then select that option with the Menu key. The phone will reboot, which can take a couple of minutes, and the hard reset will be complete.
10. A less common method to hard reset an Android smartphone, but the following key combination can be used to reset some cell phones including the Samsung Gio (GT-S5660).
Power the phone off, by using the power button or by removing and then reinserting the battery (when possible).
While the phone is off press and hold the Home button and the Power key at the same time (the Home key is typically the big button on the bottom center of the phone under the display/touch screen).
When the phone starts to power on and you see the phones logo you can release the power button but keep pressing the Home button until the Android system recover screen appears. Once it pops up you can release the Key(s).
Use the Volume keys to highlight the �wipe data/factory reset� option, and then use theHome key to make the selection. Scroll down using the Volume keys again until the �Yes�delete all user data� option is highlighted and then press the Home key to select that as well.
The system recover screen should pop back up and when it does make sure that �reboot system now� is highlighted and press the Home key to make the selection. The phone will restart and the hard reset will be done.
11. Another uncommon hard reset technique but similar to the one used in method #2. This process can be used to hard reset T-mobiles Prism and Prism II as well as AT&Ts Huawei Fusion (U8652).
Turn off the phone and then press and hold the Volume Up key and Power key simultaneously until the Android system recover screen appears.
Use the Volume Down key to highlight the �wipe data/factory reset� option and

visit link download
Read more »

Wednesday, January 3, 2018

iBall Launches Andi 2 Dual SIM Android Phone at Rs 9 999

iBall Launches Andi 2 Dual SIM Android Phone at Rs 9 999


iBall has announced a new Dual SIM Android smartphone in medium budget price tag for all Indian dual SIM lovers. The iBall Andi 2 is runs on Android 2.2 Froyo OS with an 800MHz processor.

Its second Android smartphone by iBall and its a new player in Android phone market. The first one was Andi available at Rs. 5400, and this newly launch is iBall Andi 2 both based on same Android 2.2 OS. Other features in iBall Andi 2 are 3.5-inch capacitive touchscreen display, 3.0 megapixel rear camera, a front facing VGA camera, Wi-Fi, Bluetooth, GPRS and 3G capabilities.

iBall Launches Andi 2 Dual SIM Android Phone
Other specification of iBall Andi 2 are microSD card slot for memory expansion, dual SIM standby mode, 3.5mm earphone jack and a powerful 1450 mAh battery for longer backup time.

This is second phone by iBall company and based on almost same specs with old version of Android OS on a comparably high price tab. I dont think its a right choice for such an amount, as we already have some other good choices available in market like Micromax A78 & A73 Low Price Dual SIM Android Phones, Samsung Galaxy Ace, Y Duos and Y Pro Duos Dual SIM Android Phones, and LG launched LG Optimus Net Dual SIM etc. It will be great if iBall reduced the price and if theres any official update for Android 2.3


visit link download
Read more »

how to install java games on your phone

how to install java games on your phone


Before install games to your phone, make sure the games (click to go free phone games gallery) is compatible with your mobile phones, know your phone first especially entertainment capability features, including operation system or platform (like symbian, windows mobile, java mobile, flash etc), display screen resolution (like 128x160, 176x208, 176x220, 240x320, 320x240, 352x416 etc), 3D java support etc. If you get any sort of error, its possible the games isnt compatible/or is not designed for your model. You will need to obtain a specific version for your model.
first of all Make sure the game is in a jar format (*.jar file) not a zipped file (*.zip or *.rar). If it has the zip or rar extension open the file in Winrar/winzip (download winrar) and look at its contents, if it has lots of files like a.class and image files then rename the *.rar (or *.zip) file as *.jar and transfer that to your phone. If in the zipped file it has a jar file and other files, extract just the jar file and transfer it to your phone.
When transfering the java games to your phone via usb cable, bluetooth, infrared, memory card (how to transfer photos, ringtones, games to your phhone), the games and applications folder may not appear, this is normal. All you have to do is copy the file to the root directory (the main folder) and the phone will put the files into the correct places itself. There is no need to put the game in the others folder as it will just be a waste of time and the game will not work.
open/run the jar file to install the games, then enjoy it.


visit link download
Read more »

Tuesday, January 2, 2018

How to root your Android Phone

How to root your Android Phone


Warning: These stuffs are not for newbies. Rooting and installing custom ROMs,etc are not for everyone. Rooting your phone will void your warranty. There are risks like bricking your phone and making it useless. Proceed at your own risk. You and only you are responsible for anything you do to your phone. With that said, lets proceed.. 

Root your Micromax Ninja 3 A57

WORKS FOR ALL ANDROID PHONES. Demonstration on Micromax Ninja 3 A57.
  1. Connect the phone to your PC with the Data Cable provided. It will install required drivers on your computer.  Now Disconnect the phone again.
  2. Download and install Android SDK from here if not already done and install Android SDK Platform Tools and Google USB Drivers 
  3. Download UnlockRoot from here : http://www.unlockroot.com/ 
  4. Download the given attachment. 
  5. Extract adb_usb.ini from it and place it in C:Users(your username).android . Create the folder if not found. 
  6. Now enable USB Debugging in your phone through Settings->Applications->Development Connect your phone and PC through USB.
  7. Go to Device manager and see if ANDROID DEVICES is shown. If yes then continue with next steps.
 Rooting Guide:
  1. First install drivers Install and open UnlockRoot. 
  2. Click on ROOT and then choose your device name.
         It will begin rooting and your phone will restart.

 Congratulations, your Micromax A57 is now rooted.


1.To boot into recovery mode, switch off your phone. 
Press and hold vol+ and power key. 
2.To boot into fastboot mode, switch off your phone. 
Press and hold vol- and power key. 

 Here are the Rom dumps of this phone for developers: 
  • boot.img 
  • checksum.md5 
  • config.gz 
  • recovery.img 
  • system.info.gz 
  • system.tar 
Here is the signed stock rom for Micromax Ninja 3 A57
  • STOCK ROM


ATTACHED FILES adb_usb.zip 

Incase you have messed up your Micromax Ninja 3 A57 follow  this link.


visit link download
Read more »

Important Apps for your Android Phone all by 2014

Important Apps for your Android Phone all by 2014


Android is one of the top leading mobile operating system around the world and its application are keep on increasing day by day. You may find it amazing that there are more than 1.2 million apps in Google Play out of them 1 million are free and rest are paid. Also, in just one year 2 million apps are introduced in Google Play which is 2.4 times higher then the last year.

Here, I am going to give you a list of best free Android application available in Google Play which surely save your time and energy.

The below info-graphic contains 14 categories with 5-6 best free app for you according to user reviews, reputation, popularity and downloads.

Best Android apps for your android phone
Nine Hertz

Author Bio:


GauravSharma is a Digital Marketing Manager at Nine Hertz with years of experience in SEO/PPC and other parts of Online Marketing. He is an enthusiast and love to explore new stuffs. You can check him out on Facebook and Twitter or mail him personally.


visit link download
Read more »

HTC 8S Windows Phone 480x800 Wallpapers

HTC 8S Windows Phone 480x800 Wallpapers


visit link download
Read more »

HOW TO SPY ON A MOBILE PHONE

HOW TO SPY ON A MOBILE PHONE


The advancement of technology has considerably hyperbolic the possibilities your youngsters ar being contacted by sexual predators. the net chat rooms and Instant electronic messaging services created it simple for net predators to own contact with kids through the net.  Cell phones have currently become the selection of teenagers to speak with others, even folks they are doing not grasp.  It looks that the sole thanks to keep youngsters safe is to watch everything that they are doing together with watching or spying on their mobile phones.

spy on mobile phone


Teenagers still chat over the net however the chat conversations quickly step up into texting through their cell phones, or worse however even giving out their cell numbers to folks they need neer met aside from on the net.  Another trend could be arising among teenagers is a new factor dubbed �Sexting�.  Sexting is that the term wont to outline an individual, typically an adolescent, causation nude or semi-nude footage of themselves over their mobile phone. examine the stunning sexting statistics. youngsters ar forever golf stroke themselves in harms manner. oldsters ought to keep them safe. a way to stay them safe is to strictly spy or monitor their mobile phone usage.

Teenagers ar being inactive for sexting footage as a result of an image of a nude juvenile is kiddy .  It doesnt matter if they took the image them selves or not, its still kiddy.  See some news stories regarding the risks of sexting. the bulk of the time, these footage can find yourself on the net for all to ascertain. net predators is also grooming your youngsters through their cell phone; your youngsters is also sexting flirty footage to their friends. does one have any plan what your youngsters do with all of these used mobile phone minutes.  If you would like to understand, Mobile Spy Softwares can assist you monitor, and spy if necessary, on their cell phone.

cell phone spy softwares


Mobile Spy Softwares instantly logs all voice and text conversations from your teenagers mobile phone thus youll be able to grasp precisely whom theyre communication with in the least times. this might look like associate degree invasion of privacy however the fact is that a parent must do everything doable to stay youngsters safe.  Mobile Spy Softwares can allow you to grasp if theyre talking, texting or causation photos to strangers via itinerant.  All you would like is an online association to go browsing to your spy account to ascertain and listen to what your child is doing on the mobile phone.  It shows all messages sent and received by the monitored mobile phone.

Go to the popular Cell Phone Tracking Softwares 


visit link download
Read more »

Monday, January 1, 2018

HTC Windows Phone 8X wallpapers

HTC Windows Phone 8X wallpapers


HTC Windows Phone 8X wallpapers

HTC Windows Phone 8X wallpapers

HTC Windows Phone 8X wallpapers

HTC Windows Phone 8X wallpapers

HTC Windows Phone 8X wallpapers

HTC Windows Phone 8X wallpapers

HTC Windows Phone 8X wallpapers

HTC Windows Phone 8X wallpapers


visit link download
Read more »

How to recover deleted text messages on your Android phone

How to recover deleted text messages on your Android phone


You may be one of the victims who had unfortunately lost their conversation on Android phone. But do not get panic over this loss if you ever lost your conversation. There are such tools available for free which can easily recover unluckily deleted text messages from your Android device. For this you need either PC or Mac by which you can connect your phone and proceed the instructions. There are several such tools available which scan your phone memory and restore the lost files. These tools not only scan your SMSs but also other files which may be important for you. Dr.Fone for Android is the best and worth trying tool which supports Windows XP/Vista/7/8/8.1 for free. Besides Windows it also supports Mac 10.7/10.8/10.9/10.10.3 which is also free. So you can use both PC as well as Mac for restoring the lost files. Below is the easiest method how to do it.


How to recover deleted text messages using the tool

  • Install Dr.Fone for Android on your Mac or PC and run it.
  • Enable �USB Debugging� on your phone by going to the settings. To do this, you need to have access to the �Developer options�. If you do not have the access then for this go to �About Phone�, scroll down to �Build Number� and tap repeatedly on it until you have developer access.
  • Now you will have access to �Developer options� in the �Settings� menu. Tap on �Developer options�, scroll down to USB Debugging and check the box.
  • Now connect your Android phone to your computer via USB data cable.
  • Follow the instructions in the tool to scan your Androids memory. After the scanning you can preview the deleted and undeleted data on your Android device.
  • Next, open the Messages folder in the left pane. Select the SMSs you wish to recover and click on Recover to put them back on your device.
  • Once completed, you have successfully and securely restored the lost SMSs on your phone.
Also See: How to recover deleted or lost files from Windows hard drive.


Verdict


You have seen in this how to recover deleted text messages article that using tool is very easy and safe. You do not need to root your Android phone or anything else. If you go for the process without computer then you may need to root your phone and use the paid version tool which surely you do not want to try.

How to recover deleted text messages on your Android phone

Hope that this will help you a lot and you will surely like our article. If you appreciate our work then do share it with your friends and other connections so that they may also need to restore any lost data. For more tips, Android Apps and updates keep visiting AndroidSega.


visit link download
Read more »

Sunday, December 31, 2017

how to make your android phone in to wifi htspot

how to make your android phone in to wifi htspot


For making your phone as wifi hotspot
Go to stetting then click on more
then click on Tethering & portable hotspot
then click on set up wifi hotspot
then u can change Network SSID anything or your name or what you want
and create a password and save
then check on the Portable Wi-Fi hotspot


visit link download
Read more »

How to make your phone look like a Pixel 2

How to make your phone look like a Pixel 2


The Pixel 2 is a distinctive phone with a distinctive home screen.

Every phone from Google debuts with a home screen that shares Googles vision of a launcher. The Google Now Launcher that shipped with the Nexus line is still one of the most popular launchers on Android, even though it was supposed to be retired over six months ago. The Pixel Launcher that ships with Googles Pixel 2 and Pixel 2 XL has not been published to Google Play for all of us to enjoy, but never fear! We can make use third-party launchers to get the same look � or even better versions of it.

First, a quick note about Lawnchair Launcher: Lawnchair can do an OG Pixel theme spectacularly. It doesnt have the dock search bar yet, but it does have Pixel folders and Adaptive icons. Adaptive icons on Pixel Launcher arent quite as good as Action Launcher or Nova Launcher, but Lawnchair is definitely the easiest way to get a Pixel theme sans dock search bar: install, open and set up your icons the way you want.

Wallpapers

Usually, when we post themes like these, we link you to a small selection of stock wallpapers from the device, and then I tell you to ditch those and go with a more fun wallpaper instead. For the Pixel theme, I dont have to do that. Googles Pixel phones use the Google Wallpapers app, and while there are still a few device exclusives, there are hundreds of wallpapers from Googles collections, Google Earth and Google+ to give your home screen a clean, crisp look. If youre looking for the rainy day wallpaper, its not in Google Wallpapers, but its been spread far and wide thanks to Redditors and Pixel fans over the last few weeks.

  1. Open Wallpapers.
  2. ?Tap the section you want a wallpaper from.
  3. ?Tap the wallpaper you want.

  4. ?Tap Set wallpaper.
  5. ?Tap which screens you want apply the wallpaper to.

At A Glance widget

Theres a native At a Glance widget that was recently added to Action Launcher, but the best At A Glance widget is a third-party affair called Another Widget. It allows you to change the fonts, font sizes, which calendar appointments and how many are shown at a time. Its been rapidly updating and improving, and its color-customizable, which is excellent for anyone who might want to go beyond Pixel white and get something a little bolder.

  1. Long press your home screen.
  2. ?Tap Widgets.
  3. ? Under Another Widget, press and drag Another Widget to the top of your home screen.

  4. ? In the configuration screen that appears, scroll down and tap See your Events.
  5. ?Tap Allow.
  6. ?Scroll down further and tap Control the Weather.

  7. ?Tap Allow.
  8. ?(Optional) Scroll down and tap Tap on weather opens.
  9. Tap the weather app you want to open.

Adaptive icons

Adaptive icons are here, and no doubt they will improve, but until then, weve got a few options. If you use Action Launcher, they have AdaptivePack, an Action-exclusive icon pack that gives hundreds of popular apps Adaptive icons. Nova Launcher doesnt have an exclusive pack but instead offers a masking option that will give legacy icons colored backgrounds instead of the plain, boring white that Googles Pixel Launcher � and sadly, several Google apps � use with their Adaptive icons.

Applying Adaptive icons on Nova Launcher

  1. Open Nova Settings.
  2. ?Tap Look & feel.
  3. ?Tap Adaptive icon style.

  4. ?Tap the shape you want.
  5. ?Tap Reshape legacy icons if you want Nova Launcher to add adaptive shapes and colored backgrounds to apps that dont have adaptive icons.

Applying Adaptivepack on Action Launcher

  1. Open Action Settings.
  2. Tap Icon pack.
  3. Tap Adaptivepack.

  4. Tap Icon appearance & App Shortcuts.
  5. Tap Adaptive Icon style.
  6. Tap the icon style you want.
  7. Tap OK.

Dock search bar

The Pixel 2 is a Google phone, and as a Google phone, its got a Google search bar on it. This year, as displays stretch taller and taller, Google has opted to move their search bar down to the dock, where its easier to reach and accidentally tap while reaching for one of your apps. Huzzah.

Applying a dock Quickbar in Action Launcher

  1. Tap Action Settings.
  2. Tap Quickbar.
  3. Tap Style.

  4. Tap Search bar (dock).
  5. Tap OK.
  6. Round the corner size to 100%.

You can long-press the items under layout to change the colors if you want. The default dock style includes colored logos, but I prefer the more subtle white icons. White goes with a wider array of wallpapers and icon packs, while the colored icons are more true to the actual Pixel 2 home screen. The Quickbar color can be any of the shades Quicktheme offers, though white is the most traditional.

Applying a dock search bar in Nova Launcher

  1. Open Nova Settings.
  2. ?Tap Dock.
  3. ?Tap Searchbar in dock.

  4. ?Tap Searchbar below icons or Searchbar above icons (your preference).
  5. ?Go to the home screen.
  6. ?Long press your new dock searchbar until a menu appears.

  7. ?Tap Edit.
  8. ?Tap the rounded bar style.
  9. ?Tap the logo style you want.

  10. ?Tap Bar color.
  11. ?Tap the color and transparency you want. White is what the Pixel Launcher uses, but colors may mesh better with your wallpapers/icons/theme.
  12. ?Tap Done.

Pixel Folders

Folders on Pixel devices havent changed from last year, which means they are nice and easy to apply. In fact, the Pixel folder style is the default on both Action Launcher and Nova Launcher for new users. If you had another style set up previously, heres how to change back to the Pixel folder style.

Applying Pixel folders in Nova Launcher

  1. Open Nova Settings.
  2. Tap Folders.
  3. Tap Folder preview.

  4. Tap Grid.
  5. Tap Folder background.
  6. Tap Pixel Launcher.

  7. Tap Background.
  8. Select the color and transparency you desire. White is the traditional color, but feel free to pick a color to compliment your wallpaper instead.

Applying Pixel folders in Action Launcher

  1. Tap Action Settings.
  2. Tap Folders & Shutters.
  3. Tap Style.

  4. Tap Adaptive if you want your folders to have the same shape as your adaptive icons. You can also select Circle if you want round folder icons even while using other adaptive icon shapes.
  5. If you want just the shape outline, but not a tinted background of your folder icon, you can tap the (outline) option.
  6. Tap Folder icon background.

  7. Tap the color you want. White is the traditional color, but feel free to pick a color to compliment your wallpaper instead.
  8. Tap OK.
  9. Tap Folder & Shutter background.
  10. Tap the color and transparency you want. White is the traditional color, but feel free to pick a color to compliment your wallpaper instead.
  11. Tap OK.

Your turn

So, how do you get your Pixel on? Are you an above the icons or below the icons dock search bar user? Do you go with adaptive icons or still rock a dedicated icon pack? Does Google Wallpapers rule your screen or do you let your fandoms fly on your desktop?

Whatever your style, share it with us in the comments below!


from Android Central - Android Forums, News, Reviews, Help and Android Wallpapers

visit link download
Read more »