Showing posts with label 100. Show all posts
Showing posts with label 100. Show all posts
Thursday, January 4, 2018
How to Install TWRP 3 1 1 1 and Root Huawei Honor 8 Pro Success 100 Tested
How to Install TWRP 3 1 1 1 and Root Huawei Honor 8 Pro Success 100 Tested
How to Install TWRP 3.1.1-1 and Root Huawei Honor 8 Pro Success 100% Tested.
Root Huawei Honor 8 Pro. If you need any information about how to root Huawei Honor 8 Pro, now you are at the right place. This guide will show you how to root the Honor 8 Android phone. Also, this guide is fully tested on this video. You can directly watch it or continue reading this guide. We will present this guide very simple, and easy to understand. Even if you are a beginner on Android trick. Everyone has different reasons to root their Android device, so does the Honor 8 Pro owner.
By rooting your Huawei Honor 8 Pro, you will get some advantages, for example, you can increase your phone speed and battery life, Block Ads in Apps that contains Ads, even you can remove pre-installed crapware. as we have seen, that crapware cannot be uninstalled without root access. And much more advantages.
Now, lets this guide begin.
Prerequisite.
- As the main requirement to root your Huawei Honor 8, you need to unlock the bootloader. If you dont know how to do it, you can read the following guide - How to unlock the bootloader on any Huawei phone.
- Enable USB debugging on your phone.
- D0wnl0ad ADB and fastboot from Here
- Downl0ad PHH Superuser from Here
- Downl04d TWRP recovery root from this link.
- Once TWRP successfully downloaded, now put this TWRP into a platform-tools folder.
- Rename it to twrp.img
Install TWRP 3.1.1-1 Honor 8 Pro | Guide.
- Extract platform-tools-latest-windows.zip file.
- Go to extracted folder
- Then, Open platform-tools folder.
- Now, connect your Huawei Honor 8 Pro to the computer via USB cable.
- Then, from the ADB fastboot folder right click and hold the shift button, and click open command window here.

open command in adb fastboot - Once command prompt windows come up, now you need to check your Huawei Honor 8 Pro successfully connected or not using the following command and press enter.
- adb device.
- If your device is successfully connected to the computer, then the result will return like this.
- list of devices attached ...

- Once your Huawei Honor 8 Pro successfully connected to the computer. Now, reboot your device into bootloader using this command and press enter
- adb reboot bootloader
- Just wait a minute, your device will reboot into fastboot and rescue mode.
- Once your device in the fastboot and rescue mode, its time to flash TWRP recovery to your device. Therefore you need to type this command at prompt and then press enter button
- fastboot flash recovery twrp.img
- Just wait for 2 or 3 seconds for the complete flashing process.
Boot Honor 8 Pro into Recovery.
- Power off your Honor 8 Pro.
- Now, press and hold three buttons simultaneously located at the side phone body
- Volume UP + Volume Down + Power Button
- Release all button if you see a Honor logo comes up on your screen.
- Now, you will see that honor 8 Pro has been unlocked status on screen.
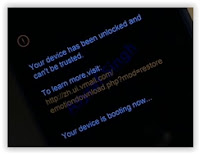
Honor 8 pro recovery mode - And now your device will boot into TWRP recovery.

- Tap Wipe - Format Data - type Yes - Ok
- Tap Back - Reboot - Recovery - Dont install
- Now your device will reboot into TWRP recovery.again. To root your Honor 8 Pro read the next step below.
Root Honor 8 Pro.
- You need to copy Superuser-r310-beta (download link available at prerequisite) to the internal storage of Huawei Honor 8 Pro
- Continued from step no. 8 above. or, make sure your device in TWRP recovery mode.
- From TWRP main menu, tap Install.
- Then, tap Superuser-r310-beta.zip from internal storage.
- Now, Swap to confirm flash.
- Once Zip file successfully flashed, you just need to click on reboot.system.
- Now, your Huawei Honor 8 Pro will reboot into the system.


Wednesday, January 3, 2018
How To LG Nexus 4 E960 Sim Card Ways Insert Sim Solution 100 Working
How To LG Nexus 4 E960 Sim Card Ways Insert Sim Solution 100 Working

Make a Jumper
Check the voltage hanging in the balance as appeared above and ensure everything produce voltage.
On the off chance that there is one line does not deliver voltage then you need to make a jumper as appeared previously.
On the off chance that the four lines has created a voltage then please attempt to embed sim card and turn on the phone.
Perhaps its only data from MobileRdx..com about LG Nexus 4 E960 No Sim Card Issue Arrangement and Trap Jumper Ways. I seek this guide can be helpful after all of you
Remember:- The each arrangements posted on Our site is very much tried before by our authority group, Yet at the same time we dont assume any liability for any harm it might bring about to your wireless. Utilize these repairing arrangements at your own particular Hazard, Bless your heart.
How To Mi Note3 Note4 All Chinese Versions To Global Versions 100 ok tested by sktelecom
How To Mi Note3 Note4 All Chinese Versions To Global Versions 100 ok tested by sktelecom
How To Mi Note3 Note4 All Chinese Versions To Global Versions 100%ok tested by sktelecom

How To Mi Note3 Note4 All Chinese Versions To Global Versions 100%ok tested by sktelecom
DOWNLOAD
HOW TO
How to make persenol bot 100
How to make persenol bot 100
Step1.
Sub Se Pehle Hum Ne
Www.2freehosting.com
Pe Account Banana Hai.
1?Apna Poora Naam Likhe.
2?Apna Email Type Kare.
3?Dono Boxes Mein Kam Se Kam 6 Words Ka Koi Password Type Kare.
4?Captcha Fill Kar Ke Sign Up Pe Click Kare.
Step 2.
Jaise He Aap Sign Up Pe Click Karoge Apke Email Pe Confirmation Msg Aaya Hoga. Jaha Se Apna 2FreeHosting Ka Account Confrm Kare.
Aur Uske Bad
? Free Hosting Plan
Par Click Kare.
Step 3.
Ab Apne Bot Site Banani Hai Jo Aap Neeche ScreenShot Ko Follow Kar Ke Bana Sakte Hai.
Step 4.
Create Pe Click Karne Ke Baad Apki Site To Ban Jayegi.
Lekin Abhi Tak Wo inactive Hai.
Step 5.
Ab Isko Active Karne Ke Leye Page Refresh Kare.
Aur Jab Page Refresh Ho Jayega To Apki Site Active Ho Jayegi Aur Phir Switch Pe Click Kare..
Step 6.
Ab Files Wali Tab Mein File Manager Ko Select Kare.
Step 7.
Ab File Manger Ko Install Karne Ke Karne Ke Leye install Par Click Kare. Kabhi Kabhi Aisa Hota Hai.
ke Pehli 3 Ya 4 Dafa File Manger install Nahi Hota ,
To Aap Bar Bar Click Karte Rahe 4 Se 5 Bar Try Karne Par install Ho Jayega..
Step 8.
Jab File Manger install Ho Jayega To Automatic Open Ho Jayega.
Waha Pe Default Wali File Hogi. Us Pe Right Click Kar Ke Pehle usko Delete Kare.
Aur Phir Upload Wale Button ko Press KAre.
Step 9.
Ab Aap Ne Script Download Karni Hai.
Jis Ko Download Karne Ke Leye Yaha Click Kare.. Secript DOWNLOAD
Script Download Kar Ke Usko Extract Kar Lein.
Aur Us Mein 2 Files Hogi.
Aik Ka Naam
? index.php
Aur Dosri Ka
? beranda.php
In Dono Files Ko Upload Karna hai.
Jaise keh Maine Step8 Mein Bataya hai.
Step 10.
Jab Dono Files Upload Ho Jaye. To Beranda Wali file Pe Right Click Kar ke
link download
Read more »
Sub Se Pehle Hum Ne
Www.2freehosting.com
Pe Account Banana Hai.
1?Apna Poora Naam Likhe.
2?Apna Email Type Kare.
3?Dono Boxes Mein Kam Se Kam 6 Words Ka Koi Password Type Kare.
4?Captcha Fill Kar Ke Sign Up Pe Click Kare.
Step 2.
Jaise He Aap Sign Up Pe Click Karoge Apke Email Pe Confirmation Msg Aaya Hoga. Jaha Se Apna 2FreeHosting Ka Account Confrm Kare.
Aur Uske Bad
? Free Hosting Plan
Par Click Kare.
Step 3.
Ab Apne Bot Site Banani Hai Jo Aap Neeche ScreenShot Ko Follow Kar Ke Bana Sakte Hai.
Step 4.
Create Pe Click Karne Ke Baad Apki Site To Ban Jayegi.
Lekin Abhi Tak Wo inactive Hai.
Step 5.
Ab Isko Active Karne Ke Leye Page Refresh Kare.
Aur Jab Page Refresh Ho Jayega To Apki Site Active Ho Jayegi Aur Phir Switch Pe Click Kare..
Step 6.
Ab Files Wali Tab Mein File Manager Ko Select Kare.
Step 7.
Ab File Manger Ko Install Karne Ke Karne Ke Leye install Par Click Kare. Kabhi Kabhi Aisa Hota Hai.
ke Pehli 3 Ya 4 Dafa File Manger install Nahi Hota ,
To Aap Bar Bar Click Karte Rahe 4 Se 5 Bar Try Karne Par install Ho Jayega..
Step 8.
Jab File Manger install Ho Jayega To Automatic Open Ho Jayega.
Waha Pe Default Wali File Hogi. Us Pe Right Click Kar Ke Pehle usko Delete Kare.
Aur Phir Upload Wale Button ko Press KAre.
Step 9.
Ab Aap Ne Script Download Karni Hai.
Jis Ko Download Karne Ke Leye Yaha Click Kare.. Secript DOWNLOAD
Script Download Kar Ke Usko Extract Kar Lein.
Aur Us Mein 2 Files Hogi.
Aik Ka Naam
? index.php
Aur Dosri Ka
? beranda.php
In Dono Files Ko Upload Karna hai.
Jaise keh Maine Step8 Mein Bataya hai.
Step 10.
Jab Dono Files Upload Ho Jaye. To Beranda Wali file Pe Right Click Kar ke
link download
Tuesday, January 2, 2018
How to move borderless form 100 EASY in VB Net
How to move borderless form 100 EASY in VB Net
Hey guys well form properties with formborderstyle - None is very good option
for customizing your form.
But the problem with this is we cant make our form draggable/movable.
I have a very good solution for this problem

� � � � � � � � Borderless Form Example
Just go to your form code & paste this code below public class form1 :
Note �: Here form1 is your form name
for customizing your form.
But the problem with this is we cant make our form draggable/movable.
I have a very good solution for this problem
� � � � � � � � Borderless Form Example
Just go to your form code & paste this code below public class form1 :
Note �: Here form1 is your form name
Monday, January 1, 2018
Huawei Honor Hol U19 Officeil Firmwar 100 Tested SHAHIN TELECOM
Huawei Honor Hol U19 Officeil Firmwar 100 Tested SHAHIN TELECOM


THIS FIRMWARE SOLVED HANG ON LOGO TOUCH NOT WORK CAMERA MONKEY VIRUS PROBLEM LCD/Display Fix/Black 100% SOLVED


Huawei Honor Hol-U19 Blank Display Soultion
Holly-U19V100R001C328B106
MT6582_Android_scatter
preloader_huaqin82_wet_b2b_kk.bin


Htc D816h Flash File 100 TESTED BY GSM MEHEDI
Htc D816h Flash File 100 TESTED BY GSM MEHEDI
Download https://docs.google.com/uc?id=0B-M6G9zRRxGzTjNVeTBVWFc5d2c&export=download
Sunday, December 31, 2017
Huawei G7010 Unlock 100 Done
Huawei G7010 Unlock 100 Done

Model Selected : G7010
Using ComPort : MTK USB Port (COM27)
Device detected ok.
IMEI : 353915048990651
CHIPID : AEB10930B9699A12FDBE76566A552339
Read backup ok, lets go..
Backup saved to : C:NCK DongleMain ackuphuawei_mtk353915048990651efs1.bin
Sserver connection ok
Data received ok
Data received, prodceed unlock.
Successfuly unlocked
Please restart phone
DOWNLOAD DRIVER
How To Karbonn A1 Plus Hard Reset Pattern Lock 100 Ok
How To Karbonn A1 Plus Hard Reset Pattern Lock 100 Ok
Karbonn A1 Plus Hard Reset,Karbonn A1 Plus Factory Reset,karbonn a1+ hard reset,Karbonn A1+ remove pattern lock,Karbonn A1 Plus Unlock Code,How to Karbonn A1 Plus hard reset,Karbonn A1 Plus pattern unlock,Karbonn A1 Plus Flash file,Karbonn A1 Plus Stock rom,Karbonn A1 Plus Firmware,Karbonn A1 Plus software update,
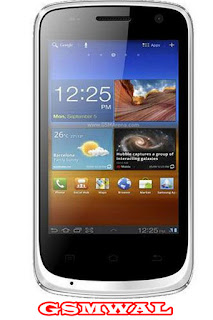 |
| Karbonn A1 Plus Hard Reset |
Switch off your mobile reinsert battery
Prees volume (-)down and power Buttons
You see Android logo then
Now you select Recovery Mode using Volum key
Now Select Wip Data Factory Reset
Next select yes-delete all user Data
Now select Reboot system
Now Hard Reset Done
Saturday, December 30, 2017
Friday, December 29, 2017
Huawei Ascend G7 L01 Firmware Flash File 100 Tested Free Download
Huawei Ascend G7 L01 Firmware Flash File 100 Tested Free Download
Disclaimer: This firmware use to update and repair Huawei Ascend G7-L01 software problem, flashing a firmware is not without risks. If you don�t do it properly, you might render your phone inoperable. If you decide to proceed we won�t be liable to whatever might get wrong (neither we could provide technical support).
What you can do with Huawei Ascend G7-L01 Stock Firmware / ROM?
- Unroot your Smartphone
- Unbrick your Smartphone
- Restore your smartphone back to factory settings
- Remove any custom ROM/Recovery on your smartphone
- Set it back to 100% stock settings, just like the day you first got it
Backup your data before start flashing you smartphone if you don�t know how backup your data read those Articles,
How to Auto Backup Photos on Android Smartphone
How to Backup your Data on Android device
You are flashing at your own risk.
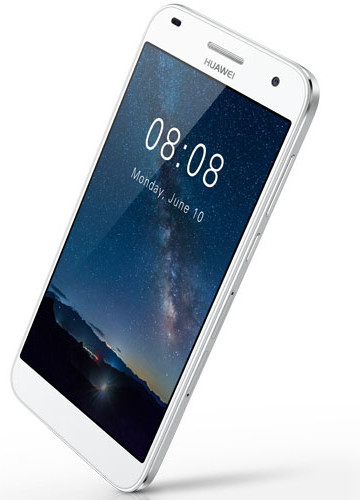
Download Link:
Firmware Huawei Ascend G7-L01
From here G7-L01-V100R001C00B250CUSTC185D001.rar
HUAWEI Y625 U32 V100R001C567B108 FIRMWARE 100 OK ALL VERSIONS FIRMWARE STOCK ROM WITHOUT PASSWORD TESTED BY SKTELECOM
HUAWEI Y625 U32 V100R001C567B108 FIRMWARE 100 OK ALL VERSIONS FIRMWARE STOCK ROM WITHOUT PASSWORD TESTED BY SKTELECOM

HUAWEI Y625-U32 V100R001C567B108 FIRMWARE
WITHOUT PASSWORD
100%OK SD UPDATED
SKTELECOM
HUAWEI Y625-U32 V100R001C567B108 download
HUAWEI Y625-U32 V100R001C328B108 DOWNLOAD
HUAWEI Y625-U32V100R001C328B105 DOWNLOAD
HUAWEI Y625-U32V100R001C328B104 DOWNLOAD
Tuesday, December 26, 2017
Huawei P8 GRA L09 Officeil Firmwar 100 Tested
Huawei P8 GRA L09 Officeil Firmwar 100 Tested


THIS FIRMWARE SOLVED HANG ON LOGO TOUCH NOT WORK CAMERA MONKEY VIRUS PROBLEM LCD/Display Fix/Black 100% SOLVED


How to Install
First of all you have to make sure that your MediaPad T1�s current
build number is C209Bxxx.
Download the firmware package from the aforementioned link and
extract it.
Verify that your SD card is formatted in FAT32 filesystem and has
enough free storage.
Copy the extracted �dload� folder (containing Update.app file) to the
main directory of your external SD Card.
Next, turn off your device and insert the SD card.
Reboot into forced SD upgrade mode by holding Vol Up + Vol Down +
Power buttons at the same time until you see some text on the
screen.
It�ll take a few minutes to complete the update. After that, it will
automatically shut down and reboot into the new OS.
Enjoy � and don�t forget thanx
First of all you have to make sure that your MediaPad T1�s current
build number is C209Bxxx.
Download the firmware package from the aforementioned link and
extract it.
Verify that your SD card is formatted in FAT32 filesystem and has
enough free storage.
Copy the extracted �dload� folder (containing Update.app file) to the
main directory of your external SD Card.
Next, turn off your device and insert the SD card.
Reboot into forced SD upgrade mode by holding Vol Up + Vol Down +
Power buttons at the same time until you see some text on the
screen.
It�ll take a few minutes to complete the update. After that, it will
automatically shut down and reboot into the new OS.
Enjoy � and don�t forget thanx

Huawei P8 GRA-L09 C432B317 Android 6.0_EMUI4.0


Huawei P8 GRA-L09 C432B200 Android 5.0 EMUI 3.1


Monday, December 25, 2017
How To Increase Utorrent Download Speed 100 Working
How To Increase Utorrent Download Speed 100 Working

Now you are ready for increase torrent Download speed
You can apply these Setting to uTorrent and BitTorrent.Most poeple use uTorrent thats why i choose uTorrent For this Tutorial to show how to change settings.But you can apply same settings to BitTorrent. Ok lets Start!!
- Click on "Option"
- Go to "Preferences"

- Click on "Bandwidth"

- Set
Maximum Upload Rate : ------------------------------- [ 10 ] or [ 15 ]
Maximum Download Rate : ---------------------------- [ 1800 ]
Global maximum number of connections : ------------- [ 2329 ]
Maximum number of connected pees per torrent : ---- [ 100 ] or not more than [ 300 ]
Maximum upload slots per torrent : -------------------- [ 14 ] - Leave rest Default

- Click on "Advanced"

- Look for "bt.connect_speed" Set it to "80"
- Look for "net.max_halfopen" Set it to "100"
Now All DoNE!! Click on "Apply"
Exit the uTorrent Application and re Run it.......Feel the new speed
(Check out the screen shot below)

Before i use this trick my download speed was 200-250kbps
.PNG)

How To Make Single Name On Facebook Without Proxy 2017 With One App SoloVPN 100 Working Trick
How To Make Single Name On Facebook Without Proxy 2017 With One App SoloVPN 100 Working Trick
Hi Assalam O Aaikum! Welcome To All About Helping Tricks Blog. Today I Show You How To Create Single Name Facebook ID. Lets Starts... Sabse Pehly Apko Aik App Ki Zaroorat Hai Jiska Naam Hai "SoloVPN" Yeh App Apko Play Store Se Mil Jaye Gi Ap is App Ko Wahan Se Download Kr Len.. Download Karny K Bad Ap Is App Ko Open Kren. Aur Iski Locations Mein Se Indonesia Ko Select Kr Len.. Ab Apka Vpn Connect Ho Chuka Hoga. Ab Ap Apna Mobile Ka Koi Bhi Browser Open Kren Aur Wahan Apni Facebook Id Login Kren.. Aur Phir Setting Main Jaa K Language Bahasa Indonesia Kr Len. Aur Ab Account Setting Mein Jaa K Last Name Ko Delete Ke Den Aur Password Enter Kr K Save Kr Den. Ab Apka Name Change Ho Chuka Hoga.. Aur Last Pe Pehly Wali Language Kr Len... Now Enjoy... I Hope You People Like This Working Trick.. Agar Kisi Ko Samjh Nahi Aai To Please Video Dekh Len.. THANKS
Saturday, December 23, 2017
HUAWEI Y300 0100 B199 v4 1 Officeil Firmwar 100 Tested
HUAWEI Y300 0100 B199 v4 1 Officeil Firmwar 100 Tested


THIS FIRMWARE SOLVED HANG ON LOGO TOUCH NOT WORK CAMERA MONKEY VIRUS PROBLEM LCD/Display Fix/Black 100% SOLVED


HUAWEI Y300-0100 B199 v4.1 Officeil Firmwar 100% Tested


Subscribe to:
Posts (Atom)