Showing posts with label custom. Show all posts
Showing posts with label custom. Show all posts
Thursday, January 4, 2018
How to Root and Flash Custom Recovery on Samsung Galaxy SL GT I9003
How to Root and Flash Custom Recovery on Samsung Galaxy SL GT I9003

Maybe you�re looking to run some root-only apps on your device? Maybe you want the freedom that your friend�s having with his rooted Android device? No problem, we�ll help you root your device. The Samsung Galaxy SL can be rooted using the popular SuperOneClick app and this guide walks you through all the steps to root the device. So, follow it and get your device rooted.
I. Before You Begin:
1. Be aware that rooting your device will void its warranty. However, unrooting should help you reinstate the warranty provided an unrooting procedure�s available there.
2. This works on Windows based PCs only.
II. Downloading Required Files:
1. SuperOneClick (Download the latest version of the app)
III. Rooting the Samsung Galaxy SL (GT-I9003):
1. Download and place the app archive onto your Desktop.
2. Extract files from the archive over to your Desktop.
3. Turn ON the USB debugging option on your device by heading to Menu>>Settings>>Applications>>Development>>USB debugging.
4. Once enabled, connect your device to your PC via USB cable.
5. Run the SuperOneClick app by double-clicking on its executable file.
6. Click Root button in the app and it�ll start rooting your device.
7. Once it�s done, reboot your device.
8. You�re done!
Awesome! Your device has been rooted and you should be able to find the Superuser app in your App Drawer. Your phone is now ready to be loaded with root-only apps!
IV. Flash a Custom Recovery Image (Optional):
1. If you would like to flash a custom recovery image in order to flash custom ROMs, head to the How To Flash a Custom Recovery Image on the Samsung Galaxy SL (GT-I9003) to learn how to do that.
If this procedure helped you please thank/donate to the original developers here and here.
If you need help with this procedure, please ask in the comments below.

Wednesday, January 3, 2018
How To Install TWRP Custom Recovery and Root Moto G4 Plus
How To Install TWRP Custom Recovery and Root Moto G4 Plus
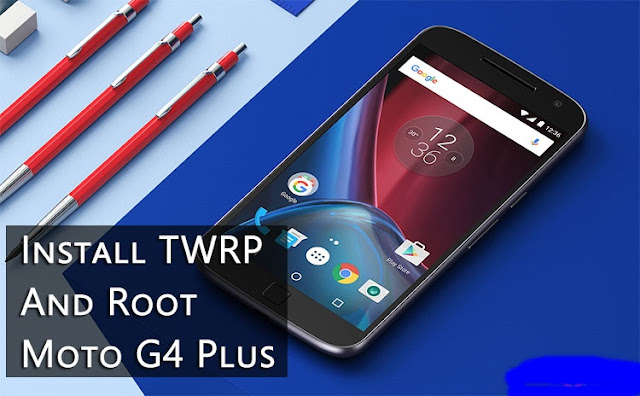
Moto G4 Plus is the better variant of the two Moto G series devices launched last month. With a better camera, more RAM and a fingerprint scanner, Moto G4 Plus should be your choice over Moto G4 if you are looking for a good smartphone in this price segment. Moto G4 Plus runs the latest Android Marshmallow 6.0.1 and the user experience is quite similar to a Nexus smartphone. The only difference being Moto display and Moto Camera are added with few nifty features like double twist to open the camera, double chop to start flashlight, etc.
The user experience is quite minimal with minimal customization options available. but if you wish to enhance your user experience and want to customize your Moto G4 Plus according to your liking and requirements you would need a rooted device. Here is a step by step guide to root your Moto G4 Plus.
Before starting off with this guide follow the following guide: �How To Unlock Bootloader on Moto G4 /G4 Plus�. As you would need a Moto G4 with an unlocked bootloader to start the rooting process.
Things You Will Need
-
Moto G4 Plus with Unlocked Bootloader
-
TWRP 3.0.2-2 | Link
-
Root-motog4-athena.zip | Link
-
SuperSU v2.62-3 Beta | Link
Steps To Follow
Step 1. Download the SuperSU zip file and copy it to your Moto G4 Plus�s internal storage.Step 2. Make sure you setup the Minimal ADB and Fastboot on your PC. If not follow the guide given above. Then download the TWRP 3.0.2-2.img on your PC and copy the file to Minimal ADB and Fastboot folder (usually C:/Program Files/Minimal ADB and Fastboot). You may rename the file to �twrp.img� for ease of use in later steps.
Step 3. Now reboot your device to Bootloader mode. To do so, power off the device and then press and hold Power + Volume Down buttons simultaneously for few seconds.
Step 4. Once in Bootloader mode connect your device to your PC using Usb cable. Also, start the Minimal ADB and Fastboot on your PC.
Step 5. Enter the following command in the window opened and then press enter:
Step 6. Download the Root-motog4-athena.zip from the link given above and extract the zip file on your PC. In the extracted folder you will see an �ROOT.bat� file, run this file. This will flash the custom boot image on your device which will help in rooting your device.fastboot flash recovery twrp.img
Step 7. Now reboot your device to TWRP custom recovery. To do so, make sure your device is in bootloader mode then select Recovery option from the menu. You can use volume down button to scroll through the options and volume UP to select an option.
Step 8. Once is TWRP recovery, select Install option and browse the SuperSU zip file which you earlier copied to your device. Select the SuperSU zip file and swipe to install it on your device.
Step 9. Reboot your device to the system.
Congratulations! You have successfully rooted your Moto G4 Plus. Enjoy your rooted device by customizing it according to your needs. You may check if your device is successfully rooted using the Root checker application available on Play Store.
joeykrim Tools Free
Download
Tuesday, January 2, 2018
How to Install Custom Firmware on Nokia N8 ! Video Tutorial
How to Install Custom Firmware on Nokia N8 ! Video Tutorial

Symbian Belle is leaked and is available for Nokia N8. If you want to install this leaked version on your N8, here is a quick video tutorial on how to install Symbian custom firmware on Nokia smartphone by Symbianlatino. The video gives step by step instructions on how to install CFW on Nokia using Phoenix software, video after break.
Saturday, December 30, 2017
iLogic Delete Custom iProperties
iLogic Delete Custom iProperties
Issue:
You have some custom iProperties in your file that you want to remove. Because you have a lot of files that contain these custom iProperties, you find yourself doing this quite often. Youd like an iLogic rule that will help with this when you encounter these custom iProperties.

Solution:
Here are three rule variations to help with this.
Variation 1
Delete only the custom iProperties found in the list.
------- start of ilogic ------
define list of custom properties to delete
Dim MyArrayList As New ArrayList
MyArrayList.add("Hello World 001")
MyArrayList.add("Hello World 002")
MyArrayList.add("Hello World 003")
define custom property collection
oCustomPropertySet = ThisDoc.Document.PropertySets.Item("Inventor User Defined Properties")
look at each property in the collection
For Each oCustProp in oCustomPropertySet
check property name against the list you want to delete
If MyArrayList.Contains(oCustProp.name)Then
delete the custom iProperty
oCustProp.Delete
Else
skip it
End If
Next
------- end of ilogic ------
Variation 2
Delete only the custom iProperties NOT found in the list.
How to Root Android One Devices:
- Download super su zip file from here and save it to your SD card.
- Then turn on your phone in recovery mode and select choose file.
- Then select install zip from external SD card and select downloaded zip file.
- Install it and youre done.
- Start your phone and you will see super user app.
- Now your phone is Rooted !
Source: xda
How to Jailbreak Using a Custom Restore IPSW and RedSn0w Windows
How to Jailbreak Using a Custom Restore IPSW and RedSn0w Windows
This entry needs translation. To help us and submit a translation please click here
These are instructions on how to jailbreak your iPhone using a custom restore ipsw and RedSn0w for Windows.**At this time you cannot generate a custom restore ipsw using Windows. You will have to download one or get it from a Mac friend. You may find it easier to use one of the simple jailbreak options like Limera1n or Greenpois0n.
Step One
Create a folder on your desktop called Pwnage
Download RedSn0w from here and place it in the Pwnage folder. Likewise, download the latest 4.1 firmware for your device from here.
Extract the redsn0w zip that you just downloaded into the same folder.

Step Two
Launch the redsn0w application from the redsn0w folder we extracted earlier.

Step Three
Once RedSn0w opens click the Browse button

Step Four
Select the 4.1 firmware ipsw we placed in the Pwnage folder on our desktop then click Open.

Step Five
Once the firmware has been verified click the Next button to continue.

Step Six
RedSn0w will now prepare the jailbreak data

Step Seven
From this window you can select the jailbreak options you would like. Choose to put your iPhone in DFU mode.


Step Eight
Please plug your iPhone into the computer and make sure its OFF then click the Next button

Step Nine
RedSn0w will now guide you through the steps to get into DFU mode. You can find more help with DFU mode here

Hold down both the Home button and the Power button for 10 seconds.

Release the Power button and continue holding the Home button until RedSn0w detects the device.

Step Ten
RedSn0w will now exploit your device with limera1n.

Step Eleven
Your device will now be in pwned DFU mode.

Step Twelve
Launch iTunes and select your device from the list on the left. To make iTunes restore to a custom ipsw, hold down Shift and click the Restore button. This will bring up window letting you select the custom ipsw for restore.

If this tutorial needs to be updated please let us know here
Subscribe to:
Posts (Atom)