Showing posts with label gt. Show all posts

Thursday, January 4, 2018

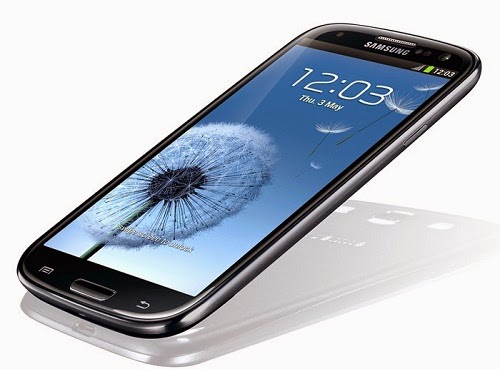
How to Install Android 4 4 KitKat Based ROM on Galaxy S3 GT I9300 GT I9305 AT T Sprint T Mobile Verizon

How to Install Android 4 4 KitKat Based ROM on Galaxy S3 GT I9300 GT I9305 AT T Sprint T Mobile Verizon


Galaxy-s3-android-4.4-kitkat
Nestle would never have even imagined that some day billions of Android users would start chanting the name of one of its confectionary products. I never seen such a brilliant way of advertising any product. Everybody with an Android phone or tablet is looking to get KitKat. While Nexus users have already been enjoying the new flavor of Android, or about to receive it anytime soon, there are billions others who are still looking toward their device  OEMs and carriers to have at least the lower versions of the platform like Android 4.2 and 4.3.
Owning a Google Nexus device is a kind of guarantee that you would be one of the first to receive the latest version of Android, but if you got a phone/tablet from manufacturers like Samsung, LG, HTC, Sony, etc., you might have no choice but to wait perpetually. Even if you get a new (?) update, it�s got to be  an old thing by the time it reaches you. Samsung�s treatment with its popular phones like the Galaxy S3 and Note 2 is a very relevant example of how manufacturers shirk from sending software updates to their users.
Yesterday we published an article on installing Android 4.4 KitKat based custom ROMs on the Galaxy Note 2 and many of its variants. Extending our KitKat treat, we have now come with a collection of Android 4.4 custom ROMs for the Samsung Galaxy S3. If you own any of the following variants of the device, you can update your phone with the newest sensation of Android:
  • Samsung Galaxy S3 GT-I9300
  • Samsung Galaxy S3 LTE GT-I9305
  • AT&T Galaxy S3 SGH-I337 (the ROMs for this model can also be installed on the Canadian variants e.g, Rogers, Bell, Telus, etc.)
  • Sprint Galaxy S3 SPH-L710
  • T-Mobile Galaxy S3 SGH-T999
  • Verizon Galaxy S3 SCH-I535

Warning:

The procedure described below is not meant for perfect noobs as it is considered risky. Follow all instructions carefully if you do not wish to caught into a compromising situation. We would always be at our end to help you in case of a mishap but we take no responsibility. Proceed only if you agree to these terms.

Prerequisites:

  • A rooted Samsung Galaxy S3. If you have not rooted your phone yet, please take some time and root it using our easy rooting tutorial.
  • The KitKat ROMs we are going to talk about are custom ROMs and therefore they require the presence of a custom recovery like ClockworkMod or TWRP on your device. Not only this, you must have the latest version of the recovery you use. You can download ROM Manager (CWM) or Goo Manager (TWRP) to install the latest version.
ROM Manager
Download @Google Play
ROM Manager
Developer: ClockworkMod
Price: Free
GooManager
Download @Google Play
GooManager
Developer: Snipanet Apps
Price: Free

Note:

Since Goo Manager is working properly these days, we recommend that you install CWM version 6.0.4.3 on your device. If you know how to install recovery image file using ADB command, download the latest CWM recovery .img file from here and install it. 6.0.4.3

About the ROMs:

Please note that most of the ROMs that we have mentioned below are based on CM 11 and therefore have all the bugs of their parent. Being in early stage of development, it is obvious that you might encounter a few bugs in performance. Please install the appropriate ROM on your phone, test them and if you find them stable enough for you,use them. We hope that with new updates, all these ROMs will become more mature and stable.
 galaxy-s3-kitkat

Downloads:

Download the Android 4.4  ROM:

Now here are the CyanogenMod 11 based KitKat ROMs for Samsung Galaxy S3. In case you find more that one ROM listed for your S3 model, download any of the two.
  • Samsung Galaxy S3:
    • CM 11 Unofficial ROM: cm-11-2013-UNOFFICIAL-i9300-V5.zip
  • Samsung Galaxy S3 LTE:
    • CM 11 Unofficial ROM: cm-11-2013-UNOFFICIAL-i9305.zip
  • AT&T & Canadian Galaxy S3 (SGH-1747 and 1747M):
    • CM 11 Unofficial ROM: cm-11-2013-UNOFFICIAL-d2att.zip
    • Quantum ROM: Quantum-v3-Beta.zip
    • BeansTalk ROM: BeanStalk-4.4001-20131120-d2att.zip
  • Sprint Galaxy S3:
    • CM 11 Unofficial ROM: cm-11-2013-UNOFFICIAL-d2spr.zip
  • T-Mobile and Canadian Galaxy S3 (SGH-T999 and T999V):
    • CM 11 Unofficial ROM: cm-11-2013-UNOFFICIAL-d2tmo.zip
  • Verizon Galaxy S3:
    • CM 11 Unofficial ROM: cm-11-2013-UNOFFICIAL-d2vzw.zip

Download Google Apps:

Google apps are not included in the ROM package. Therefore, you need to download and install them separately. Always choose the latest version of Gapps.
pa_gapps-full-4.4-20131118-signed.zip
Mediafire Mirror

Download Latest SuperUser:

UPDATE-SuperSU-v1.69.zip

How to Install:

  1. Important: Do not forget to backup your phone�s EFS/IMEI before. Read this article for detailed tutorial.
  2. Charge your phone.
  3. Copy the downloaded Android 4.4 ROM file and the latest Gapps package from above and copy them to your phone.
  4. Also copy the SuperSU zip file to the device.
  5. Boot your Galaxy in recovery mode. Here is how to do it: hold down the Volume Up+Home+Power buttons together for 4-6 seconds till the screen turns up and you see the recovery screen. Alternatively,you can enter recovery mode using  these apps.
  6. If you are using CWM, use the volume keys to scroll up/down and the power button to select files and options. TWRP users can simply touch the corresponding buttons to get a job done.
  7. Important: Before doing anything, do not forget to backup your current ROM using �backup and restore�option (in CWM) or �Backup� option (in TWRP) and check all items to backup.
  8. CWM Users: Go back to main menu in recovery and select �wipe data / factory reset> yes�. Then go to�mounts and storage� and wipe data and system.
  9. TWRP Users: Just tap on �Wipe� button and select Data, System and Cache.
  10. Now go back again and choose �install zip from sdcard> choose zip from sd card� option, select the ROM file in zip and choose �yes� when asked. If you have TWRP, use �Install� button, select the ROM and swipe the slider to confirm installation.
  11. When the ROM is installed, install the Gapps zip package just like you flashed the ROM in Step 11.
  12. Then install the �UPDATE-SuperSU-v1.69.zip� file the same way.
  13. Finally, select the reboot system option.
The first boot will takes longer than usual so wait patiently till the device boots up and you see the welcome screen. Go through the startup setup like data connection, Gmail, Google Wallet, etc.  In case you have any doubts or question, feel free to share your thoughts. Thanks!

visit link download
Read more »

How to Root and Flash Custom Recovery on Samsung Galaxy SL GT I9003

How to Root and Flash Custom Recovery on Samsung Galaxy SL GT I9003


Root the Samsung Galaxy SL (GT-I9003)
Maybe you�re looking to run some root-only apps on your device? Maybe you want the freedom that your friend�s having with his rooted Android device? No problem, we�ll help you root your device. The Samsung Galaxy SL can be rooted using the popular SuperOneClick app and this guide walks you through all the steps to root the device. So, follow it and get your device rooted.

I. Before You Begin:

1. Be aware that rooting your device will void its warranty. However, unrooting should help you reinstate the warranty provided an unrooting procedure�s available there.
2. This works on Windows based PCs only.

II. Downloading Required Files:

1. SuperOneClick (Download the latest version of the app)

III. Rooting the Samsung Galaxy SL (GT-I9003):

1. Download and place the app archive onto your Desktop.
2. Extract files from the archive over to your Desktop.
3. Turn ON the USB debugging option on your device by heading to Menu>>Settings>>Applications>>Development>>USB debugging.
4. Once enabled, connect your device to your PC via USB cable.
5. Run the SuperOneClick app by double-clicking on its executable file.
6. Click Root button in the app and it�ll start rooting your device.
7. Once it�s done, reboot your device.
8. You�re done!
Awesome! Your device has been rooted and you should be able to find the Superuser app in your App Drawer. Your phone is now ready to be loaded with root-only apps!

IV. Flash a Custom Recovery Image (Optional):

1. If you would like to flash a custom recovery image in order to flash custom ROMs, head to the How To Flash a Custom Recovery Image on the Samsung Galaxy SL (GT-I9003) to learn how to do that.
If this procedure helped you please thank/donate to the original developers here and here.
If you need help with this procedure, please ask in the comments below.


visit link download
Read more »

Wednesday, January 3, 2018

How To Update Samsung Galaxy S3 LTE GT I9305 Firmware Version Using Odin Flasher

How To Update Samsung Galaxy S3 LTE GT I9305 Firmware Version Using Odin Flasher


What is Firmware Update Process and Why We Need it:
The Firmware Update process means that your device will get a newer software version or we can say it will run with a newer version of its Operating System, For example if your Samsung Android device is running Android version 4.0.4 and Samsung release Android 4.1.2 version, Then you need to perform a Firmware Update process to install the new version into your device.

Mostly the new Firmware version is released to fix some bugs or to add some new functions, And sometimes it is released to fix some security threats.

What we should do before performing the update:
- First of all you should know your current device firmware version, Write it down so in case something goes wrong it will help you to fix your device.
- Check that you got the suitable firmware package for your device, And make sure to get it from trusted sources only.
- Check your devices battery level to be at least at 90%, Otherwise charge it before starting the update process.
- Make sure to backup any saved data into your device, Like contacts, messages...etc.

Needed Downloads For Updating Samsung I9305 GS3 LTE Firmware:
- Samsung I9305 GS3 LTE Stock Firmware Package.
- Odin Flasher.
- Samsung I9305 GS3 LTE USB Drivers.

Needed Tools For Updating Samsung I9305 GS3 LTE Firmware:
- Suitable USB cable.
- A stable computer running Windows OS.

Important Notice: We provide this guide for help purpose only, And we hold no responsibility at all, So keep in mind that your are doing this at your own RISK.

Preparation:
After downloading the needed files you should extract the zipped ones, And install the USB drivers (Restart your PC after installing).


Samsung GT-I9305 GS3 LTE Firmware Update Steps:

- Turn off the device, And take out its battery, SIM and memory cards.
- Run Odin.exe program.
- Check these options: Re-Partition (If you have PIT file only), Auto Reboot, F.Reset Time.
- Click PIT button to select: m3.pit
- Firmware files selection:


Click PDA button to select: CODE_I9305xxxxxx_746327_REV00_user_low_ship.tar.md5
Click Phone button to select: MODEM_I9305xxxxxx_REV05_CL1213990.tar.md5
Click CSC button to select: CSC_xx_I9305Oxxxxxx_1065030_REV00_user_low_ship.tar.md5

- Entering the Download Mode:
Put the battery back into your device, Press and Hold Volume Down key + Power, After you get the warning message release all keys and press Volume Up key.

- Use the USB cable to connect your device to the computer, Dont use any USB-HUB for connecting, And use only main USB slots.
- Wait until Windows detects the connected device and installs its suitable USB drivers.
- In case everything is OK, Then Odin program will detect your connected device (0:[COMxx]).
- Click on Start button.
- Odin program will start installing the new firmware files into your device, So wait until the device reboots.
- If the update was successfully done, Then you will notice PASS! Word at Odin program.
- Disconnect the USB cable.
- Check your device firmware version *#1234# (You should see the new installed one).
- Turn off the device again, Reinsert the SIM and memory cards and turn it on.
- Now you can customize your device after installing the new firmware version.
- If you made any backup of your device data before the update then you can restore it again.
- Done.

Notice: When you get one big file inside the firmware package, Then it should be selected as aPDA file only, And do not check Re-Partition option or use PIT file at all.


visit link download
Read more »

Tuesday, January 2, 2018

How To Install Android Kitkat Update on Samsung Galaxy S3 LTE GT I9305N

How To Install Android Kitkat Update on Samsung Galaxy S3 LTE GT I9305N


Samsung launched so-many Smartphones earlier and now its time to launch their software updates. Samsung Galaxy S3 and S4, are the high end devices launched last year and Samsung has already released Android 4.4 Kitkat update for Samsung Galaxy S4. This time the company launched the Kitkat update for Samsung Galaxy S3 I9305 LTE version.

Google launched Android 4.4 Kitkat update last year but Samsung has not released Kitkat update for their devices.It seems like Samsung is now updating their selected Android devices.However, Google has already launched their next Android version, called Android L and also confirmed Motorola devices which will soon get an Android L update. To remind you, the Android L preview is already launched and it is available for download for developers.


Well, many users still dont know, How to manually update their Android device. So today we have decided to make a tutorial on this topic.Samsung Galaxy S3 is a high-end Android device and it runs Android Jelly Bean OS but now it received Android 4.4 Kitkat update.

This new update brings many changes and new apps.It features all new User Interface and new taskbar.This update changes some icons and also UI.

An Android Kitkat update for Samsung Galaxy S3 comes with a new Touchwiz launcher and new interface.It can change your user experience.Android 4.4 update can increase your device performance and battery life.
  • Model: Samsung Galaxy S3 LTE GT-I9305N
  • Version: Android 4.4.4 KitKat
  • PDA: I9305NXXUFNI4
  • CSC: I9305NNEEFNI4
  • MODEM: I9305NXXUFNI4
Disclaimer: Follow this guide carefully and on your risk.We are not responsible for any damage during or after firmware installation.

How To Install Android 4.4 Kitkat Update on Samsung Galaxy S3 LTE GT-I9305N:
  1. Download zip file on your computer and extract it.
  2. Now turn off your device and reboot it in recovery mode by pressing volume down, home and power key.
  3. Now open Extracted files and open Odin tool.
  4. Keep in mind that "re-partition" is not checked.
  5. Click on PDA button  and select .tar.md5 file from the extracted zip file.
  6. Now its time to connect your device.Connect your Samsung Galaxy S3 usign USB cabel(You should install Samsung USB drivers on your computer).
  7. If you already installed drivers then you will get "ADDED" message.If not then install drivers first and follow above step again.
  8. Now click on start button.Wait for sometime.Your device will reboot automatically.Thats it.
  9. Enjoy Android 4.4 Kitkat update and its new features.
Download Update: samsung-updates


visit link download
Read more »

Monday, December 25, 2017

How to setup kitkat 4 4 on Samsung Galaxy S GT I9000

How to setup kitkat 4 4 on Samsung Galaxy S GT I9000


kitkat 4.4 on Samsung Galaxy S GT-I9000

CyanogenMod is a free, community built, aftermarket firmware distribution of Android 4.4 (KitKat), which is designed to increase performance and reliability over stock Android for your device.

CyanogenMod is based on the Android Open Source Project with extra contributions from many people within the Android community. It can be used without any need to have any Google application installed. Linked below is a package that has come from another Android project that restore the Google parts. CyanogenMod does still include various hardware-specific code, which is also slowly being open-sourced anyway.

All the source code for CyanogenMod is available in the CyanogenMod Github repo. And if you would like to contribute to CyanogenMod, please visit out Gerrit Code Review. You can also view the Changelog for a full list of changes & features.

What are UNOFFICIAL builds? A version of CyanogenMod not compiled by CyanogenMods build servers and may contain code not yet committed to the repository. If you find bugs/issues you can/must discuss here (do not submit nightlies bug on CyanogenMod issue tracker).

Downloads

Latest build: ROM Download
Google Apps: GApps Download

Installation

- First time flashing CM11 to your Galaxy S (or coming from another ROM)?

    Root your device and install ClockworkMod Recovery.
    Reboot into Recovery using 3-button-combo
    Do a Nandroid backup!
    WIPE (wipe data/factory reset + wipe cache partition)
    Install the ROM from internal sdcard using ClockworkMod Recovery
    Optionally install the Google Addon

- Upgrading from CM7/CM9?

    Do a Nandroid Backup!
    WIPE (wipe data/factory reset + wipe cache partition)
    Install the ROM from internal sdcard using ClockworkMod Recovery
    Optionally install the Google Addon

- Upgrading from CM10/10.1?

    Do a Nandroid Backup!
    Install the ROM from internal sdcard using ClockworkMod Recovery
    You will finally see a "set_metadata_recursive" status 7 error. That is normal.
    Reboot back into recovery (the reboot is required)
    Install the ROM again from internal sdcard using ClockworkMod Recovery
    Optionally restore /data from Nandroid Backup (the update will wipe your /data)
    Optionally install the Google Addon

- Upgrading from CM10.2?

    Do a Nandroid Backup!
    Install the ROM from internal sdcard using ClockworkMod Recovery
    Optionally install the Google Addon

- Upgrading from another build of CM11?

    Do a Nandroid Backup!
    Install the ROM from internal sdcard using ClockworkMod Recovery

Warning: You may get set_metadata_recursive related-errors during install if youre using a custom kernel without SELinux support. In that case, revert to the stock kernel before continuing or follow the instruction for upgrading from CM10.1.
Note: The partition layout of CM11 is the same as CM10.2.

Known Issues
Please do not report bugs if it is already listen in the list of known issues

    Display issues in Browser & other embedded webviews (Google Chrome works fine)
    No access to TV-Out menu
    Layout issues in lockscreen
    Menu soft-buttons appearing where they shouldnt
    Some CyanogenMod features a missing - please do not file bug reports for those.
    Privacy guard icon not disappearing when exited app
    Broken layout of quick message popup (SMS)
    Cannot set value via custom brightness "Edit" menu
    Vibrate on answer call doesnt work properly
    If back button is pressed during incoming call, you cant answer the call.
    FC when entering file manager settings
    FC when changing image sharpness
    Flash CM10.2 from recovery (workaround: restore a 10.2 backup or flash a 10.2 kernel before flashing)


Reporting Bugs

You are allowed to report bugs only in this thread. Before reporting a bug, please make sure you are running as stock as possible. This means no custom kernel, no custom framework modification, etc. If you are using any of the above modifications, please flash the rom again to get rid of the modifications before reporting.

REPORT BUGS IN THIS THREAD ONLY

    Grab a logcat right after the problem has occurred. (Please include at least a few pages of the log, not just the last few lines, unless you know what youre doing.)
    If it is a random reboot, grab /proc/last_kmsg. (Do not bother getting a logcat unless you can get it just before the reboot. A logcat after a reboot is useless)
    If the problem disappears after running "setenforce 0" from a root shell, grab /data/misc/audit/audit.log

Remember to provide as much info as possible. The more info you provide, the more likely that the bug will be solved. The following is a useful format to follow. Note: If you can provide the latest night/build that the bug didnt exist, it would greatly help in tracking down what caused it.


visit link download
Read more »

How to Root and Unroot the Samsung Galaxy Fit GT S5670 running Android 2 2 1 Froyo

How to Root and Unroot the Samsung Galaxy Fit GT S5670 running Android 2 2 1 Froyo


Samsung-Galaxy-Fit-root-unroot 
 
The Samsung Galaxy Fit was a pretty fit device when it was released back in March 2011 but times have changed and there are faster, better performing devices than this at the current time.  Yet, there might be some people who have hung on to this device and need some guides on rooting it, installing custom ROMs, etc.  This guide is for them and will help them root and unroot their Samsung Galaxy Fit without much hassle.

I.  Before You Begin

1.  This procedure is designed to work with the Samsung Galaxy Fit running Android 2.2.  If you are running Gingerbread, look to our other post to help you.
2.  Back up anything you feel is important before you begin.
3.  Make sure you have the necessary drivers installed before you begin.  If not, installing Samsung Kies will usually put all the necessary drivers in place.

II.  Necessary Downloads

SuperOneClickv2.3.3-ShortFuse.zip [Download link available here]

III.  Rooting the Galaxy Fit

1.  Extract SuperOneClickv2.3.3-ShortFuse.zip to a folder on your desktop.
2.  Enable USB Debugging on your device.  Go to Menu > Settings > Applications > Development and tick the USB Debugging checkbox to do this.
3.  Enable installation of apps from unknown sources.  Go to Menu > Settings > Applications and tick the Unknown sources checkbox.
3.  Connect your device to your PC.  Windows 7 should install any drivers needed at this point.
4.  From the folder you extracted above, run SuperOneClick.exe.
5.  Click on Root.
You should now be holding a rooted Galaxy Fit in your hands!

IV.  Unrooting the Galaxy Fit

1.  Follow the same steps as in Section III until Step 4.
2.  Click on Unroot.

V.  Flashing Custom Recovery (Optional)

If you would like to flash a custom recovery image in order to flash custom ROMs, head to the next procedure to learn how to do that.
If this procedure helped you please thank/donate to the original developers here.


visit link download
Read more »

Sunday, December 24, 2017

How to install CM12 Android L into GT N7000

How to install CM12 Android L into GT N7000


How to install CM12 Android L into GT-N7000

  1. Download n7000-CWM-KitKatCompatible.zip OR 
  2. V1.2.1-bauner-kernel-cm-aokp-kitkat-linaro4.9.2-n7000.zip
  3. Download CM12 Alpha 3
  4. Download Android L GAPPS


Steps to install:
  1. Copy Rom + Google Apps + KK Kernel into SDCard
  2. Reboot into recovery
  3. Flash KK Kernel
  4. Reboot recovery
  5. Factory reset
  6. Flash the rom and gapps zip files
  7. Reboot
  8. DONE!


Thanks @bauner XDA developer.

  • CM12 continue reading here. 
  • Bauner kernel continue reading here


visit link download
Read more »

Saturday, December 23, 2017

How To Install a Viper 5900 Car Alarm on a 2008 Ford Mustang GT

How To Install a Viper 5900 Car Alarm on a 2008 Ford Mustang GT