Showing posts with label g4. Show all posts
Showing posts with label g4. Show all posts
Wednesday, January 3, 2018
How To Install TWRP Custom Recovery and Root Moto G4 Plus
How To Install TWRP Custom Recovery and Root Moto G4 Plus
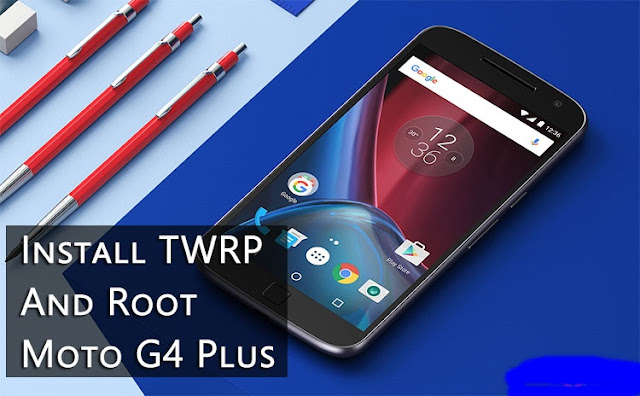
Moto G4 Plus is the better variant of the two Moto G series devices launched last month. With a better camera, more RAM and a fingerprint scanner, Moto G4 Plus should be your choice over Moto G4 if you are looking for a good smartphone in this price segment. Moto G4 Plus runs the latest Android Marshmallow 6.0.1 and the user experience is quite similar to a Nexus smartphone. The only difference being Moto display and Moto Camera are added with few nifty features like double twist to open the camera, double chop to start flashlight, etc.
The user experience is quite minimal with minimal customization options available. but if you wish to enhance your user experience and want to customize your Moto G4 Plus according to your liking and requirements you would need a rooted device. Here is a step by step guide to root your Moto G4 Plus.
Before starting off with this guide follow the following guide: �How To Unlock Bootloader on Moto G4 /G4 Plus�. As you would need a Moto G4 with an unlocked bootloader to start the rooting process.
Things You Will Need
-
Moto G4 Plus with Unlocked Bootloader
-
TWRP 3.0.2-2 | Link
-
Root-motog4-athena.zip | Link
-
SuperSU v2.62-3 Beta | Link
Steps To Follow
Step 1. Download the SuperSU zip file and copy it to your Moto G4 Plus�s internal storage.Step 2. Make sure you setup the Minimal ADB and Fastboot on your PC. If not follow the guide given above. Then download the TWRP 3.0.2-2.img on your PC and copy the file to Minimal ADB and Fastboot folder (usually C:/Program Files/Minimal ADB and Fastboot). You may rename the file to �twrp.img� for ease of use in later steps.
Step 3. Now reboot your device to Bootloader mode. To do so, power off the device and then press and hold Power + Volume Down buttons simultaneously for few seconds.
Step 4. Once in Bootloader mode connect your device to your PC using Usb cable. Also, start the Minimal ADB and Fastboot on your PC.
Step 5. Enter the following command in the window opened and then press enter:
Step 6. Download the Root-motog4-athena.zip from the link given above and extract the zip file on your PC. In the extracted folder you will see an �ROOT.bat� file, run this file. This will flash the custom boot image on your device which will help in rooting your device.fastboot flash recovery twrp.img
Step 7. Now reboot your device to TWRP custom recovery. To do so, make sure your device is in bootloader mode then select Recovery option from the menu. You can use volume down button to scroll through the options and volume UP to select an option.
Step 8. Once is TWRP recovery, select Install option and browse the SuperSU zip file which you earlier copied to your device. Select the SuperSU zip file and swipe to install it on your device.
Step 9. Reboot your device to the system.
Congratulations! You have successfully rooted your Moto G4 Plus. Enjoy your rooted device by customizing it according to your needs. You may check if your device is successfully rooted using the Root checker application available on Play Store.
joeykrim Tools Free
Download How to Unlock Moto G4 G4 Plus Bootloader
How to Unlock Moto G4 G4 Plus Bootloader

Moto G4 and Moto G4 Plus are the newest entry in the Lenovo-owned Moto G series of devices. The devices were recently launched at a launch event held in New Delhi. Both Moto G4 and G4 Plus comes with a 5.5. inch 1080p screen, which is a great improvement from last year�s models. Both devices are powered by Octacore Snapdragon 617 processor. While the G4 only has a 2Gb RAM model but G4 Plus comes in two variants one with 2gigs of RAM and another with 3gigs of RAM.
The main distinguishing feature between G4 and G4 Plus is the inclusion of fingerprint scanner and the better camera in the G4 Plus variant. All the other things remain quite the same in both the models. On the software front, both the Moto G4 variants run latest Android 6.0.1. The user experience is quite similar to stock Android, as you would get on a Nexus device. Few extra features like twist to open the camera, moto display, and double chop to start flashlight have been added to enhance the user experience.
In this guide, we will list out the steps to unlock the bootloader of your Moto G4 or Moto G4 Plus. Unlocking bootloader is a prerequisite step before rooting your device or making any other changes to your system files.
Warning: Following this guide will void your device�s warranty and it will also wipe all the data off your phone.
Backup
Before proceeding with this guide you must backup all of your data to a secure location. Backup all the application, photos, music, and all other important data you might have on your device. You may transfer the data to your PC or use an application that will backup everything to your external storage or to the cloud. Use the link given below to backup your applications and data.
 Helium - App Sync and Backup
 ClockworkMod Tools Free
Download Things You Will Need
Moto G4/G4 Plus
A PC
Usb drivers
Download and install these drivers on your PC. | Link
ADB and Fastboot
Follow this guide to install ADB and Fastboot on your Windows PC. You may follow this guide if you have a Mac PC.
Steps To Follow
Step 1. Visit Motorola website, scroll down and press Next button. Then register yourself there, you may Sign-in if you are already registered at their website.Step 2. Now open Settings app on your phone and go to About phone. Now tap Build number 7 times, this will unlock the Developer options on your device.
Step 3. Head back to the main Settings menu and go to Developer Options and switch the �Allow OEM Unlock� option. Also, enable the option for Android debugging.
Step 4. Now make sure you have successfully installed Usb drivers and Fastboot on your PC. Then connect your device to your PC using Usb cable.
Step 5. Now type the following command in the Minimal ADB and Fastboot window:
adb reboot bootloaderStep 6. The previous step would boot your device into bootloader mode. Now type the following command:
This command will show the output as shown below:fastboot oem get_unlock_data
$ fastboot oem get_unlock_data
 (bootloader) 0240540162024205#4C4D3556313230
 (bootloader) 30373as313630330df332323239#BD00
 (bootloader) 8A672BA4746C2CE0a328A2AC0C39F95
 (bootloader) 1A3E5#1F53280002000000000000000
 (bootloader) 0000000

On a Mac OS Desktop, the returned string format would be
 INFO0A40040192024205#4C4D3556313230
 INFO30373731363031303332323239#BD00
 INFO8A672BA4746C2CE02328A2AC0C39F95
 INFO1A3E5#1F53280002000000000000000
 INFO0000000
Code:0240540162024205#4C4D355631323030373as313630330df332323239#BD008A672BA4746C2CE0a328A2AC0C39F951A3E5#1F532800020000000000000000000000
Step 9. Click on the �Request Unlock Key� button and wait for the unlock key to be sent on your mail.
Step 10. Once you receive the unlock on your registered email, type the following command on Minimal ADB and Fastboot window:
Replace <code> with the unlock key you got in your email. Keep in mind this will unlock your device�s bootloader and will also wipe everything off your phone (including internal storage).fastboot oem unlock <code>
Step 11. Now wait for your device to reboot.
Congratulations! You have successfully unlocked the bootloader of your device. Now you may continue to rooting and/or install TWRP on our Moto G4/G4 Plus. The guide for those will be published soon on our website.
Stuck somewhere? Leave us your queries in the comments section below. We will try our best to resolve your issues as soon as possible.
Saturday, December 30, 2017
How To Take Screenshot on Moto G4 Plus Without Using Apps
How To Take Screenshot on Moto G4 Plus Without Using Apps
Generally, what we do is we take a screenshot or snapshot and share using WhatsApp, Hike, Telegram, etc. So, taking a screenshot on Moto G4 Plus is much easier using a special key combination. To take a snapshot on Moto G4 Plus, you don�t need to have an extra app which eats up your device valuable storage.

you can take screenshot at any time such as in between playing games, watching videos, listening music or while loading web pages. It�s much easier to take a snapshot on Moto G4 Plus without closing any of the running apps. In fact, there are many apps available in the market which can easily take a screenshot on Moto G4 Plus, but the problem is they requires root access and this is the reason, to avoid the apps. So, in this article we will be helping to take a snapshot on Moto G4 Plus without any hassle.
you can take screenshot at any time such as in between playing games, watching videos, listening music or while loading web pages. It�s much easier to take a snapshot on Moto G4 Plus without closing any of the running apps. In fact, there are many apps available in the market which can easily take a screenshot on Moto G4 Plus, but the problem is they requires root access and this is the reason, to avoid the apps. So, in this article we will be helping to take a snapshot on Moto G4 Plus without any hassle.
How To Take Screenshot on Moto G4 Plus Without Using Apps
- Get your screen ready of which you want to take a screenshot / snapshot of!
- Now, simultaneously hold Power Button and Volume Down button for 2 � 3 seconds.
- Immediately, you will have a preview of a screenshot and a new notification will be seen in your status bar.
- In the notification, it will say that the �Screenshot Captured�.
So, this is how you can take screenshot on Moto G4 Plus without using apps. In order to view the captured screenshot, pull down from the status bar and tap on notification. If you have cleared the notification, then go to Gallery and see the Screenshots folder to find all your captured screenshots in your device.
Wednesday, December 27, 2017
How to Root Moto G4 Plus After Nougat 7 0 Update for sock rom go to rompure com
How to Root Moto G4 Plus After Nougat 7 0 Update for sock rom go to rompure com
Root Moto G4 Plus on Android Nougat 7.0 .
Do you want to root Moto g4 plus on android 7.0 nougat ? if yes then you are at right place . Today we are here with the guide on How to root Moto G4 plus running on android N 7.0 Nougat .
Recently Motorola rolled out official android nougat update for the Moto g4 plus , If you havent updated it yet you can follow our guide on How to Update moto g4 plus to android Nougat 7.0 . After updating the Moto g4 plus many users wanted to root their devices and after rooting you can do many things like installing custom roms and more customizations . So lets start the guide on How to root Nougat on Moto G4 plus .

How to Root Nougat On Moto G4 plus .
To root Moto g4 plus in nougat we need a pc because as of now there is no way to root moto g4 plus on android nougat 7.0 without pc . There are some points and pre requirements you need to follow before rooting the smartphone :-
- This guide is only for Moto g4 plus running on android N 7.0 Nougat .
- TWRP or CWM recovery is required to flash the Moto G4 plus nougat rooting package . ( How to Install Twrp recovery on Moto G4 plus Nougat 7.0 )
- It is recommended to make a backup of all Important files .
- Minimum 60% of battery is required to root the device .
- It is necessary to follow each and every step carefully .
How to root Moto G4 plus running on android Nougat 7.0 .
- First of all Download Moto G4 Plus rooting package .
- Now Turn off your moto g4 plus completely .
- Now you have to boot Your moto G4 plus in Twrp recovery mode .
- To boot in recovery mode press volume down + power button together for around 8 seconds .
- Now your G4 plus will boot in fastboot mode .
- Now press the volume Down key and your G4 plus will enter in recovery mode .
- Now You will see many options .
- Choose Wipe Cache > Wipe Dalvik cache .
- Now Tap on install and Choose the Moto G4 plus rooting package you downloaded earlier .
- After flashing tap on Reboot .
- Thats All !! You have successfully root moto g4 plus on android Nougat 7.0 .
Proof Of Moto G4 plus root on Android Nougat 7.0 Update :-

So this was our guide on How to root moto G4 plus running on android Nougat , I hope this guide Helped you .
Saturday, December 23, 2017
How to Root MOTO G4 Plus 7 0 Nougat Update
How to Root MOTO G4 Plus 7 0 Nougat Update
Hello Guys in this post I will show you how to root moto g4 plus on nougat update. So As you know as moto roll out a new official update for moto g4 plus and in this post I will teach you step by step how to root moto device.
Pre-Required
- Boot loader Unlocked
- The Device should be running with custom TWRP recovery you can also check out How to Install TWRP Moto G4 Plus
- Battery atleaste 50% charged
How to Root Moto G4 Plus Nougat
- Download both zip files from the end of the post link given.
- Copy both zip files in your device internal storage
- Power off your device
- Now Boot your device into recovery mode by pressing Volume Down + Power button and press volume down button until you see the recovery mode option.
- Once you find the recovery mode option just press power button and your device boot into recovery mode.
- Now Tap on install button and select Xtream zip file and flash it on your device
- Once it flashed successfully, Similarly, flash SuperSU zip file on your device
- Now Reboot your device
- Now Download Phhs Superuser App from Play Store
- Now you can use your device with root power.
Download here
Elementx- http://bit.ly/2mhIKK8
SupeSU- http://bit.ly/2lGpXqD
Congratulation, Now you can enjoy your moto g4 plus nougat with root power. You can also check out How to update moto g4 plus nougat update.
Wednesday, December 20, 2017
HP Pavilion G4 Laptop Drivers For Windows7
HP Pavilion G4 Laptop Drivers For Windows7
 |
| HP Pavilion G4 Laptop Drivers For Windows7 |
Intel Chipset Drivers | |
Intel Chipset | Download |
Intel Management Engine Interface | Download |
HD Graphic Drivers | |
Intel High-Definition (HD) Graphics | Download |
HD Audio Drivers | |
IDT High-Definition (HD) Audio | Download |
Network Drivers | |
Atheros Wireless | Download |
Broadcom Wireless | Download |
Ralink 2011 802.11 b/g/n WiFi | Download |
Realtek RTL8102E | Download |
Broadcom 2070 Bluetooth | Download |
Ralink/Motorola Bluetooth Adapter | Download |
Mouse, Keyboard and Input Device Drivers | |
Synaptic Touch pad | Download |
Realtek Card Reader | Download |
Intel Rapid Storage Technology | Download |
HP Quick Launch Software | Download |
HP Wireless Assistant | Download |

Download HP Pavilion Laptop G4 All Drivers
Related Posts :- https://alllapdc.blogspot.in/2017/05/HPPavilionLaptopG6-2270dxDrivers.html
HP Core i3 6th Gen - (4 GB/1 TB HDD/DOS) 15-BE012TU NotebookTuesday, December 12, 2017
How to Install Unofficial Lineage OS 14 1 ROM on LG G4
How to Install Unofficial Lineage OS 14 1 ROM on LG G4
An unofficial build of Lineage OS is now available for the LG G4. For the uninitiated, Lineage OS is the new name for CyanogenMod ROM as the original maintainers of the ROM separated their ways.

As of now, the LOS ROMs are based on the same source code as CyanogenMod so there aren�t any real world difference between the two. However, changes to Lineage OS will be made once the new team is done with infrastructure setup for the new OS.
Step 2 � Connect and mount your LG G4 USB memory on your computer using the USB cable.
Step 3 � Now copy/paste the downloaded Unofficial Lineage OS 14.1 ROM zip file to your SD card. Make sure the file is in the SD card root (not in any folder).
Step 4 � Then turn OFF your phone and disconnect from the USB cable.
Step 5 � Now to get in the Recovery Mode. Switch ON the phone while pressing and holding Volume Up + Home + Power buttons together.
Step 6 � Once you are in ClockworkMod Recovery, select perform a full data wipe by selecting �wipe data/factory reset�. Use the Power button to select everything while in the Recovery Mode.
Step 7 � Then, perform a cache wipe by selecting �wipe cache partition�.
Step 8 � Now this is optional, but it is recommended to perform a wipe of your dalvik cache as well. You will not get into boot loops or any other errors. From CWM recovery, go to �advanced� and then select �wipe dalvik cache�.
Step 9 � Then go back to the main Recovery screen and select �install zip from SD card�.
Step 10 � Now select �choose zip from sdcard�. Using your volume keys, navigate to the Unofficial Lineage OS 14.1 ROM zip file that you copied to your SD card and select it using the Power button. Confirm the installation on the next screen and the installation procedure should start now.
Nougat 7.1 Gapps: Repeat the above step for the Gapps zip file as well and install it on your tablet.
Step 11 � After the installation completes, go to �+++++Go Back+++++� and reboot the phone by selecting �reboot system now� from the recovery menu .
Your LG G4 will boot now and it might take about 5 minutes to boot on your first time. So, please wait.
That�s it! Your LG G4 International � h815 should now have Unofficial Lineage OS 14.1 ROM installed on your phone! Go to Settings > About phone to verify.
As of now, the LOS ROMs are based on the same source code as CyanogenMod so there aren�t any real world difference between the two. However, changes to Lineage OS will be made once the new team is done with infrastructure setup for the new OS.
How to Install Unofficial Lineage OS 14.1 ROM on LG G4
Step 1 � Download Unofficial Lineage OS 14.1 ROM for your LG G4 and Nougat 7.1 Gapps to your computer.Step 2 � Connect and mount your LG G4 USB memory on your computer using the USB cable.
Step 3 � Now copy/paste the downloaded Unofficial Lineage OS 14.1 ROM zip file to your SD card. Make sure the file is in the SD card root (not in any folder).
Step 4 � Then turn OFF your phone and disconnect from the USB cable.
Step 5 � Now to get in the Recovery Mode. Switch ON the phone while pressing and holding Volume Up + Home + Power buttons together.
Step 6 � Once you are in ClockworkMod Recovery, select perform a full data wipe by selecting �wipe data/factory reset�. Use the Power button to select everything while in the Recovery Mode.
Step 7 � Then, perform a cache wipe by selecting �wipe cache partition�.
Step 8 � Now this is optional, but it is recommended to perform a wipe of your dalvik cache as well. You will not get into boot loops or any other errors. From CWM recovery, go to �advanced� and then select �wipe dalvik cache�.
Step 9 � Then go back to the main Recovery screen and select �install zip from SD card�.
Step 10 � Now select �choose zip from sdcard�. Using your volume keys, navigate to the Unofficial Lineage OS 14.1 ROM zip file that you copied to your SD card and select it using the Power button. Confirm the installation on the next screen and the installation procedure should start now.
Nougat 7.1 Gapps: Repeat the above step for the Gapps zip file as well and install it on your tablet.
Step 11 � After the installation completes, go to �+++++Go Back+++++� and reboot the phone by selecting �reboot system now� from the recovery menu .
Your LG G4 will boot now and it might take about 5 minutes to boot on your first time. So, please wait.
That�s it! Your LG G4 International � h815 should now have Unofficial Lineage OS 14.1 ROM installed on your phone! Go to Settings > About phone to verify.
Monday, December 11, 2017
HP Notebook G4 1201TX
HP Notebook G4 1201TX
This notebook comes loaded with the powerful Second Generation Intel Core i5 2430M processor that has a clock speed of 2.4 GHz. Built on an Intel HM65 Express chipset, the laptop also boasts of a 3 MB (L3 Cache) memory to help you work with multiple operations without facing any obstacles in terms of speed.
The HP G Series notebook features a 4 GB DDR3 system memory that is capable of being expanded up to 8 GB by using the 2 slots available. Storing your valuable data, be it movies, music or pictures, is convenient, courtesy of the SATA 640 GB HDD which has a RPM of 5400. Gaming enthusiasts will have their hands full with the AMD Radeon HD 6470M graphic processor that comes along with 1 GB DDR3 of dedicated graphics memory to support a wide variety of high-end games.


System Specification :
Featured in Intel 2nd Generation Core i5 processor15.6� Inches High resolution and definition LED Display
Wireless and Bluetooth connectivity options enabled
Supports 4GB RAM and 0.3 megapixel web camera
640GB hard disc drive with SATA hardware interface
It includes DVD Super Multi optical Drive & 5400 rpm
PROCESSOR
2nd Generation Core i5
Intel HM65 Express
2.4 GHz 3 MB (L3 Cache)
Memory
Expandable Memory Up to 8 GB
Memory Slots 2
4 GB DDR3
STORAGE
SATA 640 GB RPM 5400
OPTICAL DISK DRIVE
SuperMulti DVDR/RW with Double Layer Support
PLATFORM
Windows 7 Home Basic 64-bit
Display
High-Definition LED Brightview Display
1366 x 768 Pixel, 14.0 Inch
GRAPHICS
1 GB DDR3
Graphic Processor AMD Radeon HD 6470M
Futures
Web Camera 0.3 MP
Pointer Device TuchPad
Digital Microphone
Altec Lansing speakers
Wireless LAN 802.11 b/g/n, Bluetooth
Battery 6 Cell, Up to 3 hours, 90W AC Adapter
USB Port 3 x USB 2.0
Mic In, RJ45 LAN, HDMI Port, VGA Port, Multi Card Slot


Thursday, December 7, 2017
How to Update Moto G4 Plus to Android 7 0 Nougat Officially for sock rom go to rompure com
How to Update Moto G4 Plus to Android 7 0 Nougat Officially for sock rom go to rompure com
Update Moto G4 Plus to Nougat 7.0 Manually .
Do you want to update Moto G4 plus to android n 7.0 nougat officially ? If yes then you are at right place . Today we are here with the way to manually update moto g4 plus to Android Nougat .
Moto G4 plus is the latest budget device from Motorola . The device was launched in 2016 may and it is one of the most popular devices , The company launched moto g4 plus in competition with the Redmi note 3 . Motorola G4 plus currently runs on android 6.0 marshmallow and the company is rolling out Official nougat update for Motorola G4 plus . Motorola is also expected to release nougat 7.0 update for sock rom devices in coming days , Here is the List of Motorola smartphone updating to Android N 7.0 Nougat . So in this guide we will tell you How to Update Motorola G4 plus to Android N 7.0 Nougat .

Download Official Android Nougat 7.0 Update Zip File for Moto G4 Plus .
As this is the official nougat update for g4 plus so you can easily flash the Update zip file and update it to latest android nougat version . Before updating the device there are some pre requirements you have to follow :-
- This is not a custom rom , It is official Android n 7.0 update for Moto g4 plus from the company itself .
- Flash the update file only on G4 plus .
- Make sure there is more then 50% battery available in your smartphone .
- Make sure you have done a backup of all important files .
- The Update size is around 953 Mb so make sure there is around 2Gb of minimum space available .
- Download Moto G4 Nougat 7.0 Update Zip file .
Related :
- How to Root Moto G4 Plus on Android Nougat 7.0 .
- How to Update Moto G 2nd, 3RD Gen to Android N 7.0 Nougat .
How to Officially Update Moto G4 Plus to Android Nougat 7.0 .
- First of all Turn off your smartphone .
- Now Turn it on .
- Now You have to Enable Usb Debugging mode .
- To enable usb debugging mode on Moto G4 plus first of all Go to settings .
- Now In settings head over to Developer options , In developer options you will get a option USB debugging mode . Tap on that and enable it .
- Now Download the Moto G4 Nougat update zip file .
- After downloading move it to the root of sd card .
- Now Boot Moto G4 plus to recovery mode .
- To boot in recovery mode press Volume Down + Power button simultaneously for 7 seconds .
- Now release the keys .
- Now your smartphone will enter in fastboot mode .
- Press the volume Down Key again
- Now Your moto G4 plus will enter in recovery mode .
- Now Select the second option " Apply update from sd card " .
- Now choose the Nougat update zip file for moto g4 plus you downloaded earlier .
- After Some time you will get a notification , Smartphone updated successfully .
- Now just tap on Reboot system Now .
- Thats all You have successfully install official android n 7.0 nougat in moto g4 plus .
- You can Check the Android Version by going to settings > About Phone > Android Version ( 7.0 )
So this was our guide on How to Officially update Moto G4 plus to Android n 7.0 Nougat , I hope this guide helped you .
Tuesday, December 5, 2017
How to Install Nougat on Moto G4 Plus Official
How to Install Nougat on Moto G4 Plus Official
Moto had launched an Official Nougat update for moto g4 plus but lots of users not getting this update via OTA. In this tutorial I have shown How to install Nougat on moto g4 plus. This nougat update based on Nougat with November security patch. And With this method you can also fix boot loop problem.
Requirement
- MOTO G4/ G4 Plus
- Nougat OTA FILE
- Windows PC
- Motorola Device Manager
- ADB Tool (Download all files from the end of the post link given)
Note:
- Before installing this Update please make a full backup of your device because It will clean all data and apps from your device.
- Your device at least 40% charged
- This file is used for installation, not for update your device
How to Install Nougat on Moto G4 Plus
- Download and Install Motorola device manager on your PC
- Download and Extract ADB Tool on your desktop
- Download and Extract Nougat update on your desktop (Download all files from the end of the post link given)
- Now Copy all files from an ADB tool folder that you extract earlier.

- Paste all copied files in the Stock firmware extracted folder.

- Now boot your moto g4 plus boot in droidboot mode by press and hold Volume Down + Power button at the same time
- Once device successfully boot into droidboot mode, Now Connect your device with PC using data cable
- Now Open Stock firmware folder and find the OEM lock.bat file

- Run OEM lock.bat file and it will start flashing firmware files on your device
- It can take 10 minutes or more.
- Once it is done, your device will start automatically
- Done
Download here
ADB- http://bit.ly/2qhZVdU
MDManager- http://bit.do/35g432
Firmware- http://bit.ly/2qjNwaK
This is the complete tutorial about How to Install Nougat on moto g4 and g4 plus and this tutorial also use for fix bootloop in Moto G4 and G4 Plus. If you have any doubt or have any other questions about this device, please comment below, we will reply in 24 hours. In previous tutorial we have shown how to fix bootloop on Moto G4 Plus with Marshmallow stock rom.
Monday, December 4, 2017
How to Install Dolby Digital Atoms on Moto G4 Plus G4
How to Install Dolby Digital Atoms on Moto G4 Plus G4
Dolby Digital Atoms are a most famous sound equalization plugins. Till a few years ago Dolby Digital sound was available only on high quality home theater sound system, but now Dolby digital is also available for costly smartphones like MOTO M or Lenovo K5 Note. With Dolby Digital, You feel surround sound effect on your android phones when watching movies or listening music. But the sad part is that, this sound effect does not come with every device and In this tutorial I shall show you How to Install Dolby Digital Atoms on Moto G4 Plus and G4. Also check out List Of Moto Phones Getting Android O 8.0 Oreo Update
Requirement
How to Uninstall Dolby Digital
Now you can use Dolby Digital Atoms on your Moto G4 Plus / G4. Now you can enjoy the Surround Sound effect on your Moto G4 Plus. Please share this post and your reviews/ or bug report with our other visitors. Also check out How to Fix screen burn problem in Moto G4 Plus.
Requirement
- DOLBY DIGITAL Plugins (Download all files from the end of the post)
- MOTO G4/ G4 Plus with TWRP Recovery Pre-Installed
How to Install Dolby Digital on Moto G4 Plus
- First, Download IDolbyDigital.zip file from end of the post
- Copy IDolbyDigital.zip file in your device internal storage
- Now boot your device into recovery mode by pressing and holding the volume UP button, then a Power button at the same. Once your device will be booted into recovery mode, then press the volume down button two times or until you see the recovery mode option.
- Once you see the Recovery mode option on your display just select it by pressing the power button and your device will be rebooted into TWRP Recovery mode
- Now Tap on Install and select the IDolbyDigital.zip you downloaded earlier. "Swipe to Confirm Flash" Once it Completed.
- Tap Reboot System
- Open App Drawer and find Dolby Digital Application from the list.
- Open Dolby Digital App and enable equalization by is pressing the power icon button

- Done
Download here
IDOLBYDigital- http://bit.ly/2iPX3B8
UDolbyDigital- http://bit.ly/2jo6fzY
How to Uninstall Dolby Digital
- First, Download UDolbyDigital.zip file from above link
- Copy UDolbyDigital.zip file in your device internal storage
- Boot your device into recovery mode by using previews, step (step number 3)
- Tap On "Install" and select the UDolbyDigital zip file and flash it
- Reboot your device
- Done
Now you can use Dolby Digital Atoms on your Moto G4 Plus / G4. Now you can enjoy the Surround Sound effect on your Moto G4 Plus. Please share this post and your reviews/ or bug report with our other visitors. Also check out How to Fix screen burn problem in Moto G4 Plus.
Subscribe to:
Posts (Atom)