I think I got half brick or I dont know S Please heeeeelp
I charged my htc one mini 2 (m8 mini) at night and in the mornig It wasnt work. My device is not rooted or not s-off, so it is factory stock. Pressing power button is not working, when i choose recovery on hboot menu, device restarts and stucks black screen and shows me red interjection mark screen, then i press volume up+power button, it says "device CW install: can not found Data". If I choose factory reset on hboot, it is being the same thing ( restarts and stucks black screen and shows me red interjection mark screen, then i press volume up+power button, it says "device CW install: can not found Data"). I dont know what to do please help :( Thanks a lot.
How To Install TWRP Recovery On Samsung Galaxy S Plus
If you have been looking for a touch based recovery for your Galaxy S Plus I9001 smartphone, then TeamWin Recovery will be a perfect choice for you. TWRP recovery provides you almost all the features that you expect from a custom recovery, like it allows you to flash custom ROMs on your phone. You don�t have to use hardware buttons anymore, just tap on the option in the recovery and it will perform the appropriate action. Following is the guide on how you can install TWRP 2.1 Recovery on your Galaxy S Plus I91001 smartphone.
I. Before You Begin:
1. You must have rooted your Galaxy S Plus I9001 smartphone before doing this procedure. Please head to our how to Root Galaxy S Plus I9100 procedure first, finish it, then return to this procedure and continue.
2. This will replace your stock recovery. So, you will not be able to reboot your phone into the stock recovery afterwards.
II. Downloading Required Files:
1. Download the QuickFlasher Tool from here.
2. Download the TWRP 2.1 Touch Recovery Image from here.
III. Installing TWRP 2.1 Touch Recovery on Galaxy S Plus I9001:
1. Place the QuickFlasher and Recovery Image onto your Desktop.
2. Extract files from the QuickFlasher archive and place them on your Desktop.
3. Enable USB debugging on your phone by heading to Menu>>Settings>>Applications>>Development>>USB debugging.
4. Connect your phone to your PC with the help of the USB cable that came with it.
5. Launch the QuickFlasher Tool by double-clicking on sgsflasher_x86.exe file.
6. In the QuickFlasher Tool, check-mark the box labeled as Flash a new Recovery as shown in the below screenshot.
[ Quick Flasher Tool ]
7. Click on the Browse� button and locate the Recovery Image you downloaded earlier.
8. Hit the Start Now button to begin flashing the recovery on your phone.
9. After the recovery is successfully installed on your phone, your phone will reboot.
You did it ! You have successfully installed the Touch Based TWRP 2.1 Recovery on your Galaxy S Plus I9001 smartphone. Now, Go and get some custom ROMs to try out on your phone.
HTC Wildfire S Pc Suite and Usb Driver for Windows
HTC Wildfire S Pc Suite and Usb Driver for Windows
Could you look for in a mobile Usb Drivers and Pc Suite, here provides a Usb Drivers and Pc Suite free download and how to install to HTC Wildfire S. Make sure you have the appropriate type of model phone before downloading the driver to the computer. Usb Drivers and Pc Suite support following type model for HTC Wildfire S Usb Driver, Pc Suite, Modem, Com port. Without delay, please download the following. Download HTC Wildfire Sfor Windows here Pc Suite and Usb Driver
HTC Wildfire S Pc Suite and Usb Driver Installation Tutorial :
You should know that if HTC Wildfire S Usb Driver and Pc Suite for Windows smartphone is powered by a corresponding Mtk processor, here is explained how to install the Usb drivers and Pc Suite for the model of this type.
Run and use as an administrator if you are HTC Wildfire S Usb Driver and Pc Suite work very precisely and correctly.
Feel free to skip this step if the mobile device is not supported by Mtk Cpu :
Enable Usb Driver Pc Suite debugging on HTC Wildfire S to do that, please go to Settings > Developer Options.
Download the driver to the computers usb driver Extract files using WinZip or WinRAR, find the file "PdaNetA4150.exe" and start note (Be sure to close all programs).
Select the Type phone model HTC Wildfire S Smartphone, Please select press / click the install button.
Now you just connect HTC Wildfire S there will be a popup message saying your phone is connected. Congratulations you have completed the installation.
Well, thats a brief explanation neighbor how to download and step by step how to install HTC Wildfire S Usb Driver and Pc Suite for Windows, and uses his good luck.
How To Hard Reset Samsung S7562 Galaxy S Duos Using its Hardware Keys
When you need to perform a Hard Reset?
You can apply this operation in many cases, We will mention some of them here:
- After installing bad or unsupported application into your Samsung mobile phone which causes your phone to be frozen. - Your Samsung mobile phone doesnt respond to any order after booting because of some software errors. - Forgotten pattern lock in Samsung Android mobile phones. - Forgotten user code. - Forgotten phone code. - Before or after installing new firmware updates into your device. - You want to delete all your personal information from your device in case you want to sell it.
What to do before performing the Hard Reset?
- In case your Samsung mobile phone can connect to a computer then it is better to make a backup of your saved data using Samsung kies software. - Check that your phones battery has enough charging, Otherwise you should charge it.
Samsung S7562 Galaxy S Duos Hard Reset Steps:
- Make sure that your Samsung S7562 Galaxy S Duos is Off, And has no SIM or Memory cards are inside.
- Take out its battery for 10 seconds, Then put it in again.
- Press and hold Volume Up + Volume Down + Home Keys, Then press Power.
- Keep pressing the above keys until Samsung logo appears,Then release all keys.
- Wait until you are into Factory reset / System Recovery menu.
- Use Volume Down key to scroll down and select Wipe Data / Factory Reset option.
- Use Power button to confirm the operation.
- You need to use the Volume Down key again to select "Yes -- delete all user data"
- Use Power button to confirm the operation one more time.
- After performing the hard reset, Select Reboot System Now option, And confirm it using Power button.
- Now the phone will reboots, Wait for it to be fully on and then you can start using it.
Notice: The Hard Reset / Factory Reset operation will delete anything that are saved in your phones internal memory, So make a backup of your data in case you can access them.
How to install Picross S - Nonogram Puzzle apk for android
- For Android 4.0 or higher: Please to Settings, look down to Security, and select Unknown sources. Choosing this choice will enable to install apps download from the internet. - For devices running on lower Android 4.0: Please go to Settings - open the Applications option, and select Unknown sources, click OK on the popup alert.
Picross S - Nonogram Puzzle Description
A masterpiece of logic games, Picross, Picture Logic, also called Illustration Logic, Nonogram, Griddlers, Hanjie. Let�s have a enjoy with nice picture! ** Game Rules 1. You have blocks to find continuously as many as the numbers on the row and column. 2. If there are more than two numbers on one line, you should find blanks as many as the numbers, and there are more than one bomb between the numbers. ** Main Functions - Handle everything with dragging - Completed vertical and horizontal lines are displayed as �complete� automatically.
Download Picross S - Nonogram Puzzle 1.0.7 unlimited APK
Google Play
DOWNLOAD
Search terms: How to install Picross S - Nonogram Puzzle 1.0.7 mod apk for android How to use Picross S - Nonogram Puzzle unlimited apk How to mod Picross S - Nonogram Puzzle 1.0.7 apk How to get Picross S - Nonogram Puzzle mod apk
How to setup kitkat 4 4 on Samsung Galaxy S GT I9000
kitkat 4.4 on Samsung Galaxy S GT-I9000
CyanogenMod is a free, community built, aftermarket firmware distribution of Android 4.4 (KitKat), which is designed to increase performance and reliability over stock Android for your device.
CyanogenMod is based on the Android Open Source Project with extra contributions from many people within the Android community. It can be used without any need to have any Google application installed. Linked below is a package that has come from another Android project that restore the Google parts. CyanogenMod does still include various hardware-specific code, which is also slowly being open-sourced anyway.
All the source code for CyanogenMod is available in the CyanogenMod Github repo. And if you would like to contribute to CyanogenMod, please visit out Gerrit Code Review. You can also view the Changelog for a full list of changes & features.
What are UNOFFICIAL builds? A version of CyanogenMod not compiled by CyanogenMods build servers and may contain code not yet committed to the repository. If you find bugs/issues you can/must discuss here (do not submit nightlies bug on CyanogenMod issue tracker).
Downloads
Latest build: ROM Download Google Apps: GApps Download
Installation
- First time flashing CM11 to your Galaxy S (or coming from another ROM)?
Root your device and install ClockworkMod Recovery. Reboot into Recovery using 3-button-combo Do a Nandroid backup! WIPE (wipe data/factory reset + wipe cache partition) Install the ROM from internal sdcard using ClockworkMod Recovery Optionally install the Google Addon
- Upgrading from CM7/CM9?
Do a Nandroid Backup! WIPE (wipe data/factory reset + wipe cache partition) Install the ROM from internal sdcard using ClockworkMod Recovery Optionally install the Google Addon
- Upgrading from CM10/10.1?
Do a Nandroid Backup! Install the ROM from internal sdcard using ClockworkMod Recovery You will finally see a "set_metadata_recursive" status 7 error. That is normal. Reboot back into recovery (the reboot is required) Install the ROM again from internal sdcard using ClockworkMod Recovery Optionally restore /data from Nandroid Backup (the update will wipe your /data) Optionally install the Google Addon
- Upgrading from CM10.2?
Do a Nandroid Backup! Install the ROM from internal sdcard using ClockworkMod Recovery Optionally install the Google Addon
- Upgrading from another build of CM11?
Do a Nandroid Backup! Install the ROM from internal sdcard using ClockworkMod Recovery
Warning: You may get set_metadata_recursive related-errors during install if youre using a custom kernel without SELinux support. In that case, revert to the stock kernel before continuing or follow the instruction for upgrading from CM10.1. Note: The partition layout of CM11 is the same as CM10.2.
Known Issues Please do not report bugs if it is already listen in the list of known issues
Display issues in Browser & other embedded webviews (Google Chrome works fine) No access to TV-Out menu Layout issues in lockscreen Menu soft-buttons appearing where they shouldnt Some CyanogenMod features a missing - please do not file bug reports for those. Privacy guard icon not disappearing when exited app Broken layout of quick message popup (SMS) Cannot set value via custom brightness "Edit" menu Vibrate on answer call doesnt work properly If back button is pressed during incoming call, you cant answer the call. FC when entering file manager settings FC when changing image sharpness Flash CM10.2 from recovery (workaround: restore a 10.2 backup or flash a 10.2 kernel before flashing)
Reporting Bugs
You are allowed to report bugs only in this thread. Before reporting a bug, please make sure you are running as stock as possible. This means no custom kernel, no custom framework modification, etc. If you are using any of the above modifications, please flash the rom again to get rid of the modifications before reporting.
REPORT BUGS IN THIS THREAD ONLY
Grab a logcat right after the problem has occurred. (Please include at least a few pages of the log, not just the last few lines, unless you know what youre doing.) If it is a random reboot, grab /proc/last_kmsg. (Do not bother getting a logcat unless you can get it just before the reboot. A logcat after a reboot is useless) If the problem disappears after running "setenforce 0" from a root shell, grab /data/misc/audit/audit.log
Remember to provide as much info as possible. The more info you provide, the more likely that the bug will be solved. The following is a useful format to follow. Note: If you can provide the latest night/build that the bug didnt exist, it would greatly help in tracking down what caused it.
how to install the Android 4 4 KitKat Samsung Nexus S
how to install the Android 4.4 KitKat on your Samsung Nexus S
Get the Android 4.4 KitKat Update on Samsung Nexus S via CyanFox Dark Themed ROM
how to install the Android 4.4 KitKat on your Samsung Nexus S.
WARNING!
Warranty may be void of your device if you follow the procedures given on this page.
You only are responsible for your device. We won�t be liable if any damage occurs to your device and/or its components.
CHECK DEVICE MODEL NO.
To make sure your device is eligible with this, you must first confirm its model no. in �About device� option under Settings. Another way to confirm model no. is by looking for it on the packaging box of your device. It must be GT-I9020!
Do not use the procedures discussed here on any other device of Samsung or any other company. You have been warned!
BEFORE YOU BEGIN..
You must do this pre-installation stuff before attempting to install the ROM on your Samsung Nexus S in order to avoid any complications later, and have a smooth and successful process.
GET THE LATEST CWM/TWRP RECOVERY
Make sure that you�ve latest version of the recovery of your choice installed on your device.
Older versions of both CWM and TWRP recoveries are not working with Android 4.4 based ROMs, throwing installation errors and WiFi bugs, therefore you need to use the latest version of either recovery. We believe TWRP v2.6.3.0 and above, and CWM v6.0.4.3 and above are working fine with Android 4.4 ROMs.
? GET TWRP RECOVERY FOR NEXUS S
? GET CWM RECOVERY FOR NEXUS S
BACK UP YOUR DEVICE
Back up important data and stuff before you start playing around here as there are chances you might lose your apps and app-data (app settings, game progress, etc.), and in rare case, files on the internal memory, too.
For help on Backup and Restore, check out our exclusive page on that linked right below.
? ANDROID BACK UP AND RESTORE GUIDE: APPS AND TIPS
CHARGE YOUR DEVICE
If your android device powers off due to lack of battery while the process is underway, it could damage the device.
So, make sure your device is adequately charged � at least 50% battery of the device.
EXAMPLE VIDEO
If you haven�t used a custom recovery, either CWM or TWRP, before, to install a .zip file of a ROM on anything else, then we suggest you first watch a video of that, given right below, to get familiar with the process. Just fyi, the video below shows installing a .zip file (of recovery) on Galaxy S3, but it doesn�t matter as the process remains exactly same. So, once you are finished with video, jump to downloads and step-by-step guide below.
SAMSUNG NEXUS S ANDROID 4.4 KITKAT ROM
DOWNLOADS
Download the files given below and transfer them to a separate folder on your phone and remember the location.
GAPPS FILE
DOWNLOAD LINK | File name: CyanFox-Gapps-2013-12-15.zip (64 MB)
ROM FILE
DOWNLOAD LINK | File name: CyanFox-2.0.1-crespo.zip (201.6 MB)
For latest version of the ROM, check the original page ?
Reminder: Before you proceed, make sure you�ve transferred the files you downloaded above to a separate folder on your Samsung Nexus S.
STEP-BY-STEP GUIDE
Reminder: Make sure you�ve installed latest version of the recovery of your choice and have backed up your device adequately (including important data stored on internal memory) as mentioned in �Before you begin..� section above.
GUIDE FOR CWM RECOVERY USERS
Boot into recovery mode. For this:
Power off your device and wait for 5-10 seconds until the device is fully switched off.
Press and hold Volume Up + Power buttons together and don�t release them until you boot into bootloader mode
Once in bootloader mode, use Volume down key to navigate to/highlight RECOVERY and select it by pressing the Power button. You�ll boot into recovery mode. ? In Recovery mode, use Volume buttons to navigate Up and Down between options and use Power button to select an option.
Create a Nandroid Backup from recovery. It�s optional but very important to do, so that in case something goes wrong you can restore to current status easily. For making a Nandroid Backup, go to Backup And Restore � Backup.
Perform a Factory Reset (This will delete all apps and their settings and game progress). For this:
Select Wipe data/Factory reset, then select Yes on the next screen to confirm factory reset (screenshot)
First Install the ROM file:
Select Install zip � Choose zip from sdcard (or external sdcard, you know where your files are) � browse to the location where you saved the file and select the ROM file
Now similarly flash the Gapps file. ? Make sure to first flash the ROM file and then the Gapps file.
Reboot your device. For this, go back to the main menu of recovery and select reboot system now.
That�s all. Your phone will now reboot and it will take some time as it�ll be phone�s first boot after installing Android 4.4, be extremely excited for this! Note: In case your device gets bootloop (stuck at logo while rebooting), just do a factory reset (step 3) and you will be fine.
GUIDE FOR TWRP RECOVERY USERS
Boot into recovery mode. For this:
Power off your device and wait for 5-10 seconds until the device is fully switched off.
Press and hold Volume Up + Power buttons together and don�t release them until you boot into bootloader mode
Once in bootloader mode, use Volume down key to navigate to/highlight RECOVERY and select it by pressing the Power button. You�ll boot into recovery mode. ? In Recovery mode, use Volume buttons to navigate Up and Down between options and use Power button to select an option.
Create a Nandroid Backup from recovery. It�s optional but very important to do, so that in case something goes wrong you can restore to current status easily. For making a Nandroid Backup, go to Backup � and select all check boxes and swipe on the Swipe to confirm option at the bottom of the screen to confirm backup.
Perform a Factory Reset (this will delete all apps and their settings and game progress). For this:
Tap on Wipe � then at the bottom of the screen do a Swipe on the �Swipe to factory reset� option (screenshot)
First Install the ROM file:
Tap on Install � browse to the location where you saved the files and tap on the ROM file. Now at the bottom of the screen, do a swipe on the Swipe to confirm flash option to begin flashing.
Now similarly flash the Gapps file. ? Make sure to first flash the ROM file and then the Gapps file.
Reboot your device. Go back to the main menu of recovery and tap on Reboot � then, tap on System to reboot your phone.
That�s all. Your phone will now reboot and it will take some time as it�ll be phone�s first boot after installing Android 4.4, be extremely excited for this! Note: In case your device gets bootloop (stuck at logo while rebooting), just do a factory reset (step 3) and you will be fine.
Pre-order of Google Nexus S in India is now possible and one can book this new mobile handset at a price of Rs.28,000/- approximately from one of the leading online store known as Flipkart. This new smartphone is the successor of the popular Nexus One which was released by Google previously and which had been able to attract consumers and be widely popular among them. This is yet another android
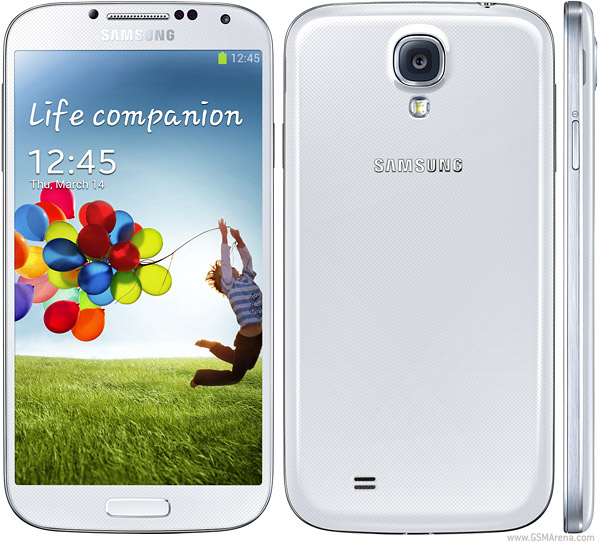
How to root Samsung Galaxy S IV I9500 JellyBean 4 2 2 on XXUAMC6 stock firmware
Hi guys Samsung Galaxy S4 I9500 is rooted! yep! i am making guide on how to root samsung galaxy s4 I9500. Samsung Galaxy S4 I9500 is a great phone with superb specifications. The Super AMOLED capacitive touchscreen 5.0 inches of screen is awesome and you will love to play HD games in Samsung Galaxy S4 I9500 and a full experience of pictures, for protecting (and making touch smooth) Corning Gorilla Glass 3 is used in Samsung Galaxy S4 I9500. The RAM...omg! it is mind blowing! 2GB RAM! all most all android (i think it is first) are having 512 RAM-1 GB RAM, but this Galaxy S4 is damn awesome with 2 GB of RAM so you can expect 1.5+ GB free RAM. Now you need not to worry of any HD game because none of them will auto close or auto die because 2 GB of RAM is here. The internet speed is also very nice, HSDPA, 42.2 Mbps; HSUPA, 5.76 Mbps which is nice. The camera is very awesome! the camera is of 13 MP which is really cool with autofocus, LED flash and many features like Dual Shot, Simultaneous HD video and image recording, geo-tagging, touch focus, face and smile detection, image stabilization, HDR. The secondary camera is of 2 MP which is very good and not like other android 1.3 uhh. The video output is 100% HD means 1080p display with approximately 30fps which is really cool! watch any HD video without even a single lag. The android version is JellyBean (Android: 4.2.2) which is latest and you will love it surely. Here is provided new chipset in Galaxy S4 I9500- Exynos 5 Octa 5410 which will be amazing fast. The processor speed is like Rocket or Tiger, Quad-core 1.6 GHz Cortex-A15 & quad-core 1.2 GHz Cortex-A7 which is damn amazing. The GPU is also rocking here, PowerVR SGX 544MP. PowerVR is these days best GPU providers for android. Samsung Galaxy S4 I9500 comes with many sensors like Accelerometer, gyro, proximity, compass, barometer, temperature, humidity, gesture which are not in ordinary android devices. Oh! lets see how to root Samsung Galaxy S4 I9500 (you can also say, rooting Samsung Galaxy S4 (I9500)-
Must See:
What is Rooting | Why To Root | Features of Rooting Fixing google play cannot download bug
Downloads 1 Download Odin Rom (rooted) for Samsung Galaxy S4 2 Odin for flashing Samsung Galaxy S4 I9500 Rom
How to Root Samsung Galaxy S4 I9500 1 Download all tools and extract them (extract all).
2 Open Odin tool to root samsung galaxy s4 i9500.
3 Switch of your Samsung Galaxy S4 I9500, then press volume down button, menu button and power button simultaneously till it is in download mode. Stop pressing all buttons when you see green robot (Android logo).
4 Now, connect your USB with Samsung Galaxy S4 I9500 with your PC and see now odin! Odin will be showing yellow color at the part of ID:COM, it means that Samsung Galaxy S4 I9500 has been connected successfully so now be ready too root your Samsung Galaxy S4 I9500.
5 Click on the PDA button to select Firmware, now browse and select the firmware that you extracted just now!
6 Click on start button in Odin to root your Samsung Galaxy S4 I9500. It will root your Galaxy S4 itself and do not play with computer or with Samsung Galaxy S4 I9500 it can lead to dead Galaxy S4.
7 When it will complete, it will reboot itself and now you can remove USB cable.
Note: Boot time will take much time because ROM needs to build cache and other data which makes system smooth while using it, so please wait for boot. Now, say "Whoooppeeee, rooted my Samsung Galaxy S4"
How to get Papa s Donuteria Connect patch 1 0 apk for bluestacks
Name: Papa s Donuteria Connect.apk ID: com.afrodigital.papasdonuteriaconnect Version: 1.0 Size: 23 Mb
Papa s Donuteria Connect Screenshots
How to install Papa s Donuteria Connect apk for android
- For Android 4.0 or higher: Please to Settings, look down to Security, and select Unknown sources. Choosing this choice will enable to install apps download from the internet. - For devices running on lower Android 4.0: Please go to Settings - open the Applications option, and select Unknown sources, click OK on the popup alert.
Papa s Donuteria Connect Description
Now the fun can play with snacks such as donuts, called "Papas Donuteria Connect". Vibration caused enormous human suffering of this game will make you more enthusiasm to continue playing. Boosted 298 levels make this game will not be boring. Starting with mild to warm up game complicated puzzle. Guarantees Your brain works hard will get here. Immediate download so plugged in tablet or your favorite handpone. The more cool definitely yes !! Yes because the support with advanced features such as: Game Features: * Almost touching the 300 level. * Features unique multicolored donuts charming. * Fullyll get a free feature until whenever, although updated several times. * It is easy to play but do not like it because it is difficult to master. * Sounds cool music and a blast when you achieve something fantastic. tricks: ==> Play repeatedly to figure out how to play good (We deliberately keep developers so that creativity and cruising you getting stronger). Our mission as a developer Papas Donuteria to realize the fun lovers puzle to continue to feel right as human beings to be happy and continue adventure. Moreover we want all parties ranging from children to adults always optimistic about the progress of the features we offer.
Whats new in Papa s Donuteria Connect 1.0
Papa s Donuteria Connect | 15 Reviewers | | Rating: 3.7
Download Papa s Donuteria Connect 1.0 unlimited APK
Google Play
DOWNLOAD
Search terms: How to get Papa s Donuteria Connect patch 1.0 apk for android How to use Papa s Donuteria Connect unlimited apk How to mod Papa s Donuteria Connect 1.0 apk How to get Papa s Donuteria Connect unlimited apk
How to root Samsung Galaxy S 4 I9500 JellyBean 4 2 2 on XXUAMC6 stock firmware
Hi guys Samsung Galaxy S4 I9500 is rooted! yep! i am making guide on how to root samsung galaxy s4 I9500. Samsung Galaxy S4 I9500 is a great phone with superb specifications. The Super AMOLED capacitive touchscreen 5.0 inches of screen is awesome and you will love to play HD games in Samsung Galaxy S4 I9500 and a full experience of pictures, for protecting (and making touch smooth) Corning Gorilla Glass 3 is used in Samsung Galaxy S4 I9500. The RAM...omg! it is mind blowing! 2GB RAM! all most all android (i think it is first) are having 512 RAM-1 GB RAM, but this Galaxy S4 is damn awesome with 2 GB of RAM so you can expect 1.5+ GB free RAM. Now you need not to worry of any HD game because none of them will auto close or auto die because 2 GB of RAM is here. The internet speed is also very nice, HSDPA, 42.2 Mbps; HSUPA, 5.76 Mbps which is nice. The camera is very awesome! the camera is of 13 MP which is really cool with autofocus, LED flash and many features like Dual Shot, Simultaneous HD video and image recording, geo-tagging, touch focus, face and smile detection, image stabilization, HDR. The secondary camera is of 2 MP which is very good and not like other android 1.3 uhh. The video output is 100% HD means 1080p display with approximately 30fps which is really cool! watch any HD video without even a single lag. The android version is JellyBean (Android: 4.2.2) which is latest and you will love it surely. Here is provided new chipset in Galaxy S4 I9500- Exynos 5 Octa 5410 which will be amazing fast. The processor speed is like Rocket or Tiger, Quad-core 1.6 GHz Cortex-A15 & quad-core 1.2 GHz Cortex-A7 which is damn amazing. The GPU is also rocking here, PowerVR SGX 544MP. PowerVR is these days best GPU providers for android. Samsung Galaxy S4 I9500 comes with many sensors like Accelerometer, gyro, proximity, compass, barometer, temperature, humidity, gesture which are not in ordinary android devices. Oh! lets see how to root Samsung Galaxy S4 I9500 (you can also say, rooting Samsung Galaxy S4 (I9500)-
Must See:
What is Rooting | Why To Root | Features of Rooting Fixing google play cannot download bug
Downloads 1 Download Odin Rom (rooted) for Samsung Galaxy S4 2 Odin for flashing Samsung Galaxy S4 I9500 Rom
How to Root Samsung Galaxy S4 I9500 1 Download all tools and extract them (extract all).
2 Open Odin tool to root samsung galaxy s4 i9500.
3 Switch of your Samsung Galaxy S4 I9500, then press volume down button, menu button and power button simultaneously till it is in download mode. Stop pressing all buttons when you see green robot (Android logo).
4 Now, connect your USB with Samsung Galaxy S4 I9500 with your PC and see now odin! Odin will be showing yellow color at the part of ID:COM, it means that Samsung Galaxy S4 I9500 has been connected successfully so now be ready too root your Samsung Galaxy S4 I9500.
5 Click on the PDA button to select Firmware, now browse and select the firmware that you extracted just now!
6 Click on start button in Odin to root your Samsung Galaxy S4 I9500. It will root your Galaxy S4 itself and do not play with computer or with Samsung Galaxy S4 I9500 it can lead to dead Galaxy S4.
7 When it will complete, it will reboot itself and now you can remove USB cable.
Note: Boot time will take much time because ROM needs to build cache and other data which makes system smooth while using it, so please wait for boot. Now, say "Whoooppeeee, rooted my Samsung Galaxy S4"
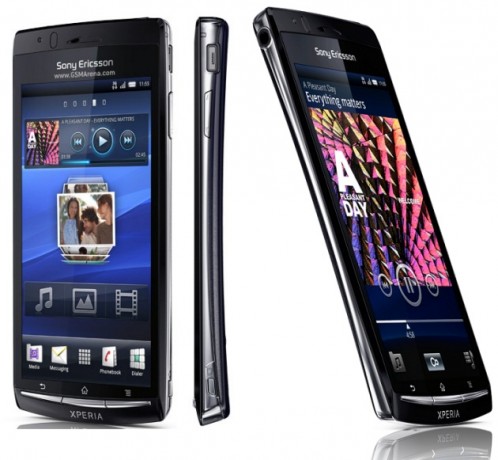
The Sony Xperia Arc comes with a 4.2-inch LCD display, a 8MP shooter and a 1GHz Scorpion processor keeping things running at its mid-range speed. The device recently saw an update to Android 4.0.4 officially but there�s no word as yet on whether there will be an official Jelly Bean upgrade. Until then, there are custom ROMs to try out and to do that, your Arc will need to be rooted. This post below will help you do that.
I. Before You Begin
1. Make sure that your device is at least 75% charged. 2. The guide below is designed to work on Windows PCs (preferably Windows 7); sorry Mac/Linux users! 3. Back up everything you feel is important before you begin. 4. This procedure is designed to work on Xperia Arc devices running firmware v4.1.B.0.587. So make sure this is the firmware versions you are running before you proceed.
II. Necessary Downloads
1. Flashtool v0.8.6.0. 2. Lt18i_4.1.A.0.562_Kernel.ftf (Link available in the first post under the Downloads section) 3. DooMLoRD_v1_Xperia-2011-ICS-ROOT-emu-busybox-su.zip (Link available in the first post)
III. Flashing the .562 Kernel
1. Double-click on flashtool.exe you downloaded above and follow the on-screen instructions to install it. 2. Copy Lt18i_4.1.A.0.562_Kernel.ftf file you downloaded above to C:Flashtoolfirmwares on your harddrive. 3. Open the Flashtool application after installation and click on the Flash icon (the one with the thunder symbol). 4. You should be presented with two options: Flashmode and Fastboot Mode. Select Flashmode. 5. Choose Lt18i_4.1.A.0.562 and click on OK. Follow the on-screen instructions on how to boot your device into fastboot mode and connect your device. Also, make sure�No Final Verification� is marked. 6. Reboot device.
V. Rooting the Xperia Arc
1. Enable USB Debugging on your device. You can do this by heading to Settings > Applications > USB Debugging and checking the tickbox next to it. 2. Enable installation of non-Market applications. To do this, go to Settings > Applications and check the Unknown Sources tickbox. 3. Enable MSC Mode. Go to Settings > Xperia > Connectivity > USB Connection Mode and select MSC Mode. 4. Connect your device to your Windows PC. 5. Extract the DooMLoRD_v1_Xperia-2011-ICS-ROOT-emu-busybox-su.zip that you downloaded above to a folder on your desktop. 6. From the extracted folder, double-click on runme.bat to run the DooMLoRD tool. 7. Follow the on-screen instructions and wait for the process to be complete (your device will reboot several times during the procedure).
V. Flashing Custom Recovery (Optional)
If you would like to flash a custom recovery image in order to flash custom ROMs, head to the next procedure to learn how to do that. If this procedure helped you please thank/donate to the original developers here. If you need help with this procedure, please ask in the comments below or in the forum. This is part of our Android How To�s. We have how to�s on rooting, loading ROMs, and tons of other tips and tricks for your specific device or for Android devices in general! For all of our Android How To�s, head here.